 Entry
Entry Dashboard
 Contacts
 Properties
 Email
Email Calendar
 Tasks
Tasks Acquisition Cockpit
 Audit-proof mail archiving
 Automatic brochure dispatch
 Billing
 Groups
 Intranet
 Marketing Box
 Multi Property module
 Multilingual Module
 onOffice sync
 Presentation PDFs
 Process manager
 Project Management
 Property value analyses
 Enquiry Manager
 Showcase TV
 Smart site 2.0
 Statistic Tab
 Statistics toolbox
 Success Cockpit
 Time Tracking
 Address from clipboard
 Text block
 Customer communication
 External Tools
 Favorite links
 Calculating with formulas
 Mass update
 onOffice-MLS
 Portals
 Property import
 Quick Access
 Settings
 Templates
 Step by step
You are here: Home / Additional modules / Smart site 2.0 / Images - integrate and change

Smart site 2.0
Images – integrate and change
To edit the banner images on the start page, click on in the menu bar.
Then click on If you have a single banner, select If you have several banner images in a slider, select (see right) .

If one or more banner images are already integrated, you can remove them using the small trash can (in the top right corner of the image).
If you want to upload a new image for Individual or Banner change , go to “Select file”. After you have selected a picture from your computer, click on “Upload”.
Hint: Please note that the banner images should ideally not be larger than 200KB (kilobytes), otherwise the page loading time will be affected. The .jpg or .jpeg format is ideal here.
The banner images should be cropped to 1920 x 600 pixels for Premium Template 5. Please note that the layout may vary depending on the premium template. If you are unsure about the right size, please ask.
Under “Edit alt text”, describe what can be seen in the image in a maximum of 5 words. You can find more information about the function here.
When changing banners, you also have the option of setting the image change and transition times.
To edit the banner images on the start page, click on .
Then select the subpage on which you want to integrate an individual banner image from the menu structure on the left.
Next to the “Create new content” field (positioned below the “Settings”), select “Custom” in the drop-down field for “Banner”.

A pop-up window appears in which you can select a file again and then upload it.

The banner size of the subpages in Premium Template 5 is 1500 x 400 pixels and here too, no larger than 200KB and in .jpg or .jpeg format.
Please note that the layout may vary depending on the premium template or that the options are limited! If you are unsure, our support team can help you.
However, there is no option to store an alt text here.
If you do not use CloudImage for image optimization on the website (because you have not booked an SEO package or have not agreed to its use), integrate the images using the normal text editor.
To do this, go to the menu via in the tree structure to the corresponding page and the content field in which you want to insert the image. Use the “Maximize” button ![]() to open the entire control panel.
to open the entire control panel.
Go to the place in the text where you want to insert an image. Then click on the Add image button in the control panel![]() .
.
A new window appears in which you click on “Search server”:
This takes you to the media library, where all your images are stored (preferably sorted into folders to make them easier to find):
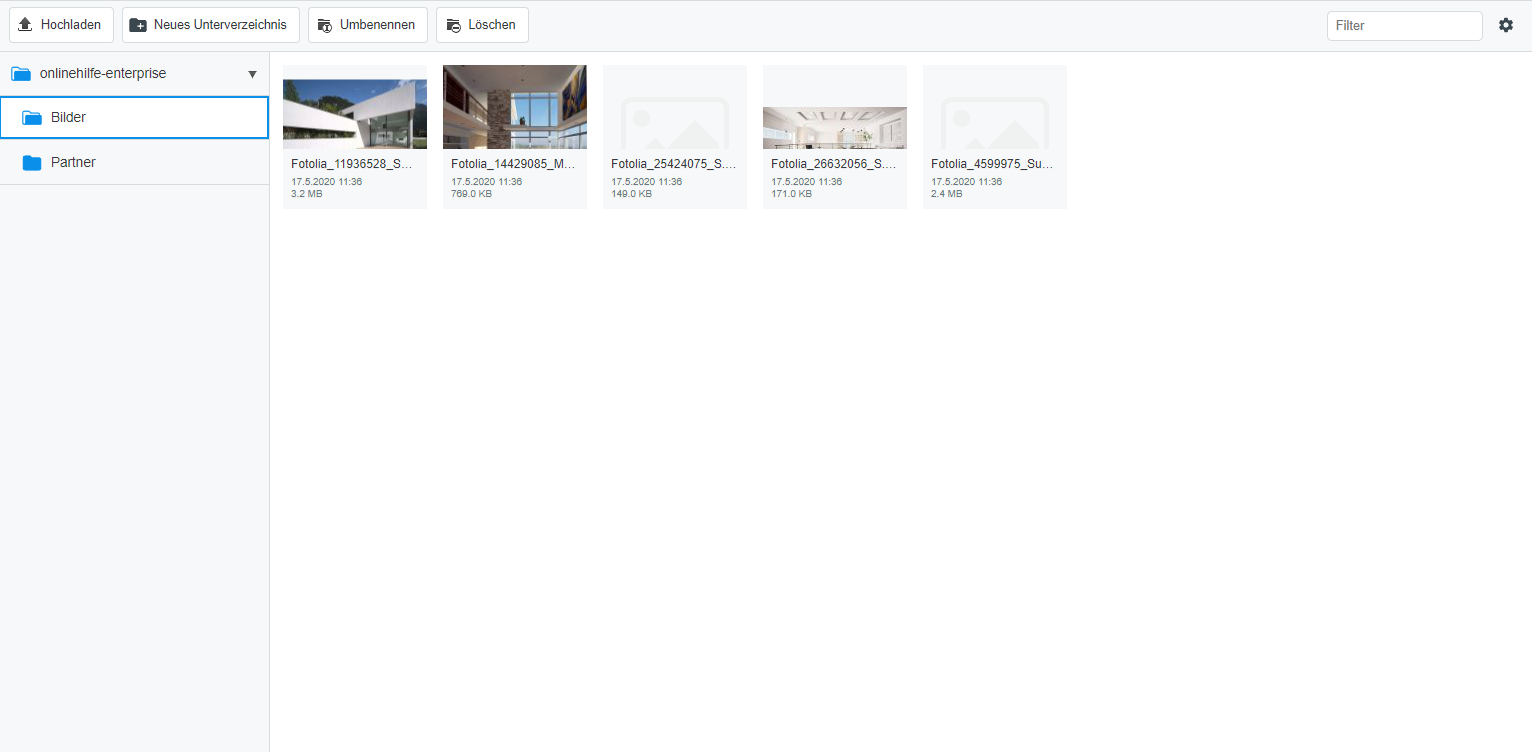
If you would like to upload a new image to the media library, select “Upload”.
If you then want to change the image name, click on the corresponding image and in the new view click on “Rename” (above the image). Enter the name in the next field and confirm with “OK”. Read more about correct image naming.
Click on “Select” (above the image) to select the desired image and return to the first window.
You must now adjust the image size here. A format of 2:3, i.e. 300 x 200 pixels or possibly 400 x 220 pixels, is best suited.
Even if you can adjust the image size afterwards, we recommend that you crop the images beforehand and compress them to an appropriate size. This prevents the loading time from being affected. Find out more here.
The images are first placed to the left of the first line of text:

However, you can place the images to the left and right of the text. Simply click on the image and then on the left ![]() or right
or right ![]() position.
position.
After you have saved via the disk ![]() and emptied the “website cache”
and emptied the “website cache” ![]() , you can view the result on the website. If you are not satisfied with the distance from image to text, please contact our support team.
, you can view the result on the website. If you are not satisfied with the distance from image to text, please contact our support team.
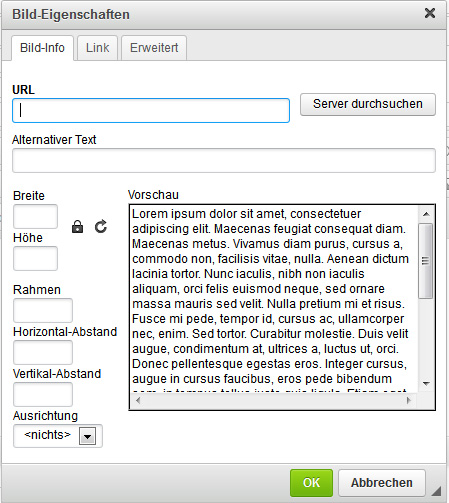
We also recommend that you maintain the alt text of your images. This is entered via the image, either directly when inserting in the dialog above, or subsequently. For the latter, click on the image for which the alt text is to be entered, expand the control panel ![]() and click on the image icon
and click on the image icon ![]() . In the pop-up, you can enter the alt text under “Alternative text”.
. In the pop-up, you can enter the alt text under “Alternative text”.
Once you have inserted the text, please save and do not forget to clear the cache so that the changes are applied!
If you have approved the use of Cloudimage for image optimization as part of our search engine optimization, then our SEO team has already integrated the images into the SEO texts. To ensure that the images are delivered optimized, we extend the image paths with two link snippets.
Here you will find instructions on how to integrate your own images into the texts with Cloudimage or how to replace existing images:
Instructions for image optimization with Cloudimage
Please note that the instructions in the PDF refer to the new Cloudimage version. If the structure in the instructions does not correspond to the one used to integrate your images into the smart site, you are probably still using the previous version. In this case, please follow the instructions below:
To begin with, the images are selected and inserted using the image icon on the smart site control panel as described in the previous section “Images in the text without Cloudimage”. However, the next steps differ from the rest of the process.
In addition to the image link, we use a link from CloudImage that determines the size and resolution of the images and an additional HTML element so that the alignment is also displayed correctly. To ensure that the information in the link and HTML also works, onOffice employees add the corresponding styling to the code.
Hint: This also means that the size specification stored in the CloudImage link is applied uniformly for all images! If you mainly have images in the same format (large images in your example), but also want to insert other (smaller) images, you must integrate the smaller images as described in the chapter “Images in the text without CloudImage”!
If you want to add images optimized with CloudImage, you must do this in the source code of your page. After you have inserted an image (as described in the previous chapter), you must expand the control panel (if necessary, click on ![]() ) and switch to the source code
) and switch to the source code ![]() .
.
You get the following view:

In addition to the image source (src=”https…”), an automatic alignment and the height and width of the CMS are specified as styling (marked yellow in the example below):

For the CloudImage link to work, the styling specified by the CMS must be deleted or replaced. The easiest way to proceed is described below.
Below is an example of how CloudImage is integrated by onOffice:

Very wide images are used in this example, which is why we have specified 1110 x 370 pixels as the size in the CloudImage link (starting with https://acnaayzuen … to /q90/). Search for this module on a page where the SEO team has inserted images.
- Copy it and place it in the source code where you have already integrated the new image via the media library.
- Now copy the image link from the image that you previously inserted via the media library (from https://cmspics … to .jpg) and insert it where the link from the previous image is shown in the module above.
- Now delete the part of the image that you previously generated via the media library:
- If you want to insert the image to the left of the text, leave the block as it is.
- If you want to insert the image to the right of the text, replace the “content-image-left” with a “content-image-right”.
The images are positioned accordingly thanks to the styling that the colleagues have stored in the code.
Hint: If you know the image name of the new image from the media library, you do not even need to insert the image first via “Images in text without CloudImage” and can save yourself steps 3) and 4). Then you only have to copy the CloudImage module from the source code of another page, paste it into the source code of the desired page and location and (if the images are in the same folder) change the actual image name to .jpg.
Now save the changes via the disk ![]() and clear the “Website cache”
and clear the “Website cache” ![]() .
.
After you have reloaded your website, you should be able to see the result on your page.
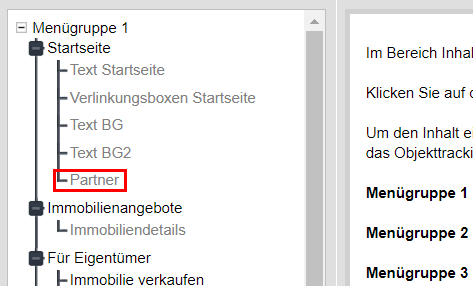
Partner logos or awards for the start page are created for you on special subpages of onOffice in the smart site 2.0 and integrated accordingly in the HTML code so that they are positioned correctly on the start page. If you want to exchange images here, you must exchange them completely via the source code, as elements in the tile boxes are created differently from the usual images in the texts.
In the menu via select the page in the tree structure on the left for which you want to adjust the images. The page for partner logos is usually labeled as “Partner” or “Tile Box Partner”.
If you want to customize awards, search for “Awards home page” or “Tile box awards”.
The partner logos are either integrated in separate content fields or all in one content field.
Hint: Don’t be confused by the appearance of the content fields, just because no preview of the image is displayed does not mean that nothing has been entered in the field! Here is an example between the view in the Gleidrung and from the start page:
![]()
You can expand the editing field via the button ![]() and click on “Source code”
and click on “Source code” ![]() :
:

The yellow marker at the top of the source code is the URL of the partner logo. This is made up of the path to the media library, your company name (blacked out here), the folder in which the image is stored and finally the image name itself. If you have saved the new image in the same folder in your media library, you only need to change the last part of the link, the image name.
Attention: You must pay attention to the file format in which the image is saved! A .jpg format is not a .jpeg for our CMS. Therefore, always pay close attention to the ending and correct spelling in the link, otherwise the link is incorrect and the image/logo will not be displayed!
Please also pay attention to the cropping of the images. In the example above, the Immobilienscout24 partner logo displayed on the homepage has a size of 270 x 200 pixels. The size of the display may vary depending on the premium template!
Hint: Images that are larger than those shown in the example are compressed by the CMS to the required size. However, the original file size of countless kilobytes or even megabytes is then stored in your media library. If this happens with a picture, it may not be noticeable. However, if you have saved too many images with too large a file size on the website, this will slow down the page load time enormously: Not only does the user-friendliness suffer, but you also risk a lower ranking in the Google search results and, in the case of a previous SEO package, undo the optimizations of our colleagues.
To be on the safe side, always ask onOffice for the correct size so that the images can be cut exactly to size in an image editing program!