 Entry
Entry Dashboard
 Contacts
 Properties
 Email
Email Calendar
 Tasks
Tasks Acquisition Cockpit
 Audit-proof mail archiving
 Automatic brochure dispatch
 Billing
 Groups
 Intranet
 Marketing Box
 Multi Property module
 Multilingual Module
 onOffice sync
 Presentation PDFs
 Process manager
 Project Management
 Property value analyses
 Enquiry Manager
 Showcase TV
 Smart site 2.0
 Statistic Tab
 Statistics toolbox
 Success Cockpit
 Time Tracking
 Address from clipboard
 Text block
 Customer communication
 External Tools
 Favorite links
 Calculating with formulas
 Mass update
 onOffice-MLS
 Portals
 Property import
 Quick Access
 Settings
 Templates
 Step by step
You are here: Home / Entry / Structure of the surface

Entry
Structure of the surface
How is onOffice enterprise edition structured? Where are which controls located?
In the following you will find the basic structure of the interface, some elements are explained in more detail on separate subpages.
You can find a detailed video on the subject here.
This also applies to details on list views, detail views and the creation of data records, etc.
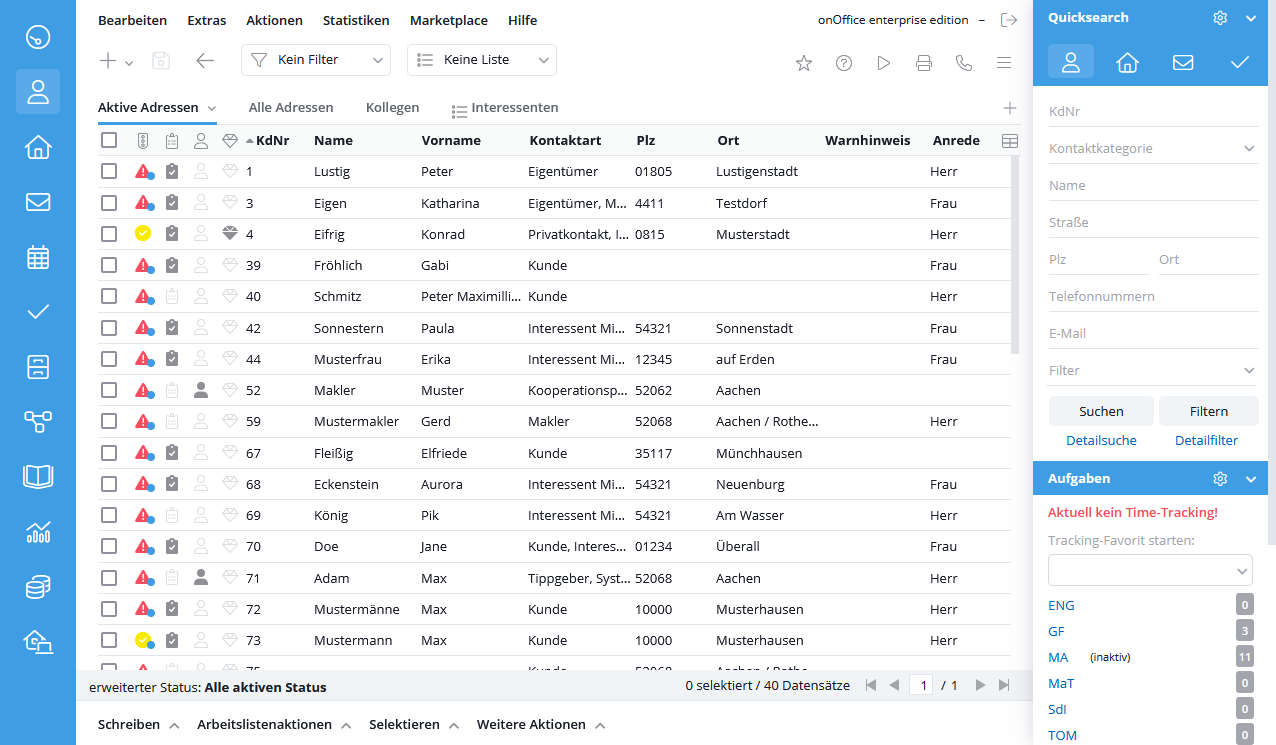
The content area is the largest area and is centrally located.
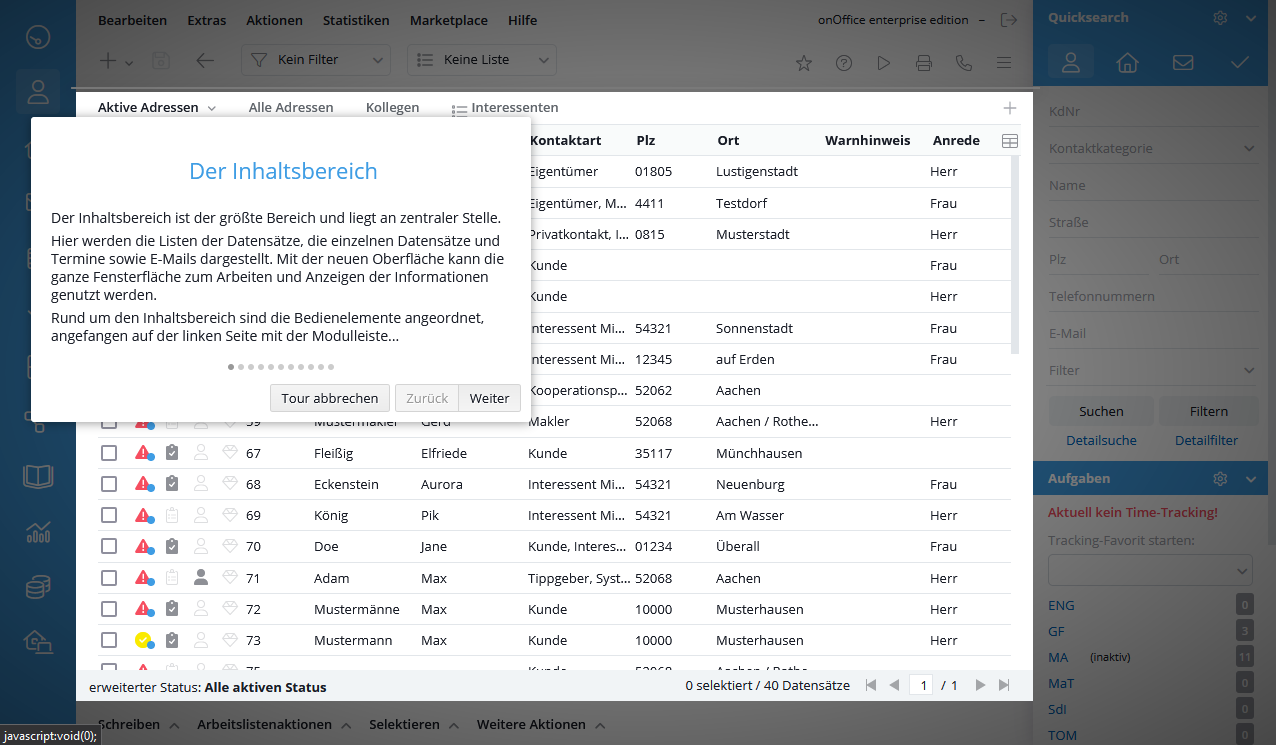
Here the lists of records, the individual records and appointments as well as Emails are displayed. With the new interface, the entire window area can be used for working and displaying information.
The controls are arranged around the content area, starting on the left side with the module bar.
The onOffice enterprise edition software convinces with its modular structure. All modules are intelligently coordinated with each other. Your advantages: automated links and thus a considerable simplification of your work processes. For example, property and address data are entered only once and are immediately available for various measures such as integration in property portals, serial Emails or customer letters.
On the left side you will find the module bar, with large clearly visible buttons.
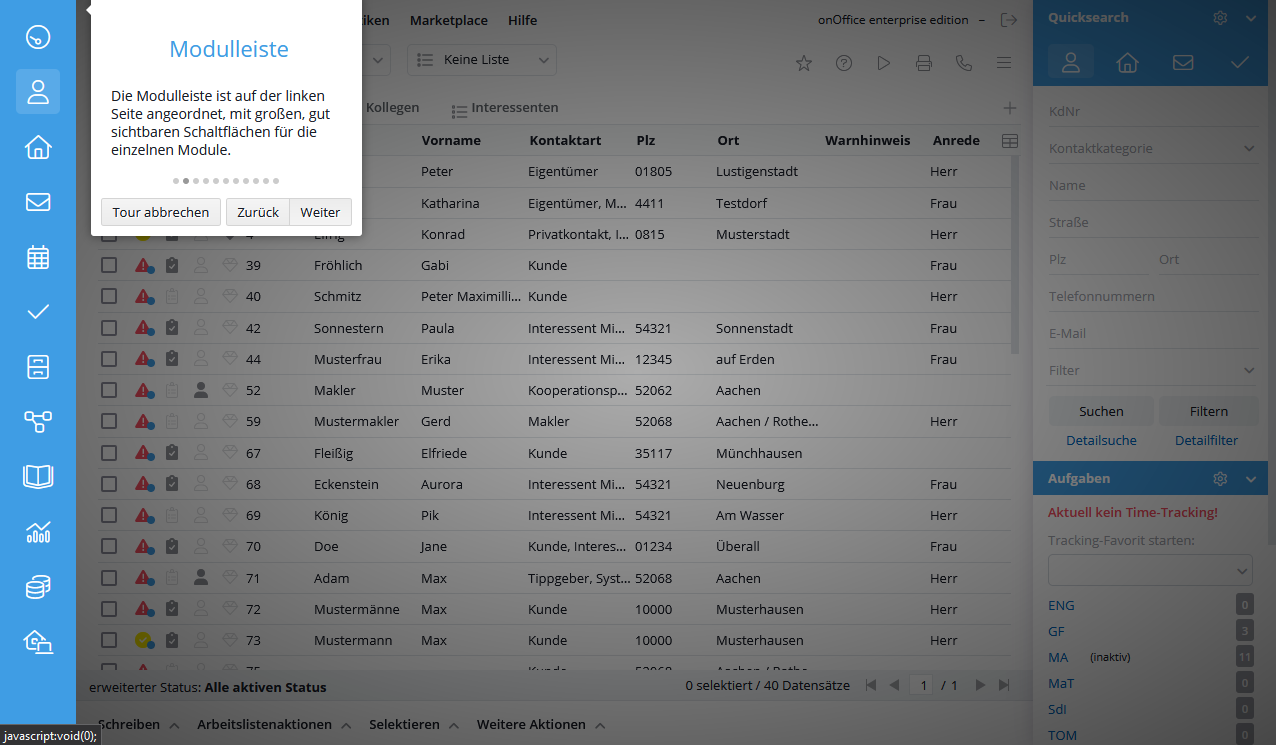
Here is a brief overview of the main modules:
- Dashboard
- Property management
- Contact management
- Email management
- Schedule management
- Task management
In addition to these “standard modules” there are other additional modules, some of which are also displayed in the module bar, for example:
- Project management
- Process Manager
- …
The menu bar is located at the top. No matter in which module, in which administration you are, this menu accompanies you in all your activities. The menus are structured thematically into Edit, Extras, Actions, Statistics and the question mark.
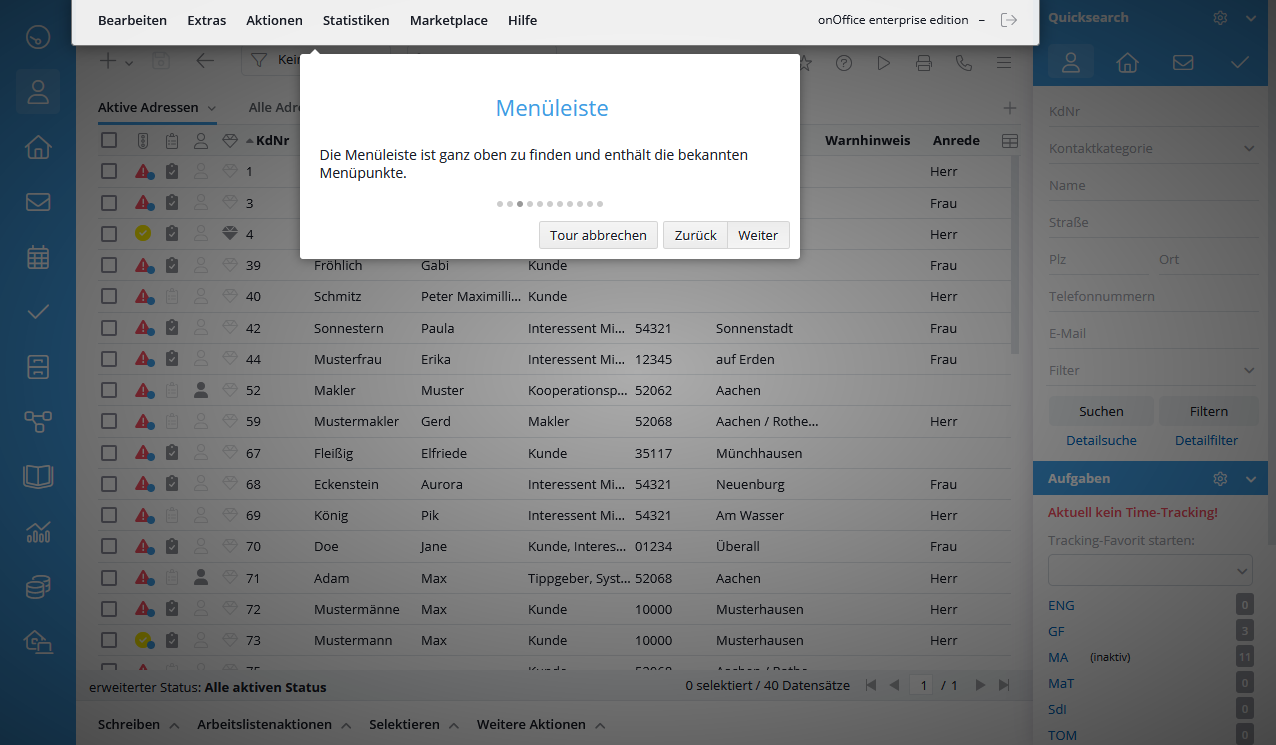
Here is the overview of the menu bar, a detailed description of the individual menus can be found here.
- The Edit item contains the templates as well as the pre-sorted views of addresses and properties.
- In the item Extras you will find the management and administration.
- In the Actions section, you will find functions for processing several data records, divided into property and addresses
- In the statistics section you will find statistics and reports as well as information about the memory consumption of your enterprise version.
- In the question mark you will find the online help and further information.
Use the logout button to log out of the software.
The toolbar is located below the menu bar and contains the most important helpers.
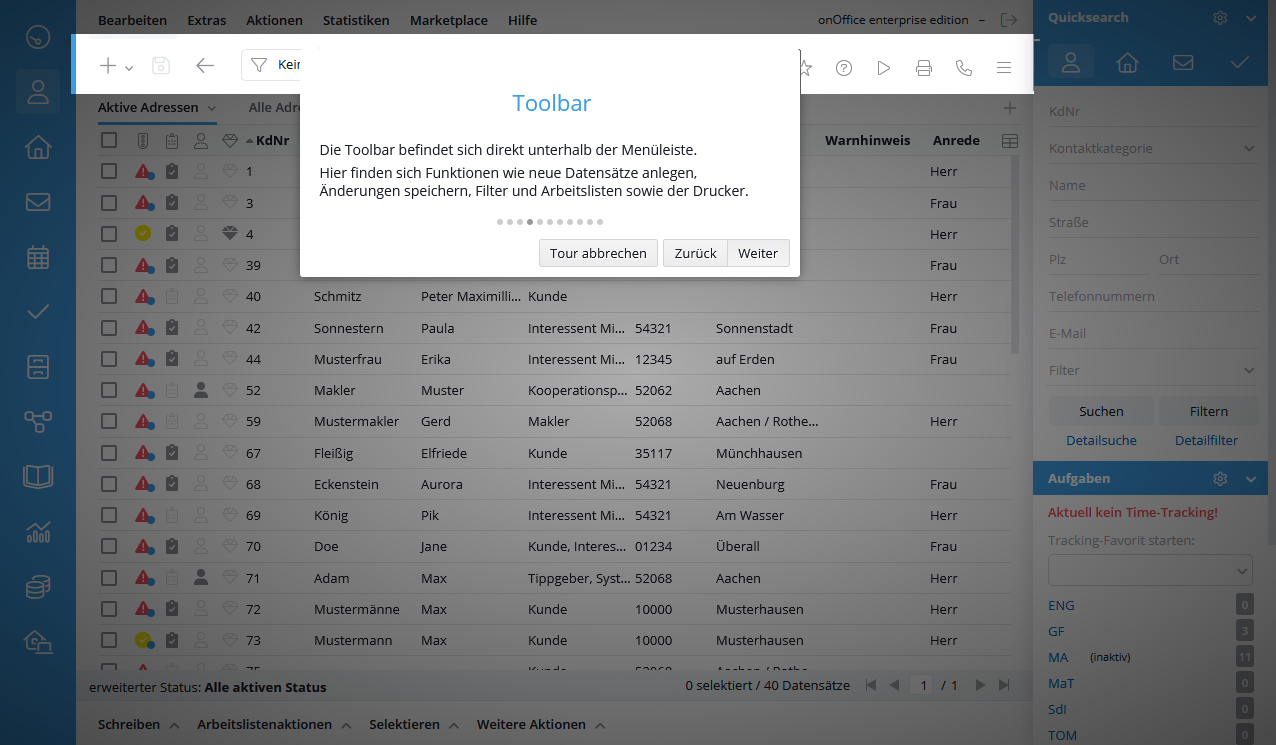
Here you can use the plus sign to create new data records, i.e. properties or addresses etc. and save changes. Use the back arrow to switch to the previous view or page within onOffice.
Depending on the module and job, the selection for filters, worklists or users are also displayed here.
Integrated print views and lists can be called up via the printer icon. Use the three horizontal lines next to it to open the sidebar.
5 minutes before the start of an appointment of the type “video conference”, the orange meeting icon also appears here, which leads directly to the video conference.
Are you looking for a property? An address? The sidebar with the integrated Quicksearch helps further. This allows you to perform a quick search in the existing data with freely selectable search criteria for properties, addresses and in the emails.
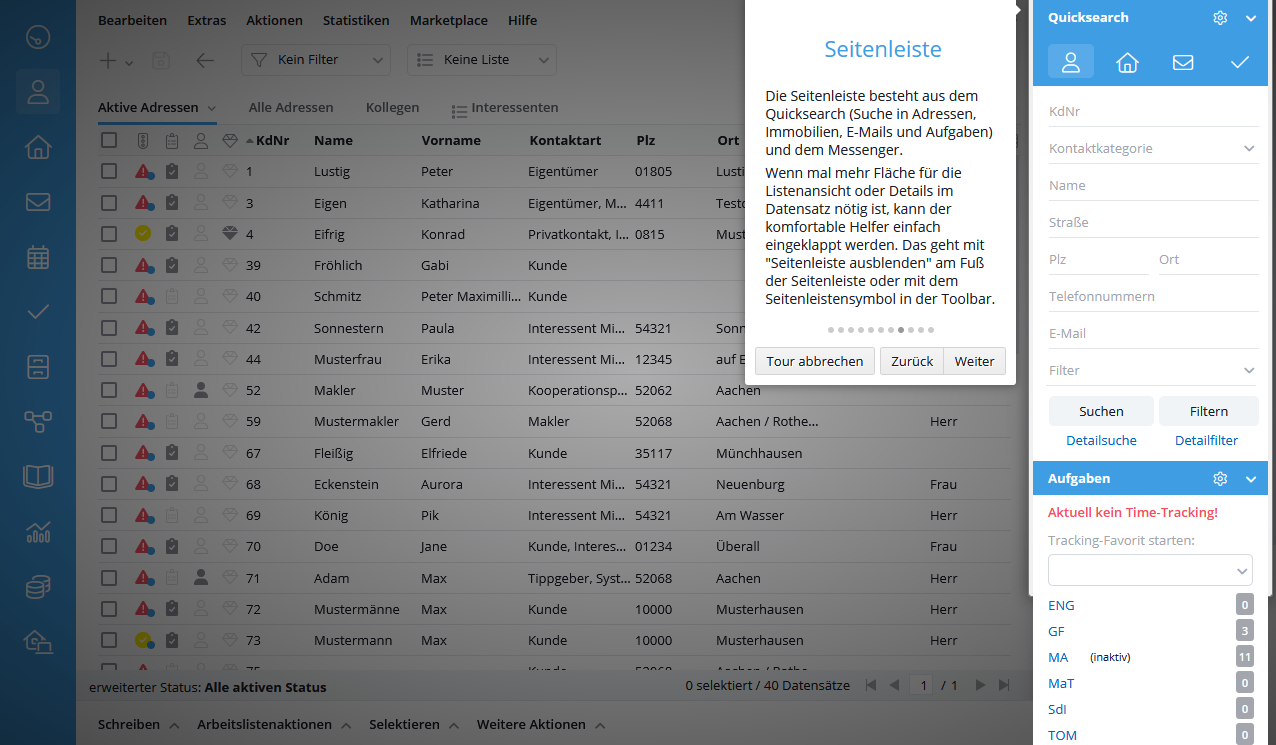
In the Tasks pane, you can view the number of assigned tasks for each user.
The messenger connects all users with each other, simply exchanging messages works great with it.
The sidebar is expanded or collapsed using the three horizontal lines in the toolbar.
The navigation bar is located above the action bar and summarizes all information, numbers and elements for the displayed data sets.
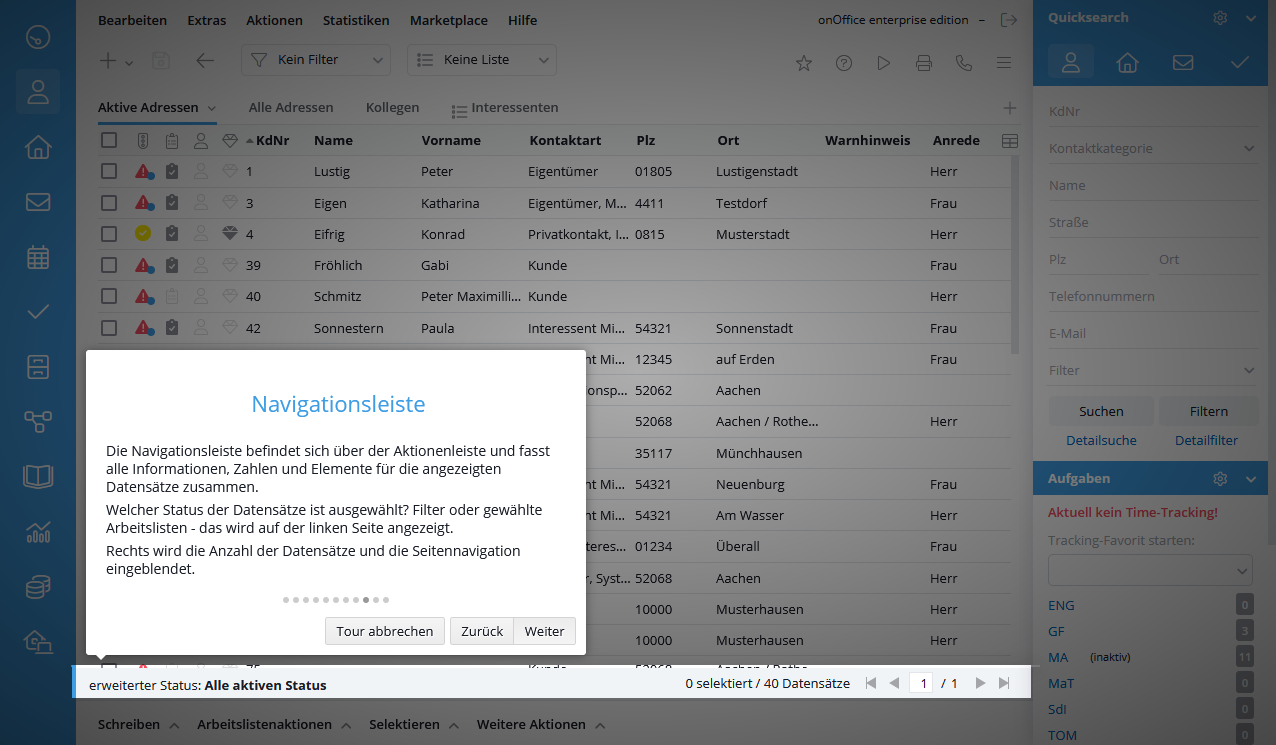
Which view was chosen? Active records? Inactive or archived? This is displayed on the left side of the bar, as well as whether a filter or worklist has been selected.
On the right side, information about the total number of records listed as well as the number of selected records is displayed.
On the far right are the navigation buttons that allow you to move around the list or scroll through the pages of the list. For orientation, the current page and the total number of pages are indicated.
The action bar is located at the bottom and closes the frame around the content area.
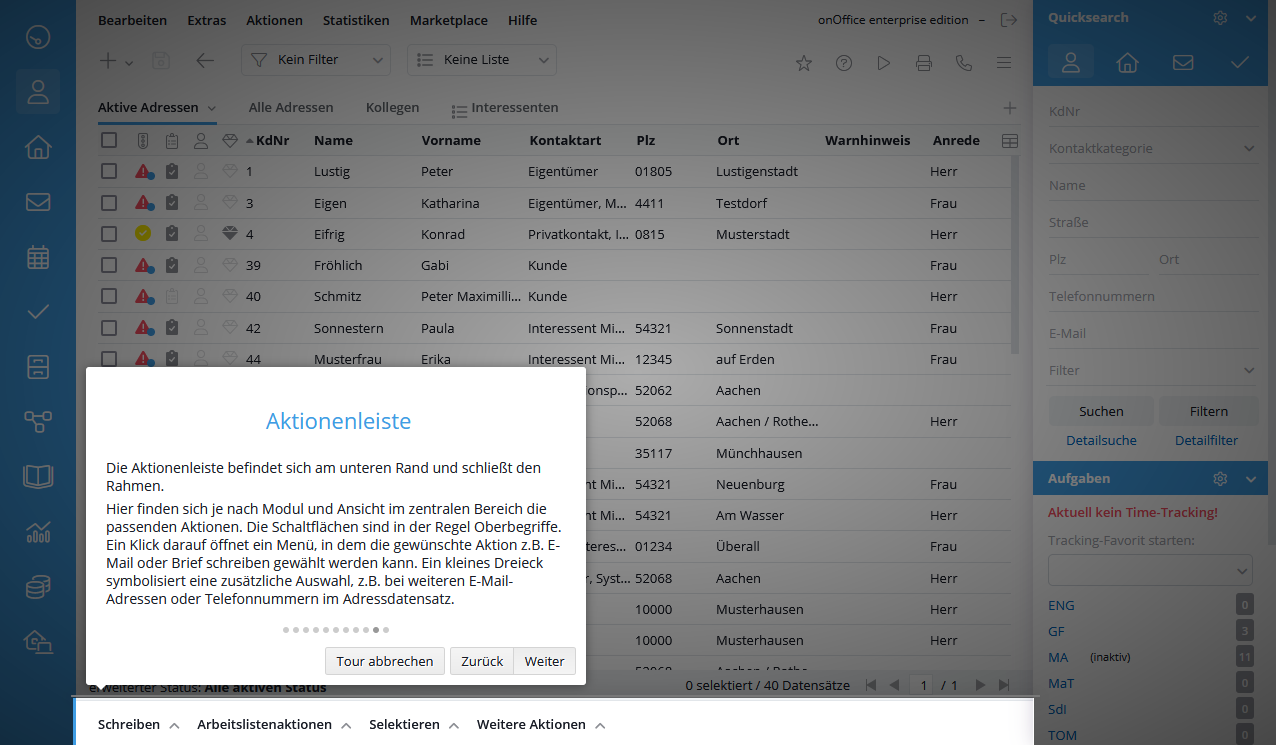
Here you will find the appropriate actions depending on the module and view, i.e. the content is different in a contact record than in the list view of the addresses.
The buttons are usually generic terms. By clicking on the desired generic term, a menu opens in which the desired action, e.g. Email or letter writing, can be selected.