 Entry
 Dashboard
 Contacts
 Properties
 Email
 Calendar
 Tasks
 Acquisition Cockpit
 Audit-proof mail archiving
 Automatic brochure dispatch
 Billing
 Groups
 Intranet
 Marketing Box
 Marketplace
 Multi Property module
 Multilingual Module
 onOffice sync
 Presentation PDFs
 Process manager
 Project Management
 Property tracking
 Property value analyses
 Enquiry Manager
 Showcase TV
 Smart site 2.0
 Statistic Tab
 Statistics toolbox
 Success Cockpit
 Time Tracking
 Address from clipboard
 Text block
 Customer communication
 External Tools
 Favorite links
 Calculating with formulas
 Mass update
 onOffice-MLS
 Portals
 Property import
 Quick Access
 Settings
 Templates
 Step by step


You are here: Home / Modules / Tasks / Tasks Action bar

Tasks
Tasks Action bar
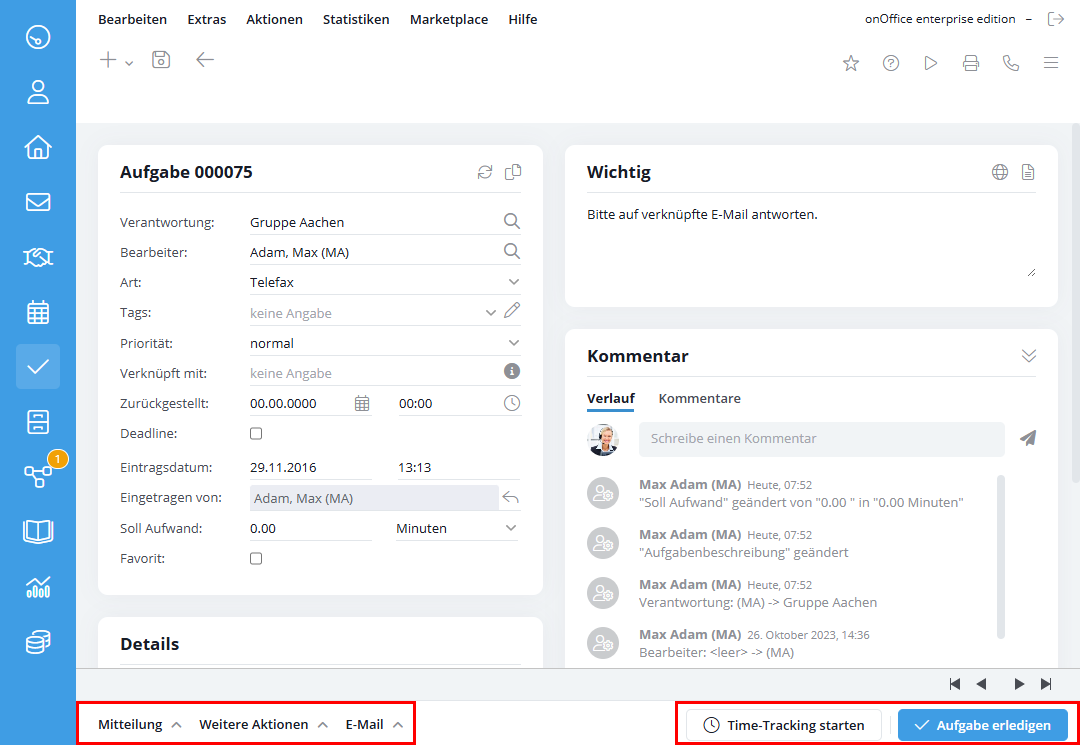
- Message to person in charge
Using this function you can send a direct message to the person or group in charge for the task. The person in charge or the group receives this message as an email or internal pop-up message. - Message to processor
Using this function you can send a direct message to the processor of the task. The processor receives this message as an email or internal pop-up message.

- Create project
Clicking on “Create project” opens a pop-up that allows you to create a new project from within the task. Task subject and task description are transferred to the project as project title and project description. Attached files, linked contacts and properties as well. The newly created project has the status “Started”. - Create appointment
By clicking on “Create appointment” a new appointment is created, where the creator of the task is entered as participant. Furthermore, task subject and task description as well as attached files are transferred to the appointment. If there is an appointment type that corresponds to the task type, this is also taken over. - Create follow-up task
This allows you to create subtasks, e.g. to split this task into several parts. The follow-up task takes the task description of the main task and the subject of the main task with the note ‘(follow-up task)’. A kind of history is then also displayed above the task number. It should be noted that no tasks in a task sequence can be deleted. - Delete
Clicking on “Delete” deletes the task. - Record Permissions
When you click “Data Record Permissions,” a pop-up appears where you can assign read, write, and delete permissions for the selected task. You can create a stamp from your selection, which gives you the same user rights as a template and allows you to use them in other areas where record rights are used.
If record stamps already exist, you can choose between individual record permissions or use the record stamp via a quick-select option.
- Solve link
Solves the email link with the task. - Reply to all
This button allows you to reply directly to all the linked contacts of the email from which the task was created. The first linked contact is copied to the To field, the others as CC. - Reply
This button allows you to reply directly to the email from which the task was created. - Read
By clicking this button you can read the email from which this task was created.
Use this action to start or stop the time spent on the task. In the task overview, this gives you a view of the total time spent. For this option you need the additional module “Timesheet”.
To complete a task quickly, you can click the button. He gets the tasks done with little effort. If a task was closed too early, it can be reactivated using this button.
Tasks