You are here: Home / Additional modules / Project Management / Create/complete project
€

Project Management
Create/complete project
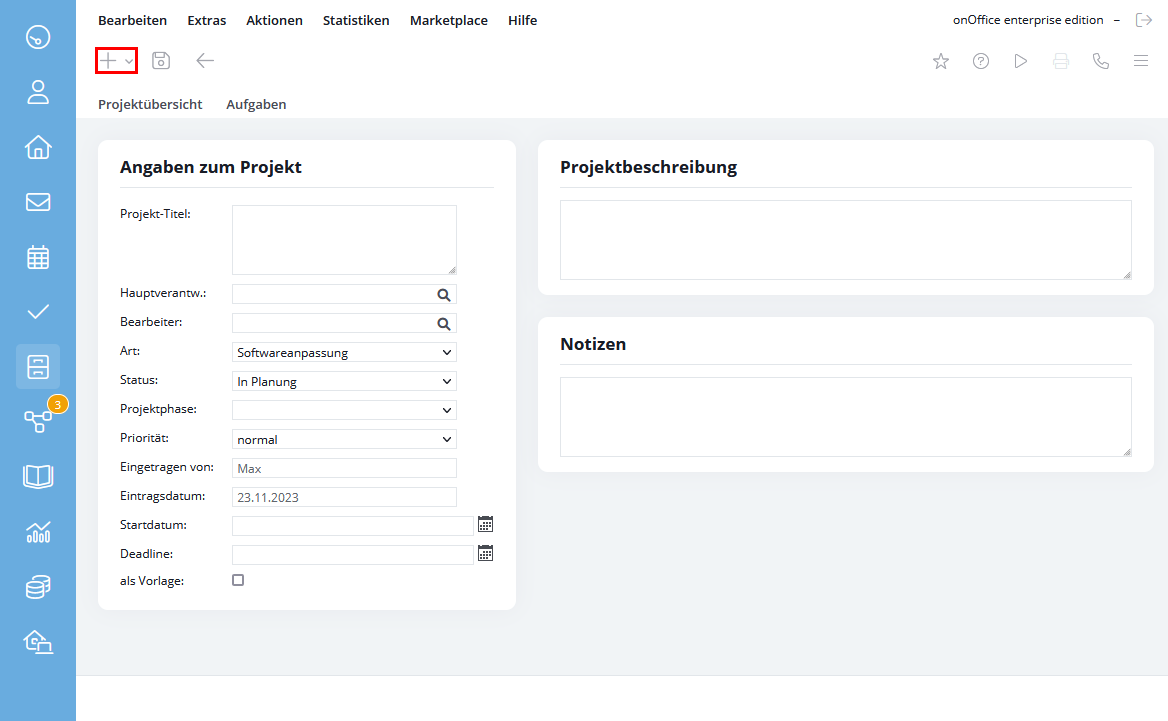
To create a new project, click on the “Projects” module icon in the module bar. Via the ‘New record’ icon ![]() you create a new project.
you create a new project.
In all other views, you can use the small arrow next to the plus symbol – via the ‘New project’ entry – to create either from a template or a completely new project.
After assigning a suitable project title, you can assign a start date and deadline for the project. Save the project using the diskette icon. In the next step, further settings and links can be made.
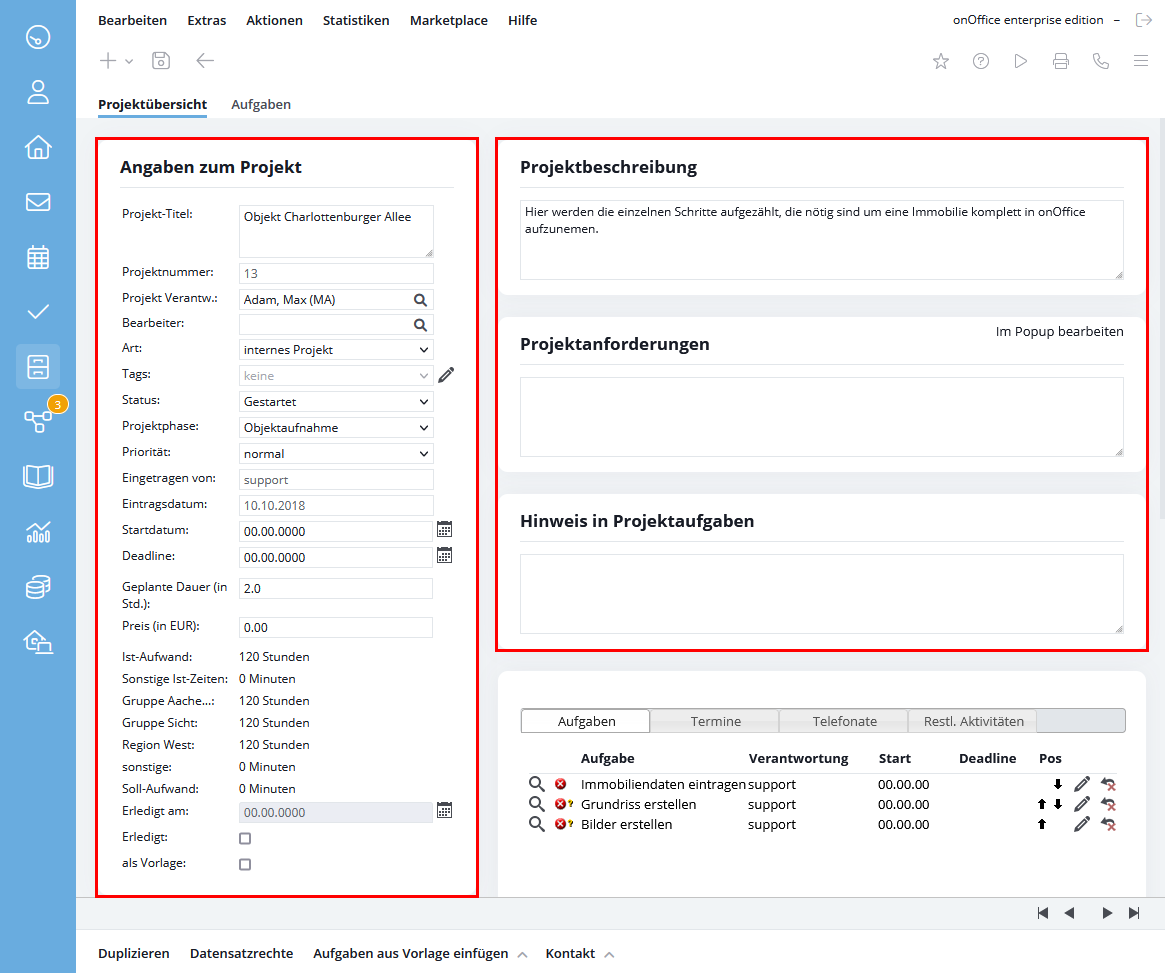
Project information
The following fields are available, among others:
- Project description: Describe what the project is about here.
- Project Requirements: Define the project requirements here. If this field is filled, it will also be visible in all tasks associated with the project.
- Note in project tasks: Enter useful notes for the project here.
- Project Respons: Enter the person responsible for the project here.
- Type Specify the type of project.
- Tags: Assign one or more of the tags stored in the administration here.
- Status: Status of the project with options “In planning”, “Started”, “Finished”.
- Priority: Assign the project a priority from “lowest” to “highest”.
So you can create any entries for the “Type of project” under Tools >> Settings >> Administration >> Tab Singleselect >> Module Project management >> Key field Type .
Project status
When assigning the project status, pay attention to which functions are linked to it:
- In planning: In the “in planning” status, the tasks that are linked in the project are not displayed to the responsible person or the editor. The only way to view the tasks is through the project management.
- Started: The project has started. The linked tasks are all submitted to the appropriate agents/responsible parties.
- Finished: In the “Finished” status, all tasks are set to completed. If one of the tasks of the project is not yet set to done, a warning will be issued.
With this, the following procedure is recommended: Create the project until all subtasks are entered as far as necessary. The tasks you enter are not visible to other users at first. Only when you then set the status to “Started” do the tasks appear for the responsible users.
Assign property and contacts
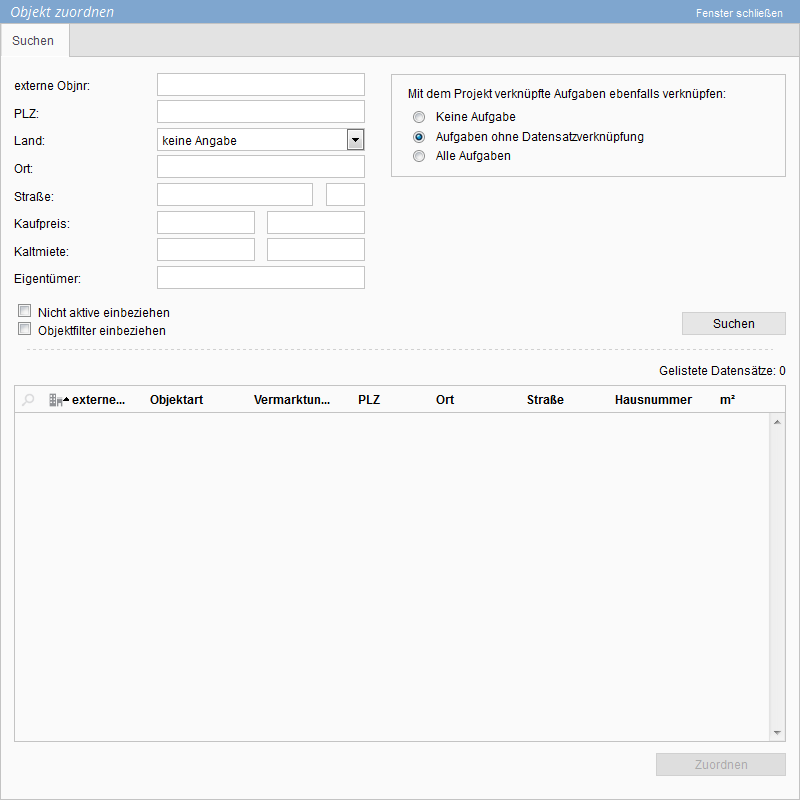
When linking an address and/or property to a project, you also have the option of assigning the tasks assigned to the project to these addresses and properties.
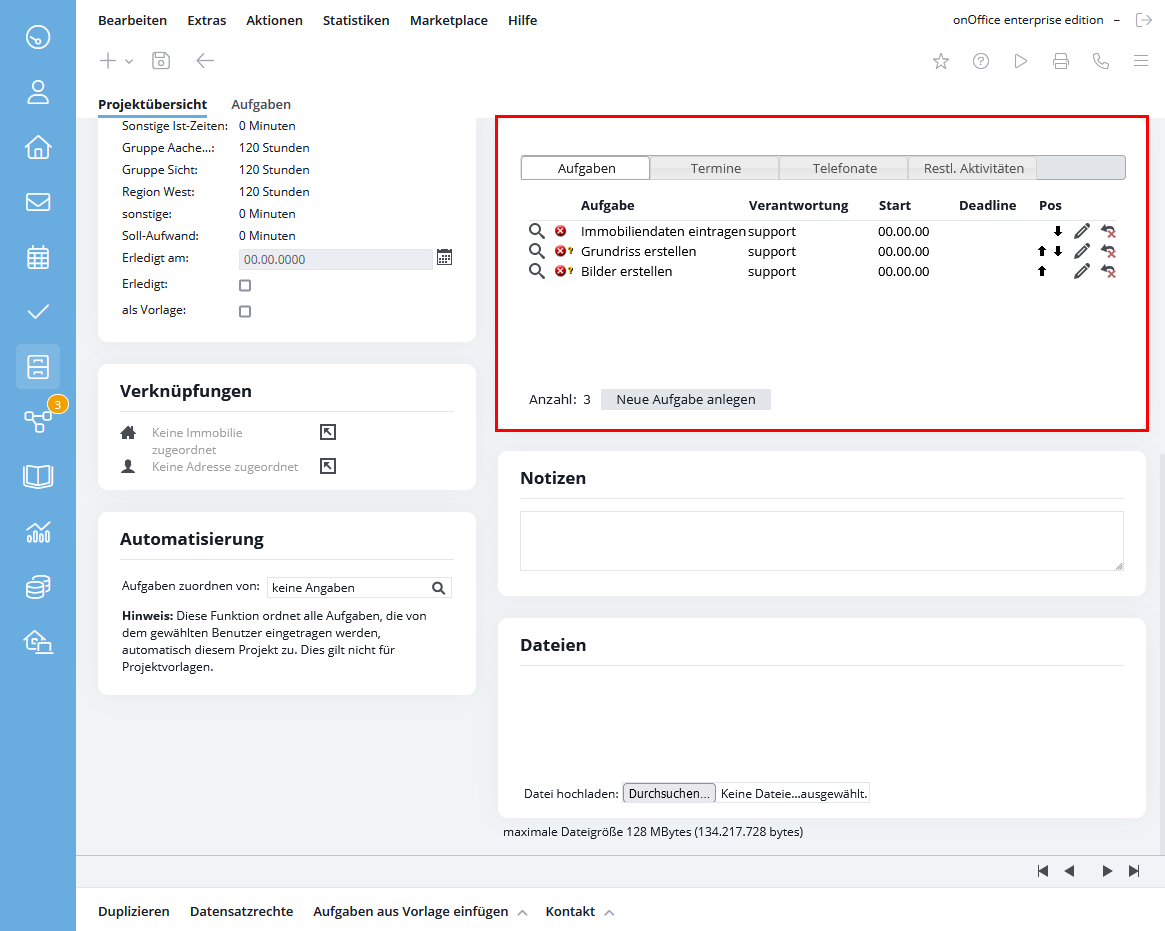
The next step is to create new tasks for the property. The tasks are assigned directly to the responsible employee. For more details, see the corresponding entry for task management.
The colored icons to the left of the tasks show the status of the tasks:
- green symbol = status “Done”.
- yellow symbol = status “in process”.
- red symbol = status “Not started”.
- red symbol with question mark = from more than 7 days unchanged status e.g. “in process”.
Notice:
It is also possible to link tasks to several different projects.
Contact to the linked contact
The linked contact can be contacted via the actions bar. You can choose between letter and email. This way, information about the project can also be sent via various macros .
Magnifier view
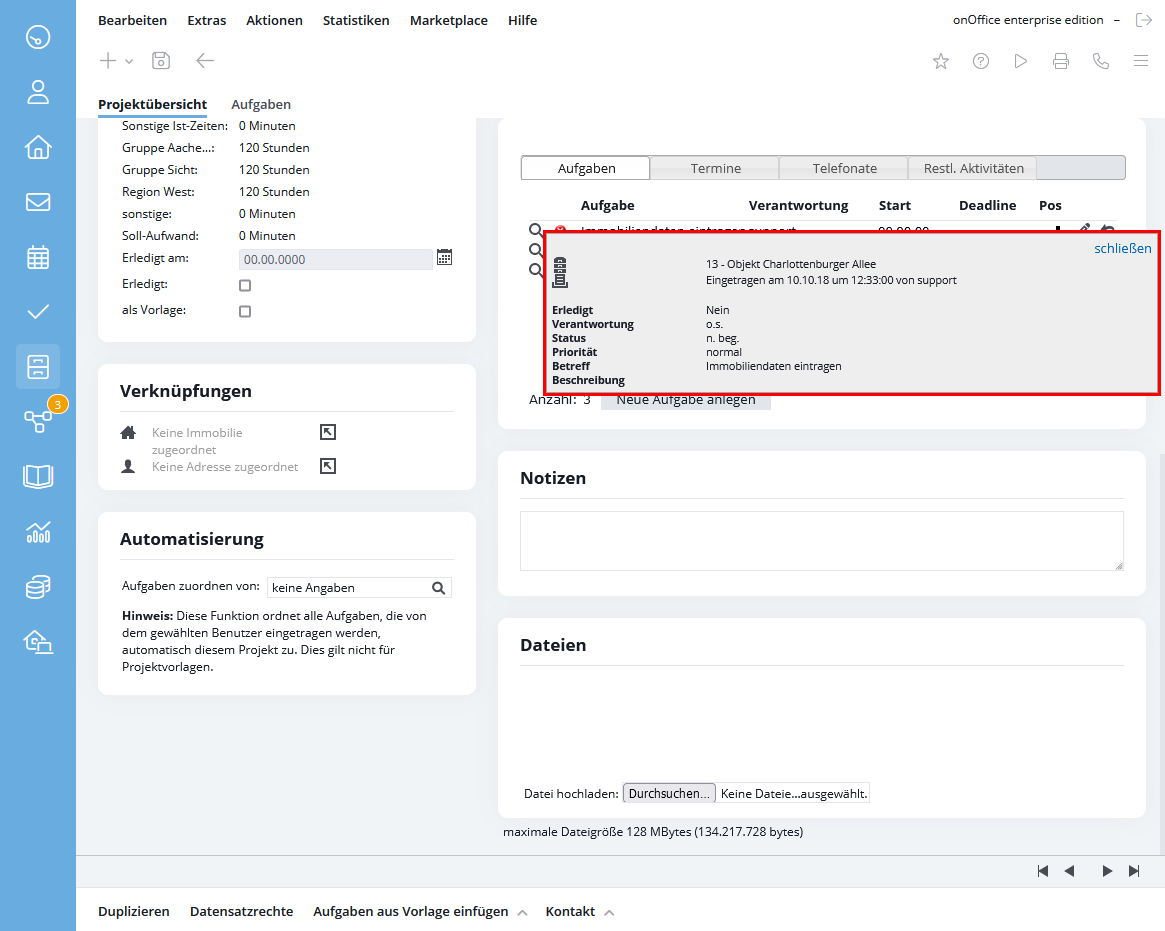
Once the project has been created and tasks, appointments and remaining activities have been linked to the respective project, it is possible to get a quick overview of the respective task, appointment or remaining activities in the respective tab using the magnifying glass icon.
Files
Files can be saved in a project via the Files box. Multiple files can be uploaded at the same time.
In linked tasks, in addition to the files of the task, the files of the project are listed via the “Project files” box.
Automation
In the automation box, you can specify that a user’s newly created tasks are assigned directly to the project. This function automatically assigns all tasks entered by the selected user to this project. This does not apply to project templates.
If a user is entered in several projects under Automation, the tasks are linked to all projects.
Complete/finish project
Complete
Once the main tasks for your project have been completed, the project can be set to completed. This is done via the “Done” checkbox. By checking the “Done” box, the “Done on” date is also filled in, which directly calculates a “Done after” value in days. The “Entry date” and the “Completed on” date are used for the calculation. When completing a project, the open tasks remain open. Completing a project affects the project overview , in which the project is now displayed in green.
Exit
To finalize a project and ensure that all tasks have been completed, you can use the project phase. If you set this to “Finished “, you will be asked before saving: “Would you like to change the project status to Finished? All tasks are set for completion!” If you click on OK, all tasks are set to completed as described, the checkmark is placed next to Completed and the project is closed.
Notice:
Please note that the project module is an additional module that is subject to a fee. You have the option to purchase this through the shopping center .

 Entry
Entry Dashboard
 Contacts
 Properties
 Email
Email Calendar
 Tasks
Tasks Acquisition Cockpit
 Audit-proof mail archiving
 Automatic brochure dispatch
 Billing
 Groups
 Intranet
 Marketing Box
 Multi Property module
 Multilingual Module
 onOffice sync
 Presentation PDFs
 Process manager
 Project Management
 Property value analyses
 Enquiry Manager
 Showcase TV
 Smart site 2.0
 Statistic Tab
 Statistics toolbox
 Success Cockpit
 Time Tracking
 Address from clipboard
 Text block
 Customer communication
 External Tools
 Favorite links
 Calculating with formulas
 Mass update
 onOffice-MLS
 Portals
 Property import
 Quick Access
 Settings
 Templates
 Step by step