 Entry
Entry Dashboard
 Contacts
 Properties
 Email
Email Calendar
 Tasks
Tasks Acquisition Cockpit
 Audit-proof mail archiving
 Automatic brochure dispatch
 Billing
 Groups
 Intranet
 Marketing Box
 Multi Property module
 Multilingual Module
 onOffice sync
 Presentation PDFs
 Process manager
 Project Management
 Property value analyses
 Enquiry Manager
 Showcase TV
 Smart site 2.0
 Statistic Tab
 Statistics toolbox
 Success Cockpit
 Time Tracking
 Address from clipboard
 Text block
 Customer communication
 External Tools
 Favorite links
 Calculating with formulas
 Mass update
 onOffice-MLS
 Portals
 Property import
 Quick Access
 Settings
 Templates
 Step by step
You are here: Home / Extras / Templates / PDFdesigner / Create PDF brochure / Create new pages

Templates
Create new pages

To configure the title page, click on it. On the right side you can now configure the settings for the title page.
In the settings you can, for example, select the background graphic (previously uploaded in the basic settings of the PDF brochure), adjust the font, define individual page margins, choose a layout pattern or display the full address of the property.
For some templates, you can display data on the title page (Data Block element). The configuration corresponds to the data block page.
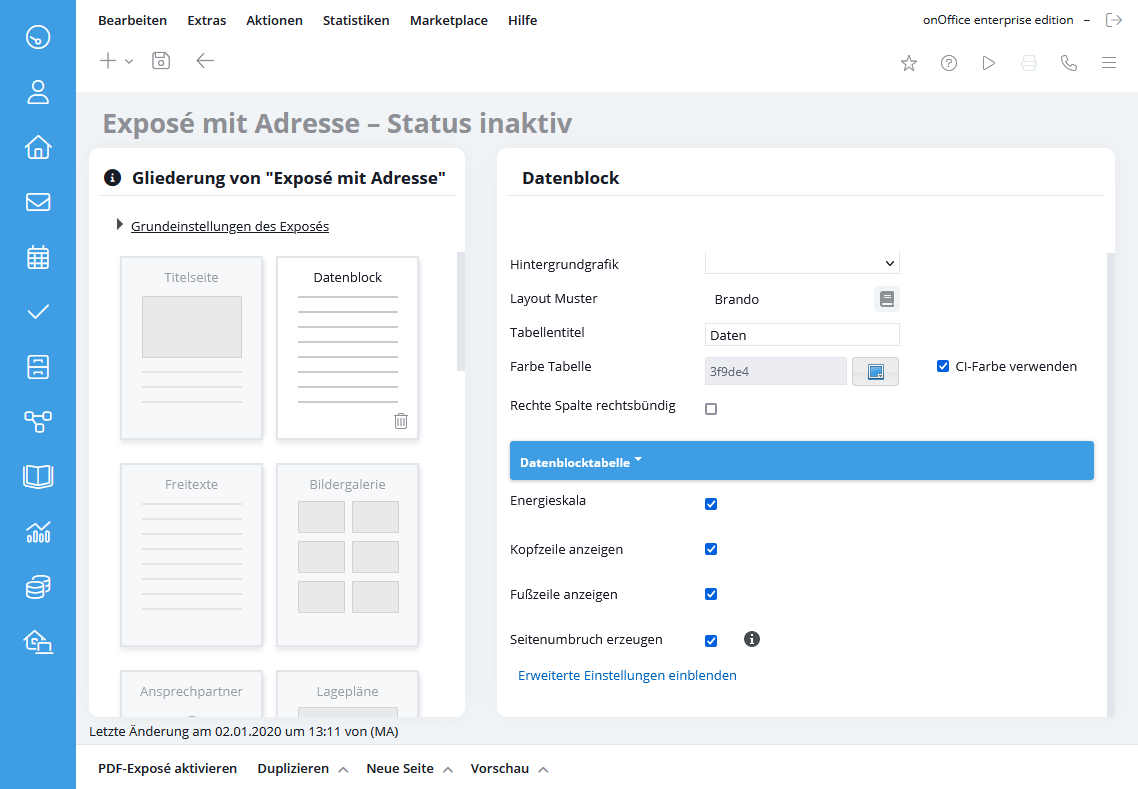
First of all, you have to select via the radio buttons above whether the fields for “short” or “long” brochures should be displayed. This is based on the definition by the administrator.
You can add the “Data Block” page as often as you wish and place it in different places.
In the menu “Data block tables” you can select which categories from the property record are to be displayed in the brochure. Place a check mark next to the desired category.

You can change the order of the categories by drag & drop.
The elements of the pages “data block” and “free texts” are displayed on one page. The configuration corresponds to the one on these pages.
You can find a video on how to create and use free texts on our YouTube channel.
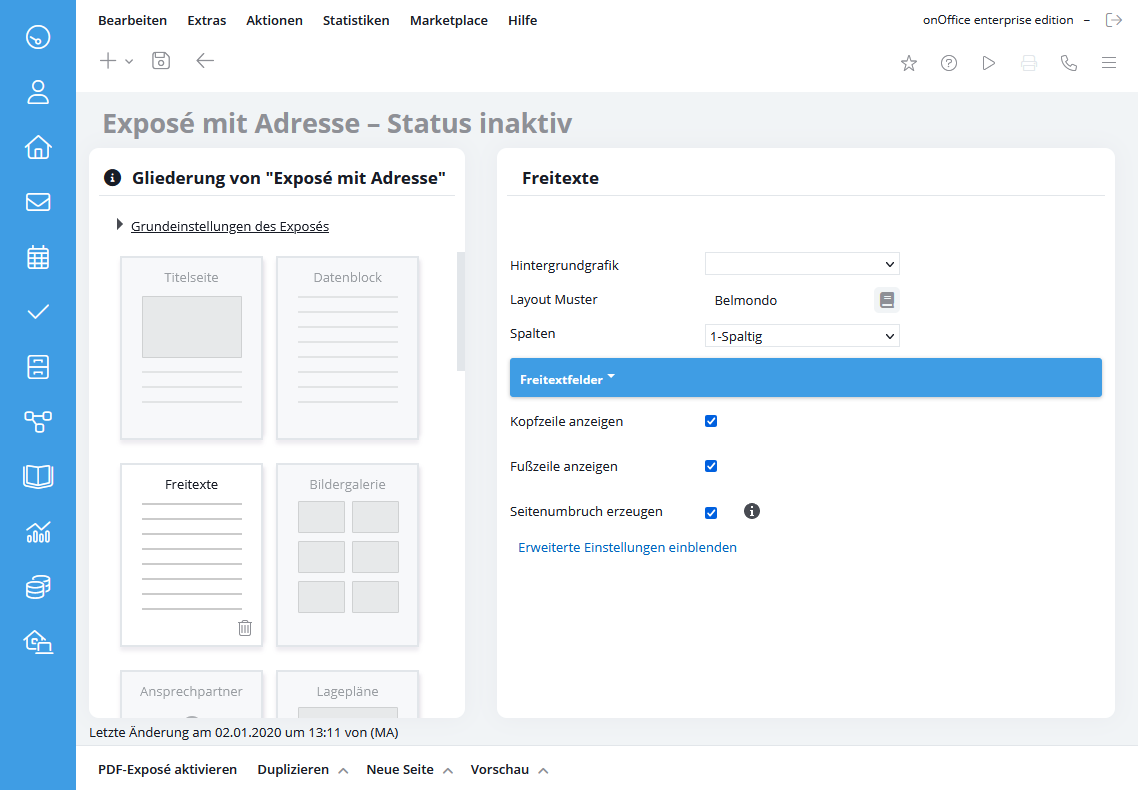
You can add the page “free texts” as often as you wish and place them in different places.
You can define which free text fields should be displayed in your brochure and what the titles should be. By clicking on the checkboxes of the categories, the corresponding free text is displayed in the brochure. In the field to the left of the checkbox you can define the individual title in the brochure for the free text field.
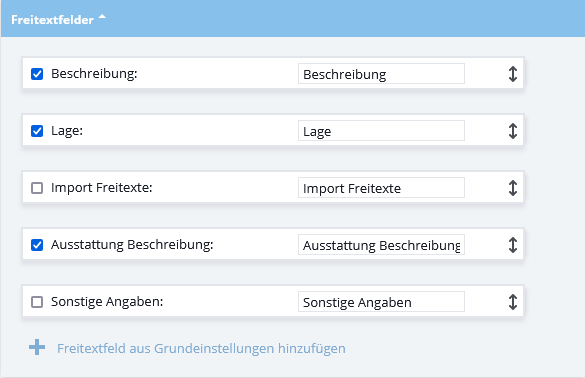
You can change the order of the free texts by drag & drop.
The advanced settings are listed below.
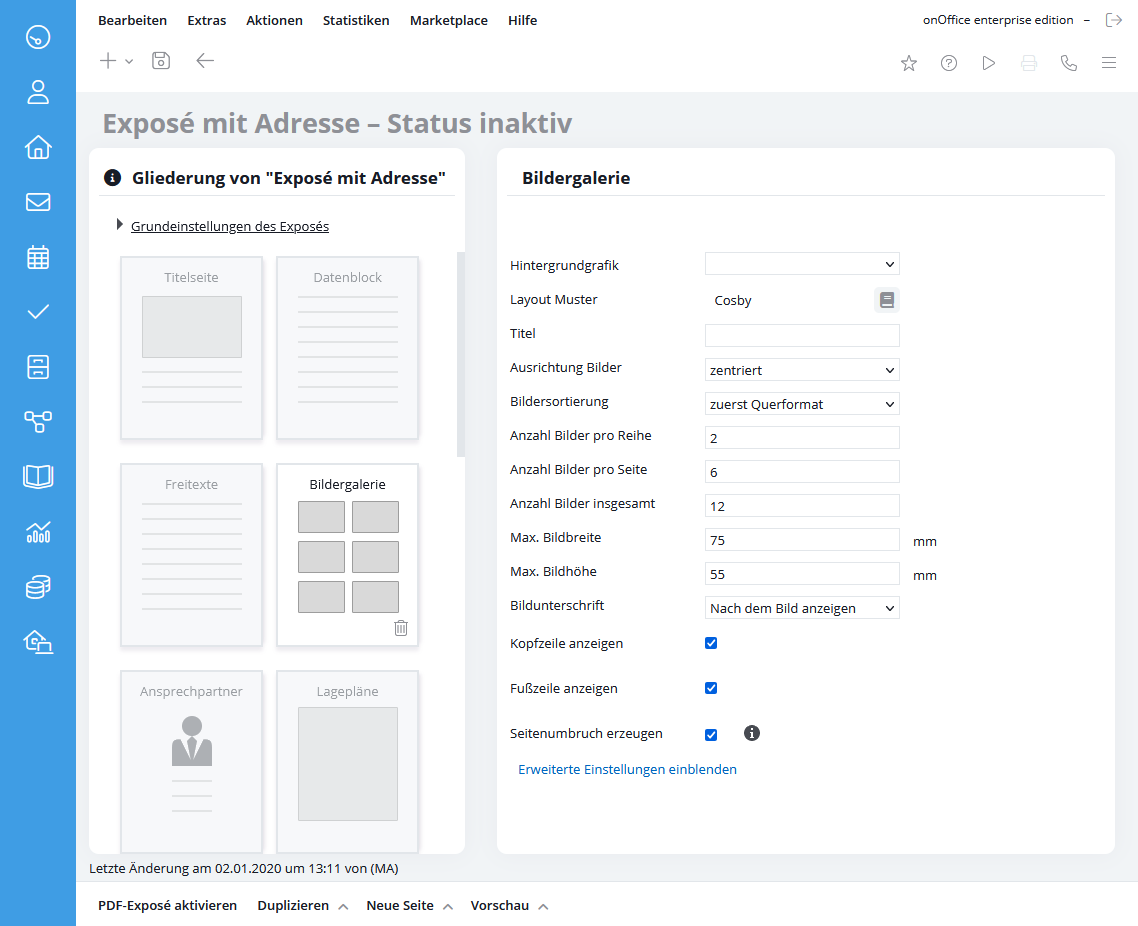
Here you can configure the display of the images in the brochure.
You can also configure which pictures of the property can be displayed in the brochure. You can define the release for the brochures in the property per picture .
You can assign a title to the image gallery, select the background graphic that you uploaded in the basic settings. You can use the “Alignment Images” option to decide whether the images are displayed left, right, or centered on the page in your Brochure.
Under “Image sorting” you can determine whether images in portrait or landscape format will appear first in the image gallery. If no information is given, the pictures will be displayed in the order in which they are deposited with the property.
You can also configure the number of images per page, per row and the maximum number of images in the brochure. The images are displayed as large as possible, the “number of images per page” is shown as the maximum number. Changing the number of images per page will therefore NOT INEVITABLY change the size of the images.
For some layouts, you can manually set the max. image width and height in millimeters. The aspect ratios of the image are maintained.
Example:
You can calculate the maximum width of the images in your brochure by subtracting from the page lengths of your PDF (210mm wide and 297mm high for DIN A4) the page spacing that you have specified in the basic settings and, if necessary, a space in the middle between the images. Then divide this value by the number of images per row to get the maximum width of an image.
Example:
Width DIN A4: 210mm; 2 pictures per row
distance left: 20mm, distance right 20mm -> total distance 40mm
Desired distance between images: 15mm
width Din A4 – total distance – image distance = 210mm-40mm-15mm= 155mm
Maximum image width: 155mm: 2 pictures per row= 77,5mm
Whether the image title should be displayed and whether it should follow the image can be selected in the “Caption” field.
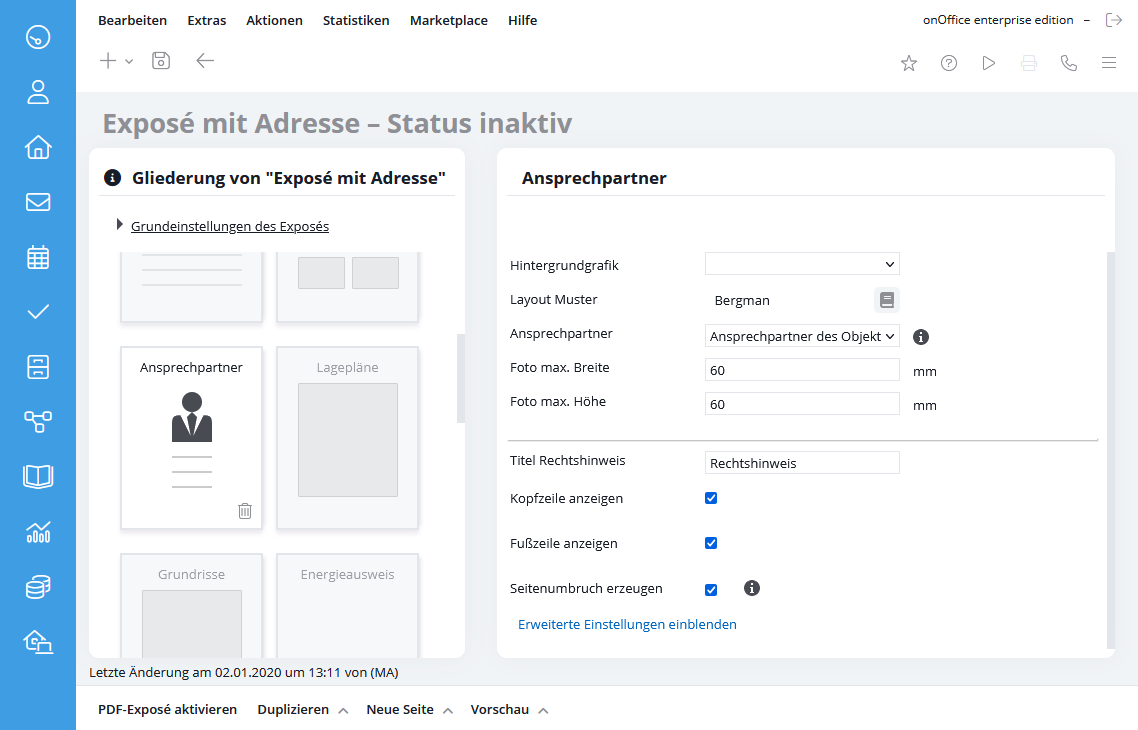
Here you can select the background graphic that you previously uploaded in the basic settings.
You can also configure the maximum width and height of the contact person’s photo in millimeters.
In the field “Title legal notice” you can give the legal notice taken over from the basic settings a title.
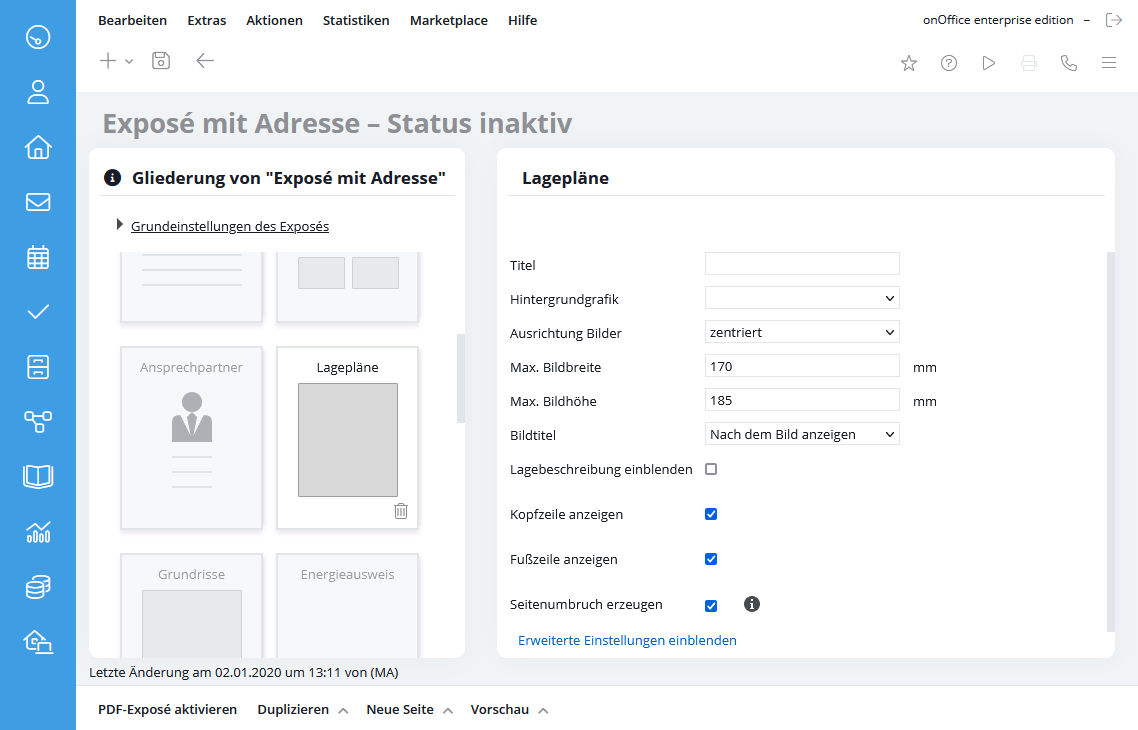
The site plans stored in the files of the respective property are output here, provided that the site plan or plans are released for brochures.
On the Site Plans page, you can assign an individual title, select the background graphic that you have previously uploaded in the Brochure’s basic settings, and choose the alignment of the images.
You can also define the maximum width and height of the site plans in millimeters by entering the desired length and width in the respective fields “Max. image width” and “Max. image height”.
Whether the image title should be displayed and whether it should follow the image can be selected in the “Caption” field.
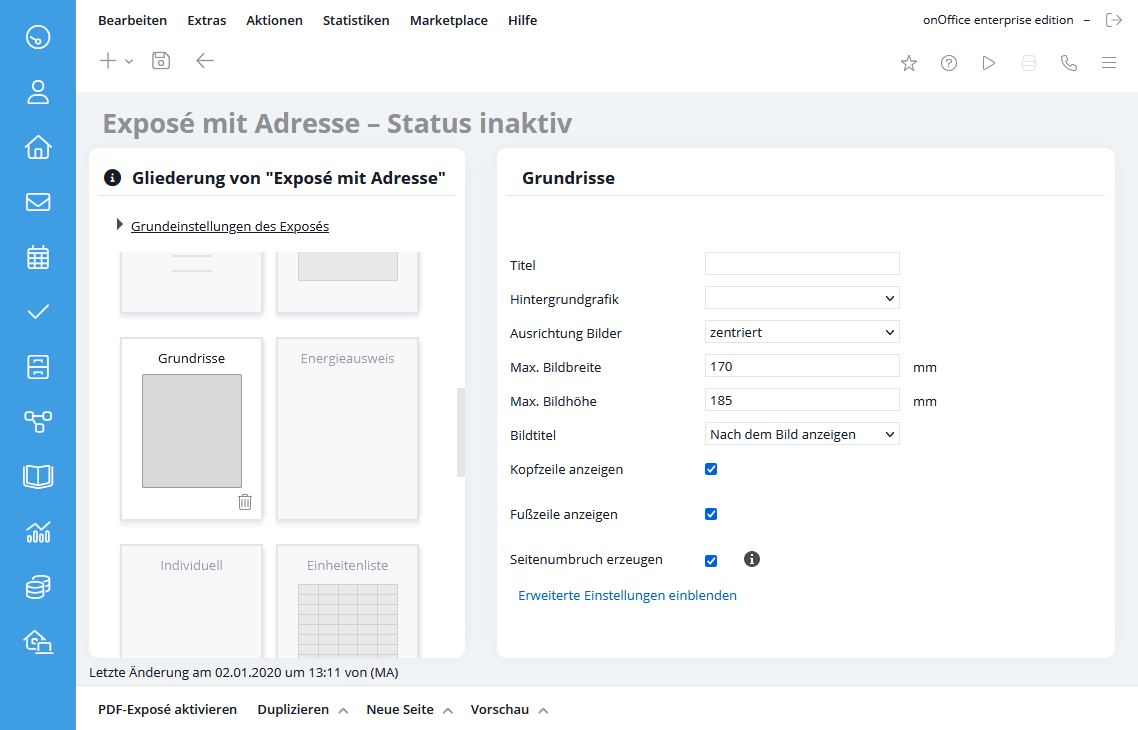
Here the floor plans saved in the files of the respective property as file type “Floor plans” are output, provided that the floor plan or floor plans are released for brochures.
You can give the Floor Plans page an individual title, select the background graphic that you have previously uploaded in the Brochure’s basic settings, and select the alignment of the images.
You can also define the maximum width and height of the floor plans in millimeters by entering the desired length and width in the respective fields “Max. image width” and “Max. image height”.
Whether the image title should be displayed and whether it should follow the image can be selected in the “Caption” field.

On this page, the energy certificate is displayed, which is stored in the files of the respective property as file type “energy certificate”, provided that the energy certificate is released for brochures. You can also set whether the footer is displayed.
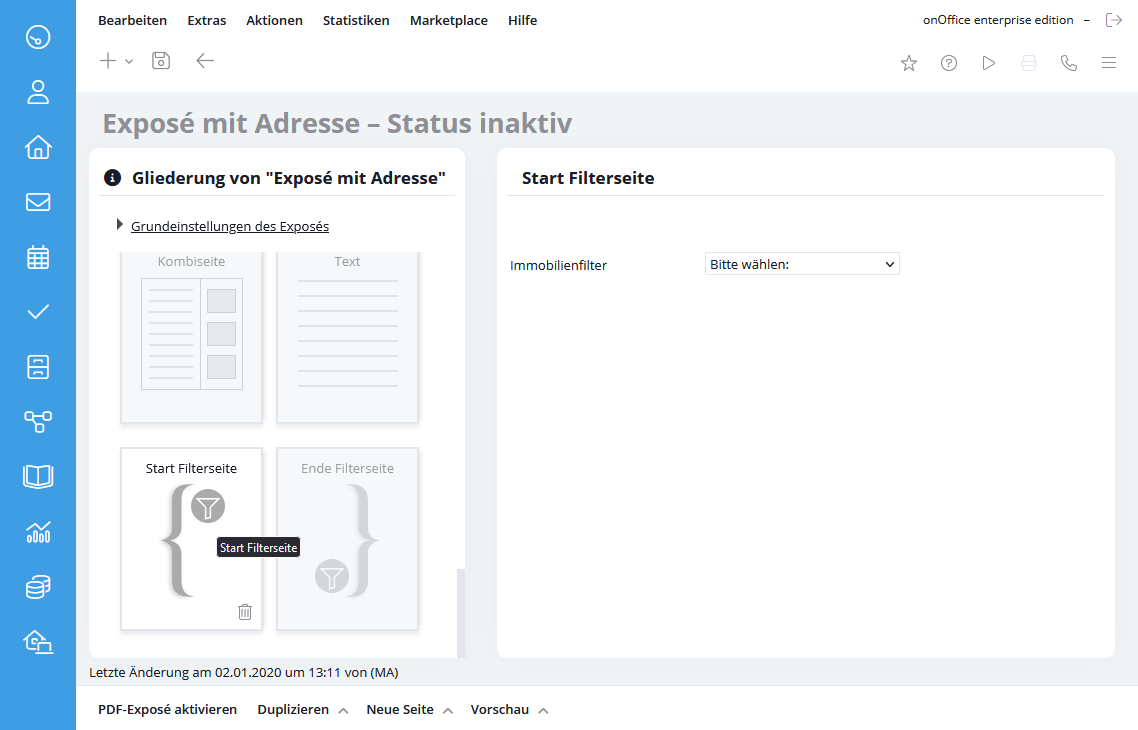
On the filter page, a property filter can be set in the settings. All PDFdesigner pages (except unit loop) that are between the start and end of the filter page are only displayed if the property is also displayed in the filter.

Individual pages offer the possibility to include your own texts (PDF documents or multi-page PDF brochures) or specially selected pictures of the property in the brochure. You can add the page “individually” as often as you wish and place it in different places.
Under “Name” you can add a title which is only visible in the overview on the left side. Helpful if several individual pages are included.
With the selection “individual file” you can integrate an existing PDF document into the brochure. In this case, please check the settings for displaying the logo and footer.
With the selection “property File” you can include from the property a picture or a PDF document deposited there. A special feature here is the layout pattern “Lawrence”. Here you have the possibility to manually limit the maximum width and height of an included file and to display it at the desired position in the brochure.
Which file is to be used can be determined by the file type. If there are several files of the same type, the first matching one is always taken. On the other hand, this can be done via the document characteristic, these can only ever be assigned once per property.
For the “property file” you can further influence the display by using the layout patterns.
When you select this page type, two pages “Start Unit Loop” and “End Unit Loop” will appear – they are not visible in the Brochure. However, all pages that are within the unit loop are output for each unit of the master property.
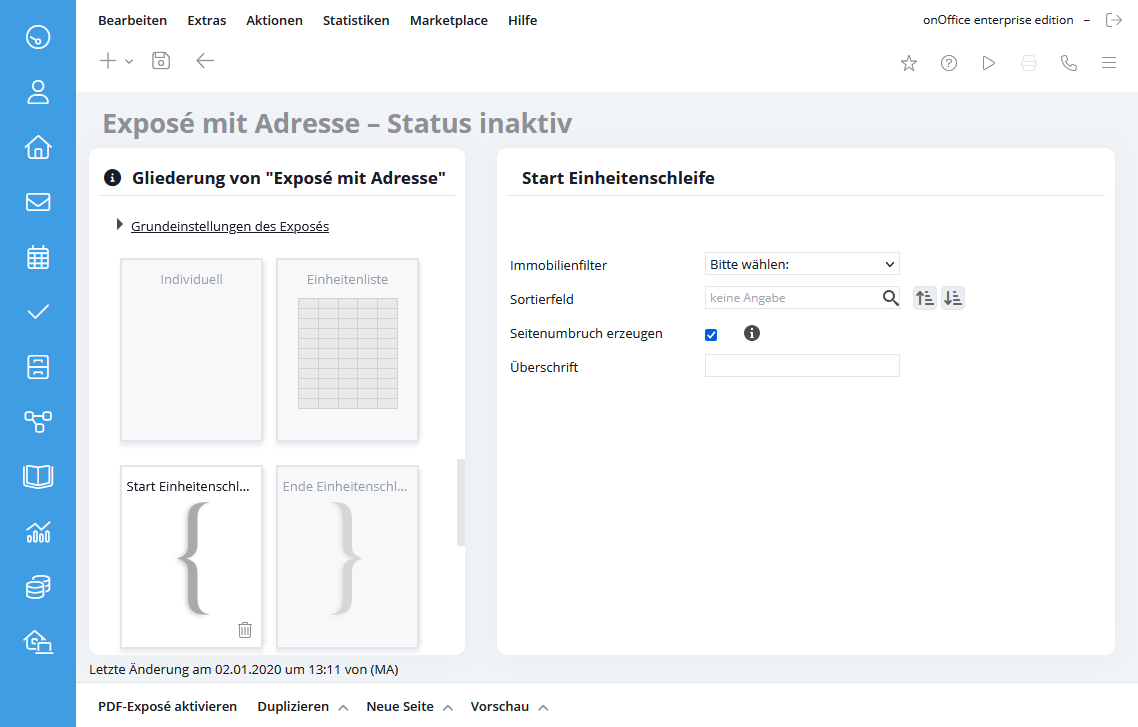
With a click on “Start Unit Loop” you have the possibility to set a property filter so that only certain units are considered. You can also define a sequence according to certain characteristics in the “Sort field” and using the sort buttons. With the checkbox “Create page break”, you can choose whether the respective content of a page (e.g. picture gallery) is displayed continuously or whether each unit gets its own page.
A title will be created in the headline, which shows the reference to the unit in each block. To make this happen for each unit, please use property macros.
You can create a list of the units of a master property. For example, you can use the property filter to display only active units or units with a certain marketing status. You can use the Sort field to specify a field after which sorting is to take place. The sort order is controlled by the two buttons next to the input field.
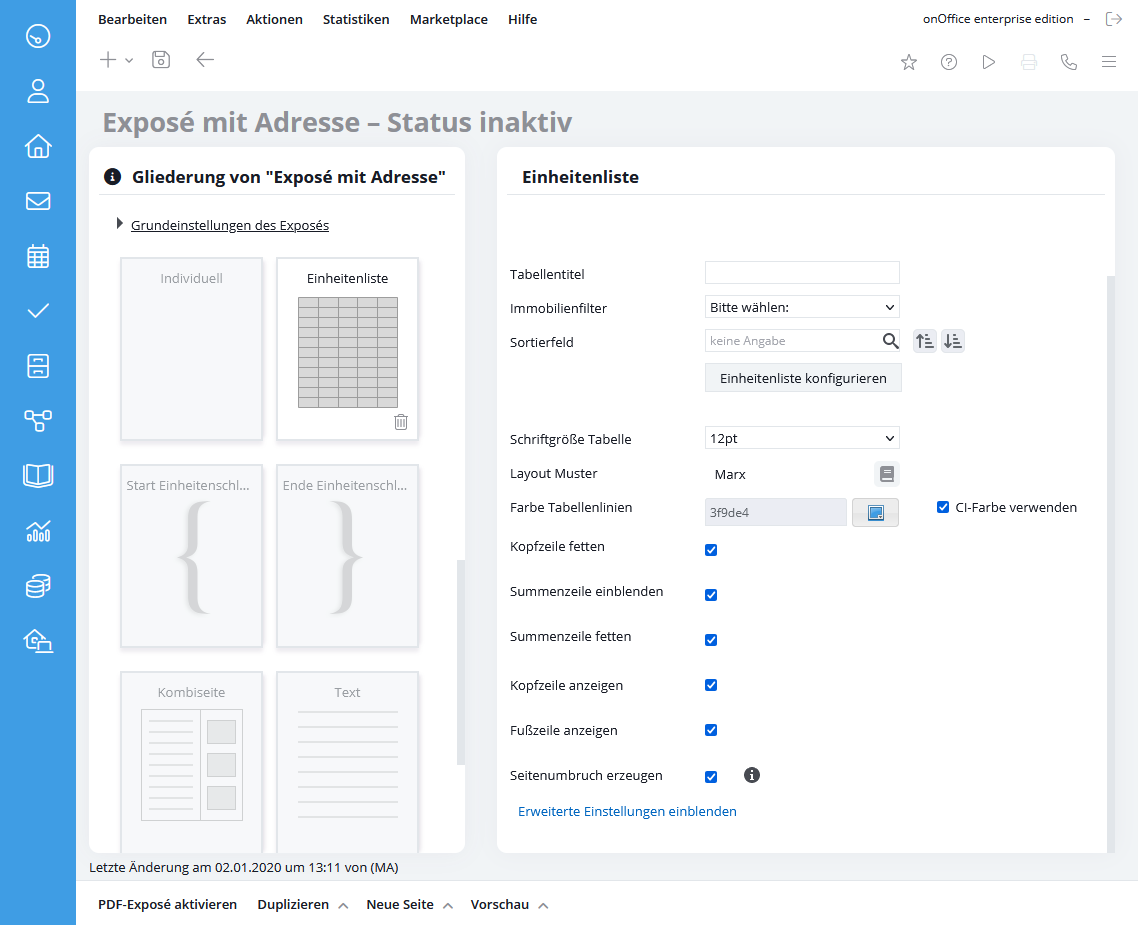
The layout of the table can be adapted to your wishes using layout patterns and other setting options.
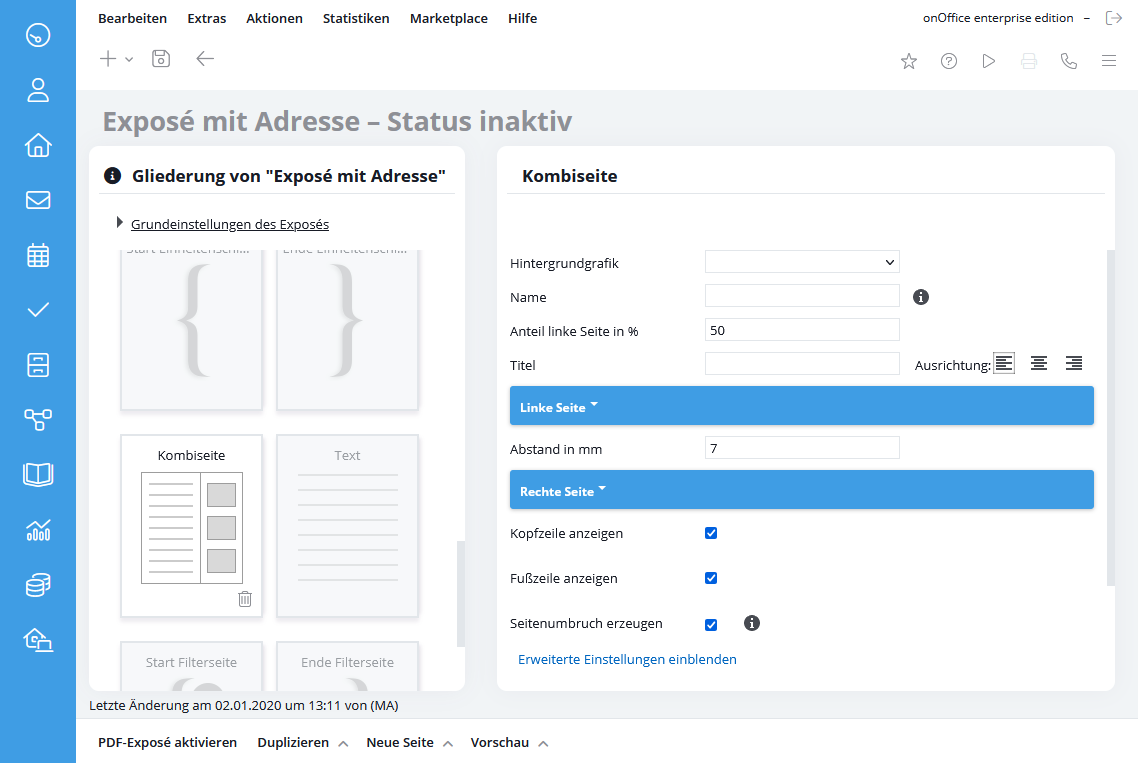
With the combi page you can output content divided into 2 columns. You can choose from the elements that you can also use as a page in the brochure. The page has the usual configurations and the elements each have the configurations that belong to you.

If you want to add an individual text to your PDF brochure, e.g. about your real estate agency, you can select the page ‘Text’. On this page you can enter a text, add links or even include pictures and tables. To do this, click on the image icon or table icon in the CKEditor.
Advanced settings
To further customize your brochure, you can set individual page margins for each page in the advanced settings. For example, the picture gallery of a property can be optimally displayed on one page to show even more details of the property in the brochure.
To display the advanced settings for header and footer, an individual footer must be created and used in the basic settings of the brochure, and the header must be active in the advanced settings of the basic settings of the brochure.
With these two settings, you can set each page type individually and provide it with a different header and/or footer.
For the pages of free texts you can also define how the bullets of a list or enumeration are displayed. It determines what is recognized as a bullet character – the default is a hyphen – and decides which character from the drop-down will replace it. A hyphen in the text is not recognized as a bullet character.
You can set the color of the bullet points and whether the CI color from the default settings should be used for them.