You are here: Home / Extras / Templates / Web brochure / Change interactive brochure

Templates
Change interactive brochure
Only users with the corresponding user right “Manage interactive brochure” can create or change interactive brochures.
When changing the interactive brochure there are 2 main areas – visible as left and right category in the interactive brochure editor.
On the left you can change the displayed blocks and on the right you can change the configuration / layout of the interactive brochure or the individual blocks. In addition, on the left side of the overview there is the link to the basic settings of the complete interactive brochure and the link to the quick start guide.
Generally speaking, a block without content will not be displayed.
The changes in an active interactive brochure only take effect when you publish them via Actions bar >> Publish changesafter finishing the work.
Important, please remember
- Save the changes
- Control the changes via the preview (Actions bar >> Preview)
- Activate the changes at the end for all, i.e. publish them(Actions bar >> Publish changes).
Inhaltsverzeichnis
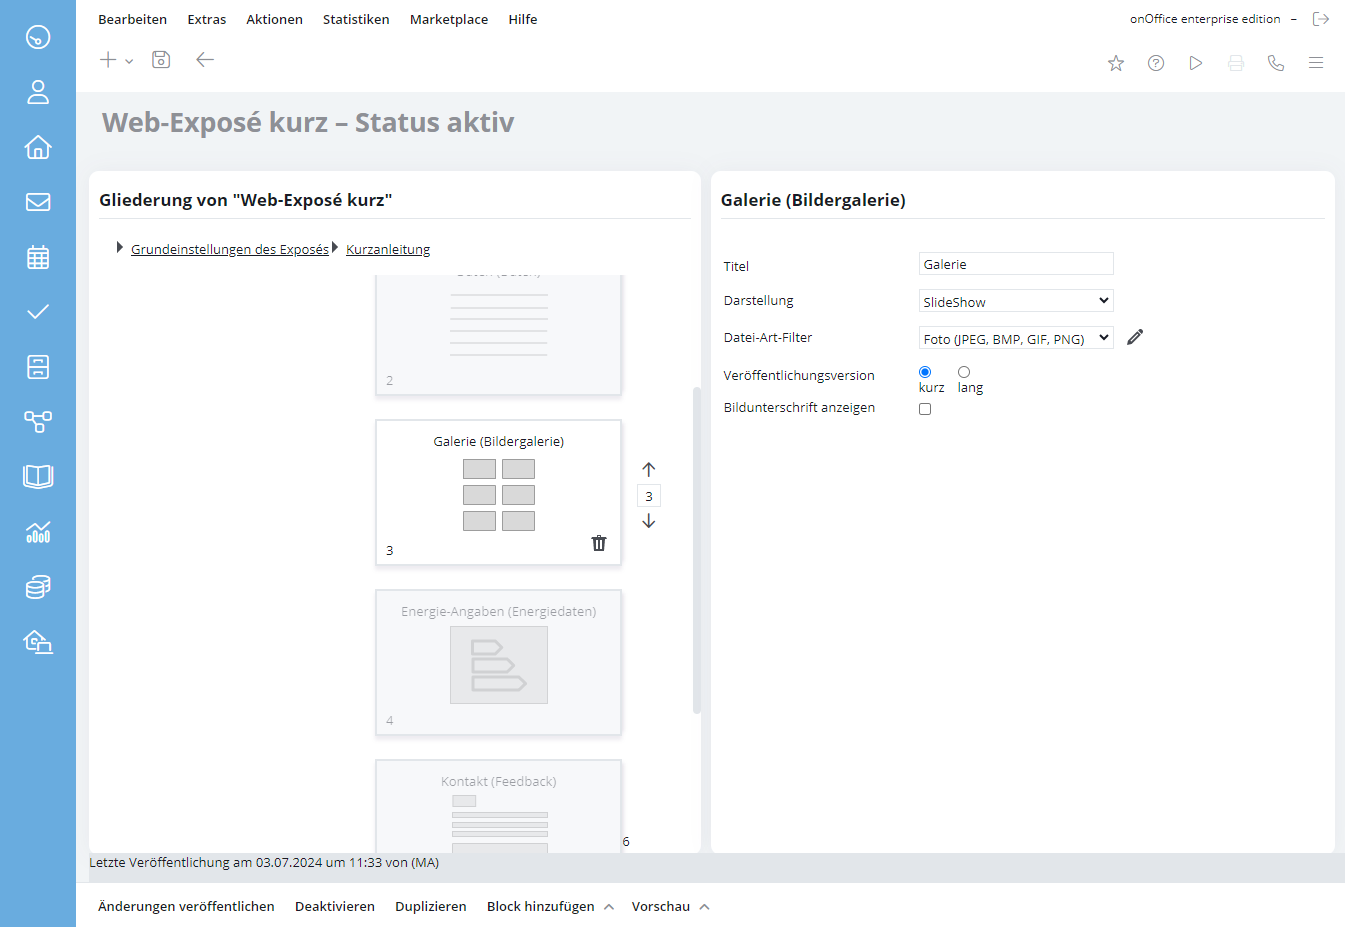
Change blocks, add block
You canadd new blocks via Actions bar >> Add block >> Add block name.
You can add all blocks multiple times, in the drop-down menu you can directly see which blocks are already present and how many times.
In the overview list on the left you can change the order of the blocks (select block, change order using arrows or enter the number).
The blocks are similar to the pages from PDFdesigner, the function and configuration is comparable. You can find a description of the most important blocks here. The new blocks are always added at the end.
You candelete blocks using the trash can icon
at the bottom right of the selected block.
Configuration
Basic settings – Basic configuration.
You configure the basic layout in the basic settings of the brochure.
Important here is the validity of the web brochure, by default this is set to 14 days. After that, the prospect will see a message “interactive brochure expired”.
The colors / font colors stored in the basic settings as well as the logo are also used by default and can be changed here if desired.
The logo and the contact data in the footer are obtained from the basic data of the group .
Customize the configuration of a block
When you select a block in the overview list, you will see its configuration options on the right.
The settings are more extensive for some blocks and are explained in more detail below.
You can view a wide range of media from a property and can configure that. The important step is to share the media files in the property on the Files tab under “Publish“. You already know the process from the release for the portals and the other brochures.
Please remember to publish matching the category “short” / “long” of the media blocks in the web brochure.
The following is a brief explanation of the configuration of selected blocks.
In the “Image gallery” block you can output a slideshow of the images or a single image.
The image gallery is intended for images or photos, the other file types such as floor plan, site plan, etc. have their own blocks.
With single image , only one image is output per added block, so you need to specify how many images should be displayed in the brochure at most and add the corresponding number of blocks and configure it as single image. By default, the sort is taken from the property and incremented by one per block.
If you only want to output a specific image from the property, please change “Image selection via” to “Document feature” and select the corresponding feature to the right – the document feature must have been assigned to the image in the property beforehand! You can freely assign document features via the administration .
The Documents (Files) block allows you to offer files for download within the interactive brochure.
At “Name” you can give the block a name. Via “File type filter” you can set which file types should be displayed.
ATTENTION: All shared files for download are displayed. The set publication version is observed.
You can display property data via the “Data” block. You can freely select the displayed fields.
Fields without data in the property will not be displayed.
If you add another data block, you can output other / additional data.
The “Unit list” block comes with the Multi Property Module add-on and, given a master property, outputs the list of associated units.
You can configure which information or columns appear in the list.
Attention: The block differs in behavior from the “Unit List” page in PDFdesigner. In the web brochure, the list of units is displayed only in a master property.
The “Filter” block allows you to display other blocks if certain conditions are met. It consists of two elements “Start Filter” and “End Filter”. Between them you can position any other blocks.
All blocks of the web brochure, which are located between the start and the end of the filter, are displayed only if the property is also included in the set property filter. Under “property filters” you can select from your property filters. Thus, different information can be output for different properties.
At “Name” you can assign a name to the filter block. This name is only displayed in the outline of the designer, not in the brochure.
It is also possible to use several filter blocks within one brochure.
The eye symbol at the top right of the “Start Filter” element can be used to expand and collapse the entire filter together with the blocks in the filter for better clarity.
In the block “Text” you can store free texts, here you can work with macros to the property and the “written to” contact record to store individual contacts and information.
With the multilingual module you can store the texts in several languages (language selector right below the text box), matching the language of the contact written to the text is then displayed in the interactive brochure.
These are additional blocks to display media. Please note the configuration of the individual blocks.
Here the publication about the categories “short/long” is still built in.
In the Contact person block, you can enter the contact person for the property. The following options are available to you:
- The contact person from the contact record with the real estate agent type of contact
- If no contact person with the contact type Real estate agent is stored in the property, the “Contact person” block is not displayed.
- the property manager from the basic data of the property
- the supervisor of the contact
- the calling user
Preview
You can open a “preview” of the interactive brochure via the Actions bar. Either the property / contact from last time is used or you enter new ones. For new ones you can select the property and contact.
The contact is needed if there are contact macros in a text block or if the language of the text blocks should match the language of the contact in the multilingual module .
Integrating iFrames into the interactive brochure
With an iFrame, you can integrate external interactive content – such as virtual 3D tours (Matterport), YouTube videos or analysis tools (AreaButler) – directly into your onOffice interactive brochure.
As the interactive brochure is a closed system, the integration requires a specific procedure so that the editor interprets the HTML code correctly.
Step-by-step instructions
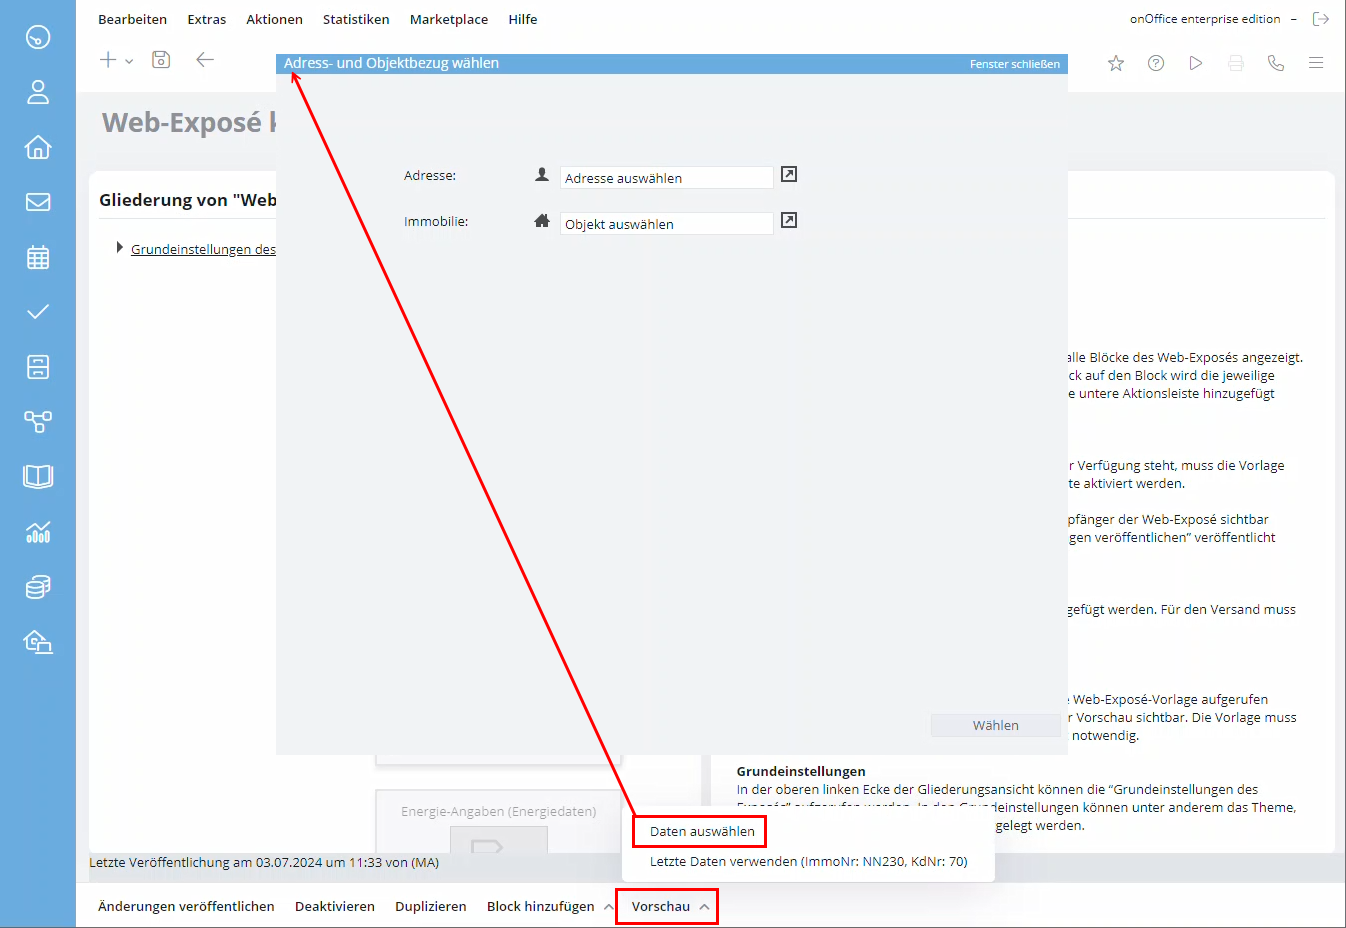
- Open interactive brochure Designer
Navigate in onOffice enterprise to Edit → Interactive brochure. Select the desired template or create a new one using the plus symbol . - Prepare text block
Add a new content block of type Text at the position where the external content is to appear. Assign a unique name for the block (e.g. “Virtual tour”). - Enter iFrame code
Enter the HTML code for the iFrame manually in the text field of the editor.- Static link: If you always want to display the same link:
<iframe src=”IHRE_URL_HIER” width=”100%” height=”600″></iframe> - Dynamic link (recommended): If the link is to be loaded from a field in the property (e.g. a special URL field), use the corresponding macro:
<iframe>_feldname</iframe>
- Static link: If you always want to display the same link:
- Activation by “Save and reopen”
In order to turn pure text into an interactive element, the brochure must be closed and reopened. Please click on Save and close the editor tab or the template completely.
Open the template again from the list, the editor now recognizes the HTML code and displays an iFrame graphic (placeholder) instead of the text.
- Fine adjustment of the properties
Click on the iFrame placeholder in the editor with the right mouse button and select iFrame properties. - Publish
Save the template and click on Publish changes. Check the result in the preview of a property for which the corresponding data field is filled.
Please note the following points to avoid errors in the presentation:
- Number of iFrames: It is recommended to use only one iFrame per interactive brochure page. When using two or more iFrames within brochure, there may be problems with the display.
- Copy & Paste: The code must be entered exactly as described above. Subsequent changes to the source code should be made carefully.
- Security protocol: Make sure that the embedded URL begins with https://. Many browsers block unsafe http content within secure pages (mixed content)

Entry
Dashboard
Contacts
Properties
Email
Calendar
Tasks
Acquisition Cockpit
Audit-proof mail archiving
Automatic brochure dispatch
Billing
Groups
Intranet
Marketing Box
Multi Property module
Multilingual Module
onOffice sync
Presentation PDFs
Process manager
Project Management
Property value analyses
Enquiry Manager
Showcase TV
Smart site 2.0
Statistic Tab
Statistics toolbox
Success Cockpit
Time Tracking
Address from clipboard
Text block
Customer communication
External Tools
Favorite links
Calculating with formulas
Mass update
onOffice-MLS
Portals
Property import
Quick Access
Settings
Templates
Step by step


