You are here: Home / Additional modules / onOffice sync / onOffice Sync via memotoo
€

onOffice sync
onOffice Sync via memotoo
When syncing via memotoo, in most cases the basic user setup and the rights are set accordingly.
The setup on the smart phone or in other sync destinations has to be done by yourself, you will find the corresponding instructions after the notes.
The type and scope of the synchronized data and how it is synchronized can be found in Setup in onOffice.
Notice:
Security alert: Please backup your data on your smart phone or in Microsoft Outlook before the first synchronization.
NOTE:
Usually you have been using your smart phone for a longer time when you synchronize with onOffice enterprise for the first time. To avoid duplicates in the smart phone and also in Microsoft Outlook, we recommend creating separate folders or calendars there. These should be used as targets for synchronization.
Please do not change the synchronization destination after that. Data may be missing or duplicates may occur during the next synchronization.
How you create new folders and calendars varies depending on your device and software. Please consult the respective help files for further explanations.
If you already have similar data in your client (e.g. Microsoft Outlook or Smart phone) as in onOffice enterprise, please delete the duplicate data in your client before the first synchronization. Otherwise, duplicates will be created.
Please do not give the smart phone to another onOffice enterprise edition user until you have informed the onOffice support (+49 241 44 686 122). Only then can we deactivate and/or correctly assign the user accounts if necessary.
The automatic synchronization in general, the direction in which the data should be synchronized and other settings are defined in the user settings .
Here we explain how to synchronize, what is synchronized and what happens when you delete data.
How to synchronize?
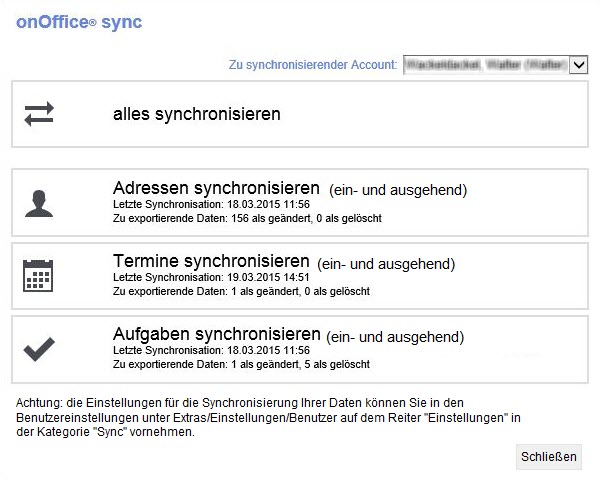
Via the menu Actions >> Sync you open the onOffice Sync Pop-up.
You decide whether you want to synchronize automatically or manually. You can set this in the user settings Sync under “automatic synchronization”.
Automatic synchronization is standard. You can disable the automatic synchronization or exclude a range from synchronization that should not be automatically synchronized in the user settings under “Synchronization direction”.
For a manual synchronization, click once on the corresponding unit and the sync process will start.
Alternatively, click on “synchronize all”, this will synchronize the activated units.
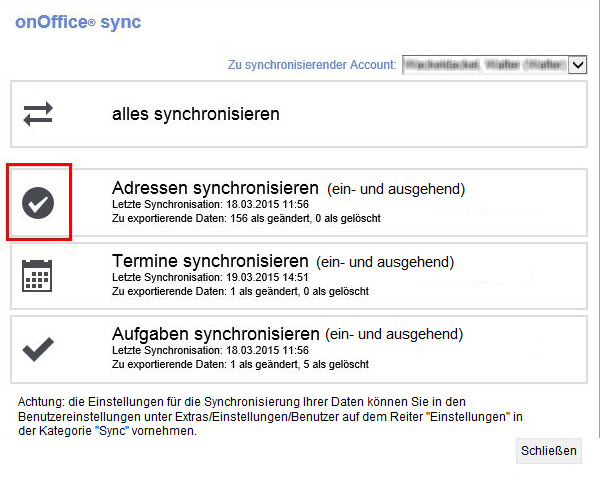
Synchronization has been completed successfully if a gray check mark appears in front of the respective unit. Click the “Close” button to close the popup.
Sync for other users
With the user right “Memotoo Sync for other users” you can also control onOffice Sync for other users. To do so, please select the user in the field “Account to be synchronized”.
The user right “Set onOffice sync in addresses for other users” allows you to perform a limited mass update for other users. In doing so, you activate or deactivate the sync hook in addresses for other users via mass update. More information about Sync for Others can be found here.
Borders
A maximum of 500 addresses are synchronized during each synchronization run. If you have more addresses, appointments or tasks, start the synchronization process several times.
Synchronization error
If a synchronization should contain errors, this is made clear by a corresponding note. In this case, send us the date and time of the synchronization time and tell us what you wanted to synchronize and where the error occurred.
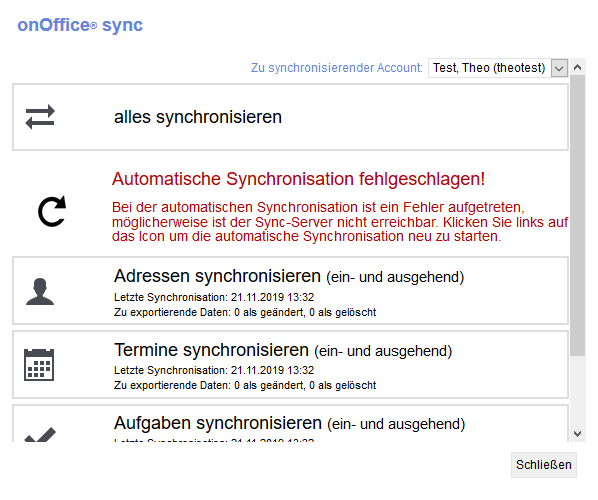
If the automatic synchronization has failed five times in a row, no further attempt is made to synchronize automatically. In this case you can restart the automatic synchronization via the sync popup.
What is synchronized?
From onOffice addresses, appointments and tasks can be synchronized.
Contacts
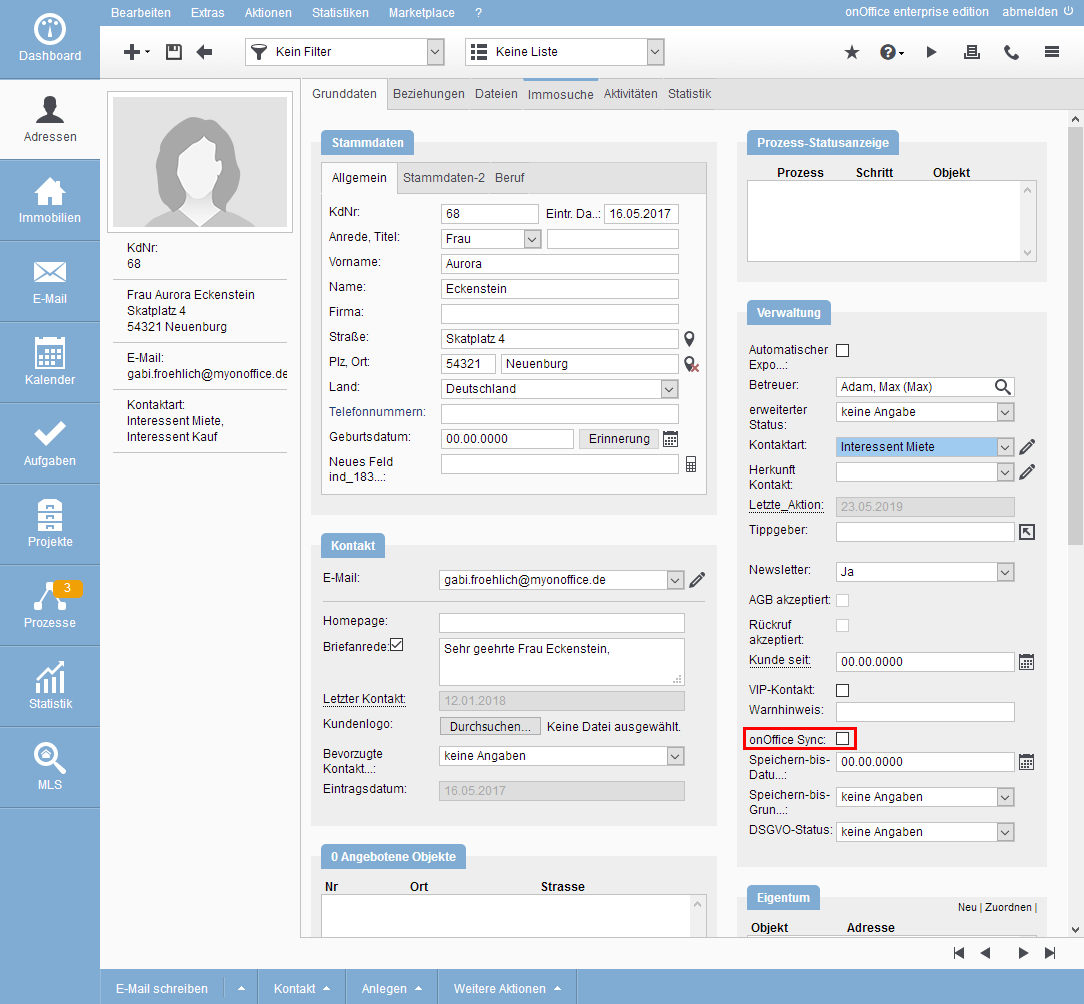
Only those addresses are synchronized from onOffice for which the check mark “onOffice Sync” is active. You will find the checkbox in the address details in the “Administration” category.
If you do not see this field & checkbox, you have to unlock it in the administration first.
With the mass update you can enable several addresses at once for synchronization. Please limit the list view in the Addresses module beforehand by means of a filter or a work list so that only the addresses that are to be changed are listed. You start the mass update with Actions >> Mass update >> Addresses.
We recommend always assigning the telephone, fax numbers and email addresses to a contact type (business / private).
Dates
So that an appointment can be synchronized, you must be entered in onOffice as a user in the corresponding appointment. If your user is assigned to a group, onOffice will also recognize this as your appointment. Individual and serial appointments are synchronized. Special cases such as “Every 3rd Monday of the month” cannot be synchronized and are therefore ignored.
Tasks
In order for a task to be synchronized, your name must be in the Responsibility field of the onOffice task.
Deleting data
For example, if you delete an address in Microsoft Outlook and synchronize it with onOffice, it is not deleted in onOffice, but the check mark “onOffice sync” is removed from the address record. An appointment is set to “Canceled” during synchronization in onOffice enterprise and is not deleted.
This is a security measure to avoid accidentally deleting data and links in onOffice.
Remove data
If you want to definitely delete data, you should always do this first in onOffice enterprise edition and then synchronize.
IMPORTANT: If you want to delete an address, the “Sync hook” must be set in onOffice enterprise edition so that the entry is also deleted in the address book.
If the additional module onOffice Sync has been activated for you, you will receive your personal access data by mail. Please use them for the setup on your Android phone as follows.
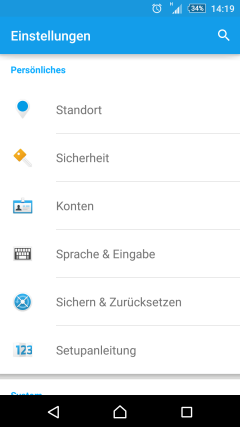
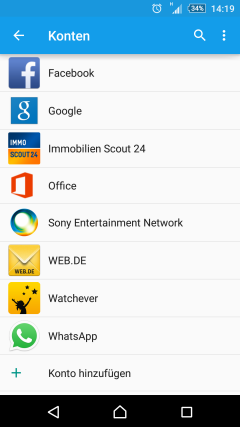
First, call up the “Settings” of your Android phone. There you select “Accounts”.
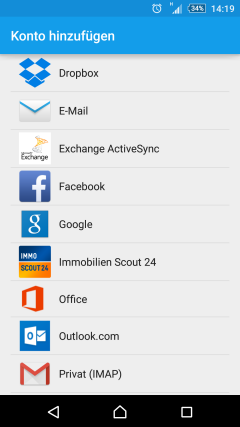
Once you have arrived there, click on “Add account”.
The account type to be selected now is “Exchange ActiveSync”.
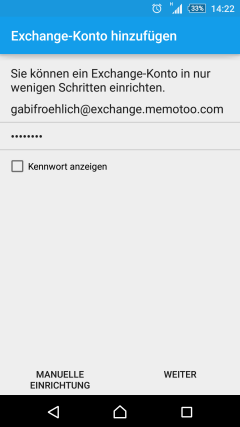
In the following you have to enter your Memotoo account data that you have received by mail.
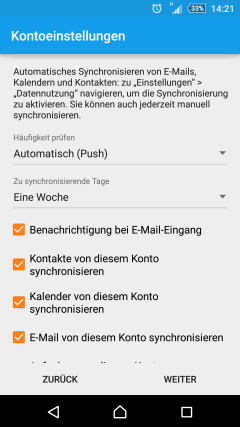
Then press “Next” and specify which data should be synchronized and how often this should be done. Select “Automatic(Push)” for Frequency and select Contacts, Calendar and Tasks as needed and according to your selections in Enterprise.
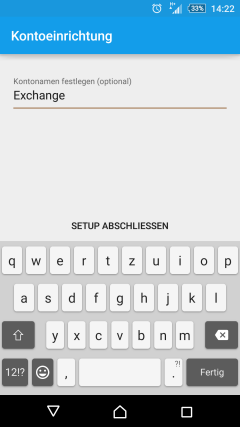
The setup is completed by assigning an account name for information purposes only (to select the calendar or address book).
The setup is now complete. From now on, addresses and appointments are assigned to the account when you create them and are thus synchronized. The account last selected is first proposed in the dialog box.
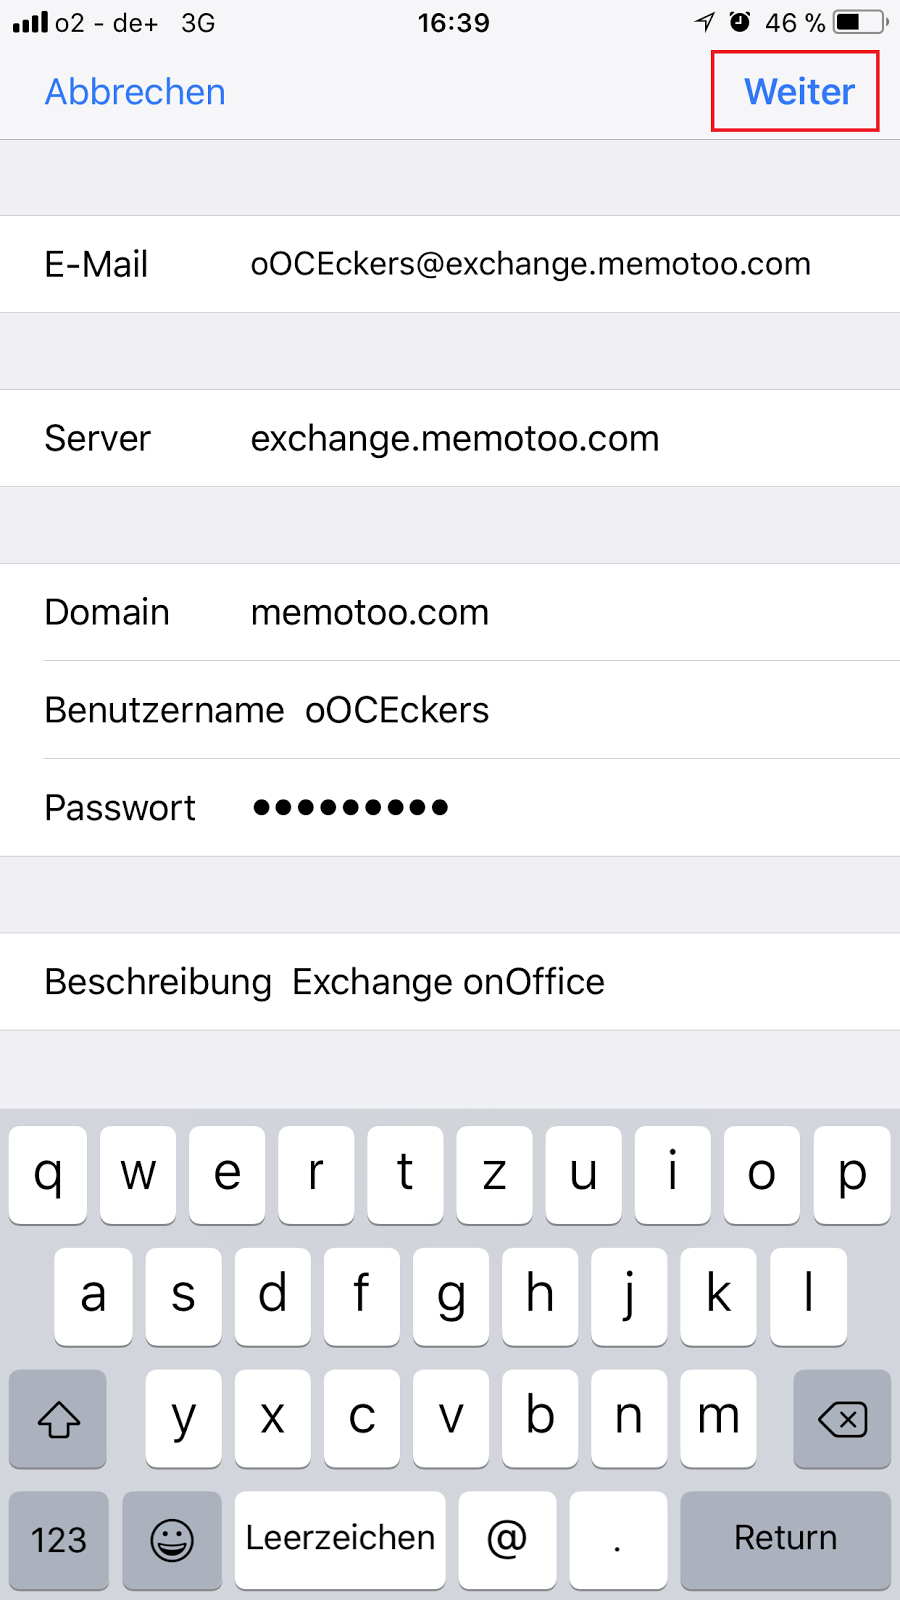
If the additional module onOffice Sync has been activated for you, you will receive your personal access data by mail. Please use them for the setup on your iPhone as follows:
Apple partly changes the settings of “Mail,Contacts, Calendar”, on iOS 13 and 14 you can find them under Mail, on older versions they are different items in the settings.
First, call up the “Settings” of your iPhone. There you select “Mail and then Accounts”.
Once you have arrived there, click on “Add account”.
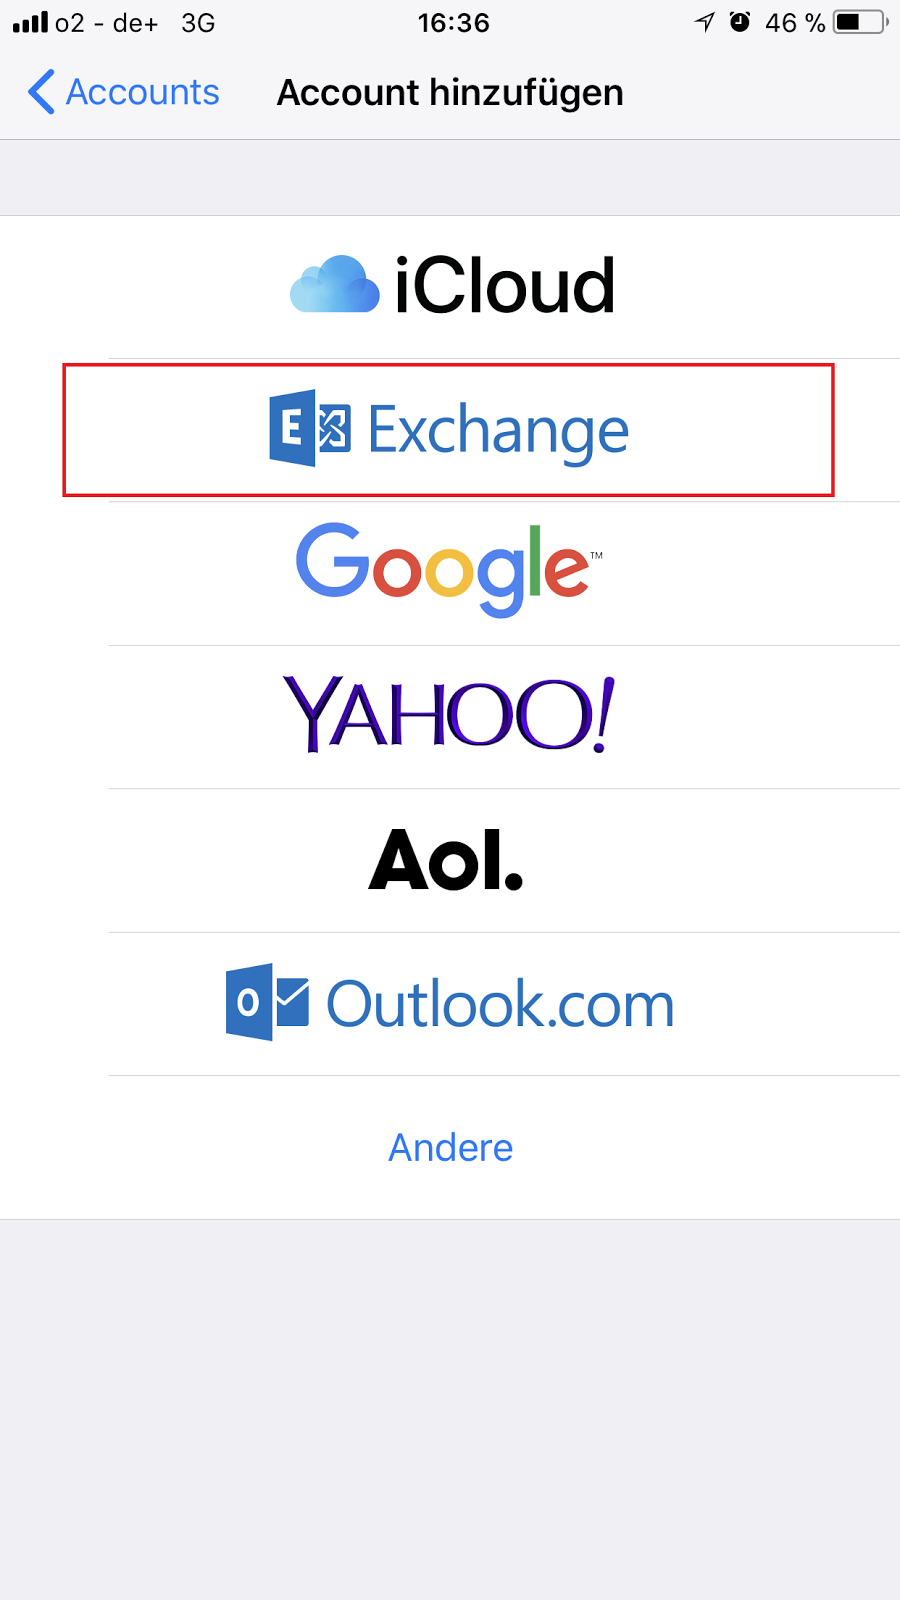
The account type to be selected now is “Exchange”.
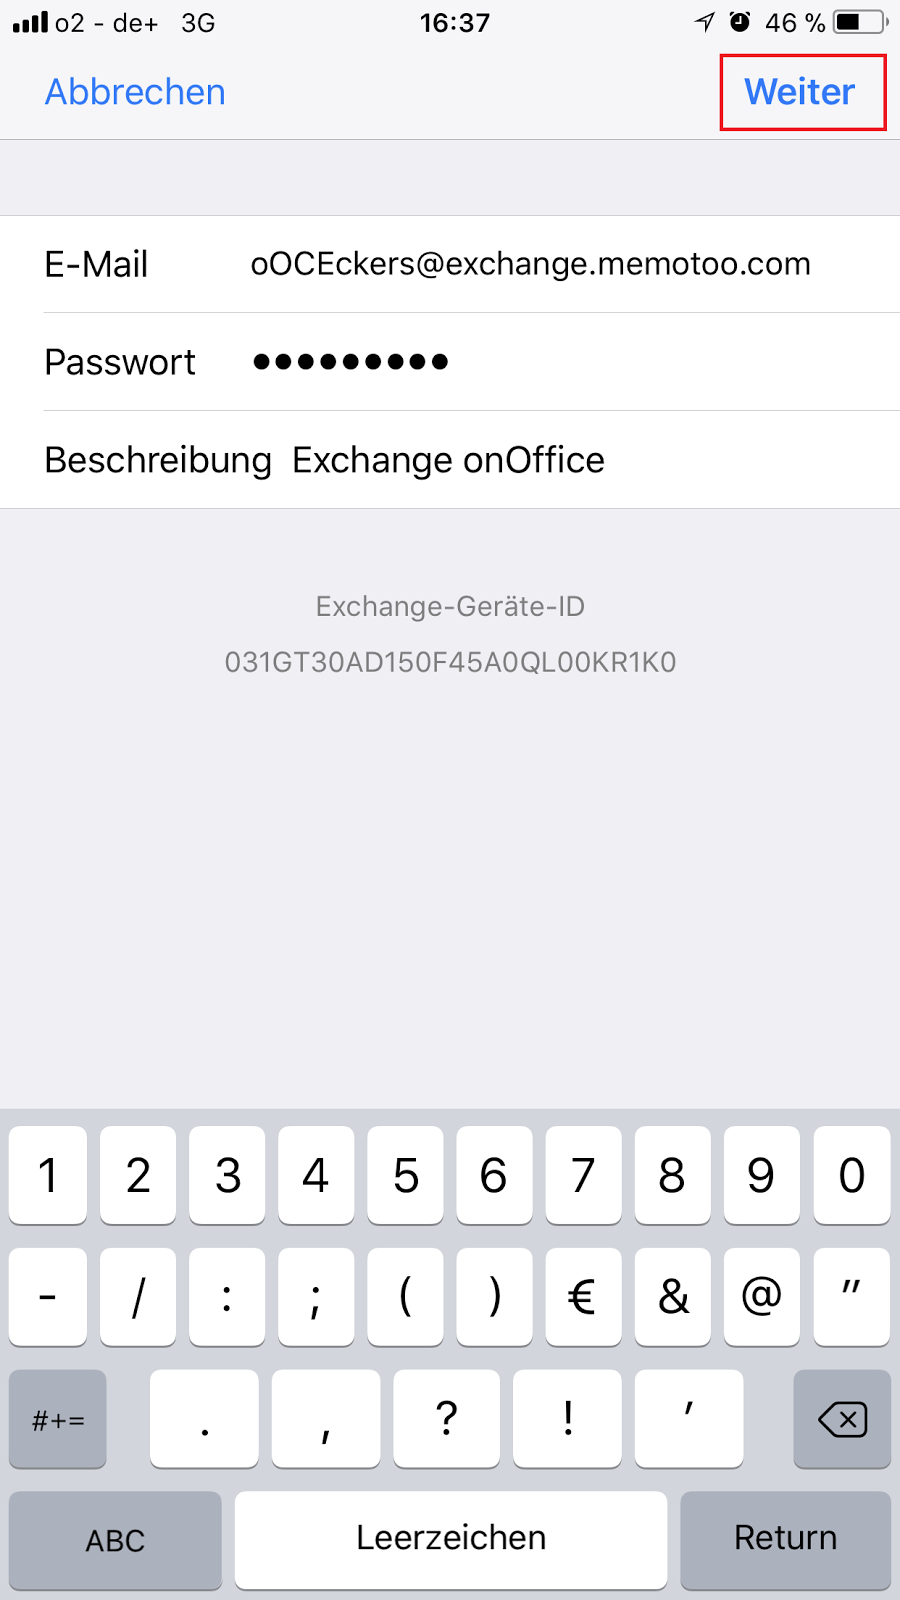
In the following you have to enter your Memotoo account data that you have received by mail.
Now select “Configure manually”
After another click on “Next” you will be prompted to enter the password.
Here you enter the further data.
Finally, please select the desired functions which are to be synchronized:
- Contacts
- Dates
- Tasks
Emails cannot be synchronized.
The setup is now complete.
When entering appointments, make sure you use the correct calendar/account (the Memotoo-Sync account) and address book.
It’s best to set the sync account as default for both the calendar and the address book. This happens again in the iPhone settings under Settings >> Calendar >> Default Calendar.
Cloud services like Google and iCloud
However, Memotoo must carry out the setup itself.
- Google: If desired, you can set the synchronization to synchronize only one single event / category and contact type / group.
- iCloud: Calendar synchronization between iCloud and Memotoo does not work reliably because some appointments are not transferred. It is therefore strongly discouraged from a setup with the iCloud
- Alternative: Synchronization on Mac, iPhone, iPad etc. via CalDAV / CardDAV or Exchange Active Sync
CalDAC and CardDAV
Hint:
Note that you must add the following attribute to your user name: “_device=NAME” NAME can be replaced by any combination of the numbers 0-9 and the letters A-Z. For the sake of clarity, it is advisable to refer the name to the device used. e.g.
- For an iPhone:“_device=iPhone”
- For MacOS:“_device=MacBook”
Thus a correct user name would be called for example “maxmustermann_device=iPhone”
Synchronization with Google Calendar and gmail
gmail contact synchronization:
- Click on them and confirm with “Allow Memotoo access to my gmail contacts”
- You will then be redirected to the Google page where you should log in and click “Allow”.
- Select the sync type and what you want to synchronize. The sort sequence may remain “empty”.
- Confirm with “Synchronize”.
Google Calendar: Calendar Synchronization
- Click on them and confirm with “Allow Memotoo to access your Google calendar”
- You will then be redirected to the Google page, where you should log in and click on “Allow”.
- Select the sync type, the target calendar, and the category you want to sync. You can also synchronize “All events of the Memotoo calendar”.
- It is recommended to activate the checkbox below.
- Now click on “Synchronize”
Outlook – Exchange ActiveSync
Hint:
No already existing appointments/calendars in Outlook will be synchronized! Only a new calendar is added, which you have to use for synchronization.
You can find instructions for synchronization with Outlook 2016 here.

 Introduction
 Dashboard
 Addresses
 Properties
 Email
Email Calender
 Tasks
Tasks Statistic-Kit
 Statistic-Tab
 Request manager
 Showcase TV
 Acquisition Cockpit
 Marketing box
 Success cockpit
 Process manager
 Groups
 onOffice sync
 Presentation PDFs
 Billing
 Smart site 2.0
 Project management
 Time recording
 Property value analyses
 Multi-Language-Module
 Automatic brochure distribution
 Multi-Object modul
 Intranet
 Audit-proof mail archiving
 Favorite links
 Boilerplates
 Property import
 onOffice-MLS
 Portals
 Address from clipboard
 Mass update
 Formulas and calculating
 Quick Access
 Templates
 Settings
 Customer communication
 External Tools
 Step by step