You are here: Home / Modules / Calender / Dates (Calendar) / Create new appointment / Appointment basic data

Calender
Appointment basic data
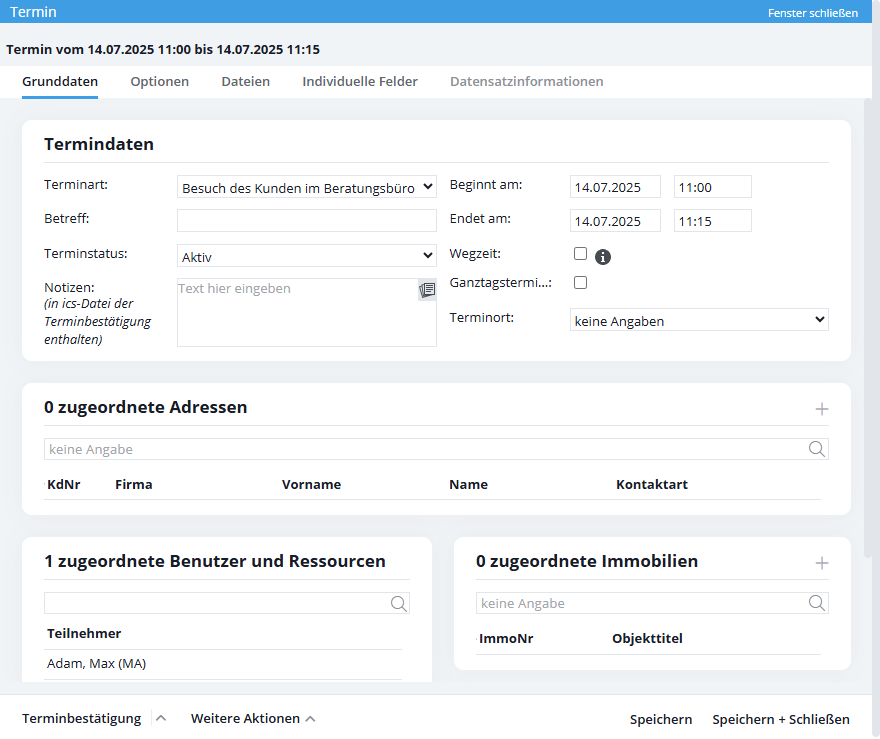
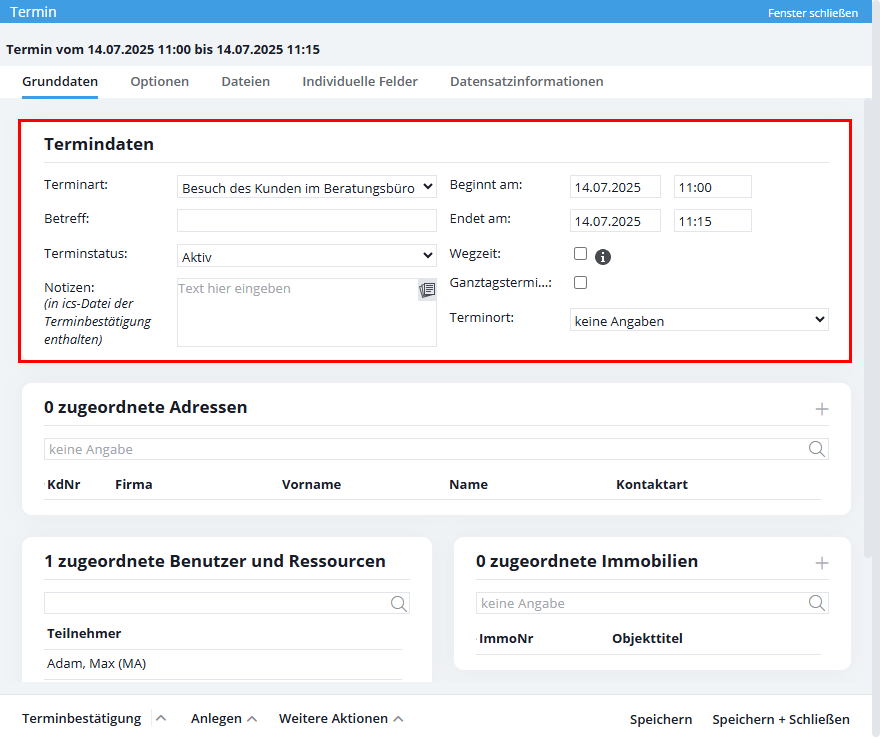
The basic data of the appointment are entered here. Appointment type and subject, start and end of the appointment, travel time, full-day appointment, appointment status, notes and appointment location as well as address(es), real estate reference and participants.
Inhaltsverzeichnis
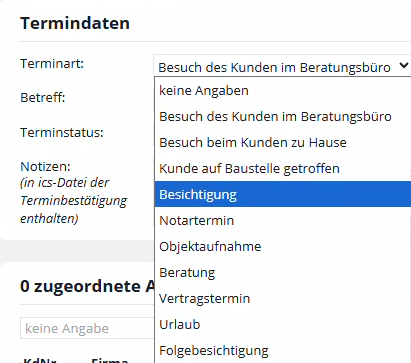
Appointment type
Select the type of appointment here, e.g. viewing or property recording. The appointment type is entered with in the agent’s log and the activities as kind of action. You can customize the list of appointment types in the Administration tab Types of action and expand.
Subject
Here you can enter the subject line of the appointment. This is displayed in the calendar view.
Appointment status
You can choose to set your appointment to active, done, canceled or participant available. If you select the “Participant available” status, all possible missed deadlines of the linked users will be ignored.
It often happens that colleagues enter info appointments in the calendar, e.g. “at the office”, “at the home office”, etc.. These appointments are then reported as overlap when one wants to enter appointments with the persons.
To get around this, there is the appointment status “Participant available”. (Appointment data >> Appointment status).
Once this status is selected, the appointment will still be visible to everyone, but will not be reported as an appointment overlap.
Project notes
Here you can create notes for the respective appointment. However, these are only displayed in the appointment detail preview.
Start/End, multi-day events
By setting “Begins on” and “Ends on” you can define the time duration of the appointment. This can also extend over several days.
Travel time
The Travel time setting allows you to set times before and after the appointment (identical or different), which you use to represent the travel time. The travel time is shown shaded in gray before and after the appointment. The travel time is included in the overlap.
The travel time is only displayed in the onOffice calendar. It will be inserted before and after the appointment and will be taken into account in case of overlap with other appointments. Synchronization to other calendars (e.g. Outlook) and reminders before the way time are not possible.
Full day appointment
As soon as you check the box, the appointment will be created as an all-day appointment. In the calendar overview, the appointment is displayed at the top of the 0-24 field. For full-day appointments lasting several days, the full days are also entered in the full-day line.
Appointment location
Here you can choose from various appointment locations:
- Contact from basic data / office group
- Contact of the property
- Contact of the linked contact
- Contact of the linked user
- Other
- Videoconference
- Video conference from user
The contacts that you have entered in the basic data or the office group are always stored with the “Appointment location” field.
As soon as you link an contact, a property or a user, the contact or contact data created there will be automatically added to the selection of appointment locations.
If you set the appointment location to “Other”, you can freely enter an appointment location that does not appear in the selection list in the line below the selection.
Under “Videoconference”, enter a meeting link for a videoconference as the appointment location. For “Video conference from user”, the user’s meeting link from the basic user settings is entered.
5 minutes before the start, an orange icon will appear in the top toolbar leading to the video conference.
Here you can specify the participants of the appointment from the available users and groups by a simple click. If you want to delete a user from the appointment, click on the small red X on the right side next to the user. In addition to the users, you can also specify the resources, e.g. conference rooms or the company vehicles, so that they are blocked for the period of the appointment.
To add your own resources, navigate to the administration via the following path(Tools >> Settings >> Administration >> Singleselect tab >> Module: Appointment management >> Key field: Resources). Enter the required resources. These are then immediately available in appointments.
Resources that are already occupied are displayed in gray in the user/resource search, but can still be selected.
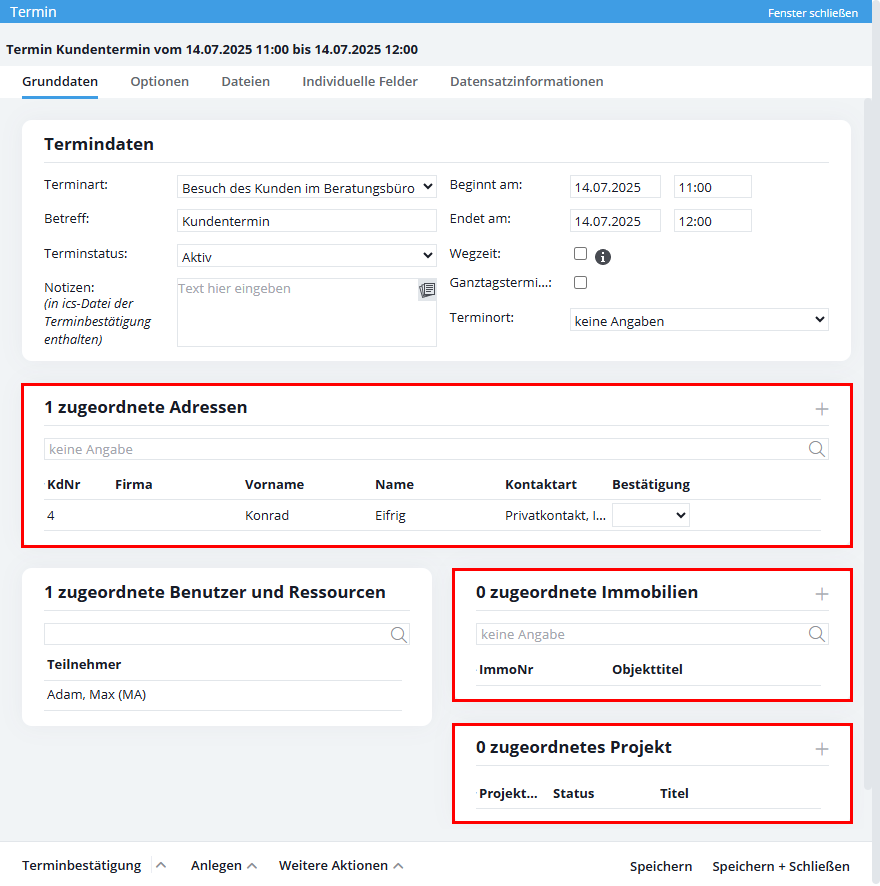
You can assign contacts, a property or a project to an appointment. If you assign a property to your appointment, it will also be included in the agent’s log . If you assign an contact to your appointment, the appointment will also appear under the Activitiestab.
To do this, please click on the plus symbol in the areas “assigned contacts”, “assigned properties” or “assigned project”. In the assignment dialog for contacts you can also create a new contact, please switch to the tab “New” in the assignment dialog.
If appointment follow-up is active, you can additionally manage automatic appointment follow-up for each assigned contact.
Appointment overlaps
If an appointment for the specified period has already been entered for at least one user or resource, a note indicating the overlap appears in the upper area. If you click the info icon in the hint field, the appointment or appointments that overlap will be displayed. Appointments to which the user does not have read permission are also displayed. For these, all resources and participants are displayed, the subject is not visible.
Date slot finder
You have an overlap in the appointment and want to find an appointment for all users, groups and resources without overlap? Use the appointment slot finder, via this you have the possibility to find appointment slots without overlaps.
Settings
For the Appointment Slot Finder, you can define when your working time starts and ends under Tools >> Settings >> Basic Settings >> General . This is then entered in the appointment slot finder.
Furthermore, you can define in the Appointment Slot Finder when a lunch break takes place and whether it is relevant for the appointment window.
Function
If there are overlaps in an appointment, you can open it in the Actions bar via Next Actions >> Appointment Slot Finder . The function is deactivated if there are no overlaps or the appointment is not yet saved. In the lightbox you can then easily find suitable time slots by clicking on the ‘Find appointment’ button. Select the appropriate slot by clicking the button behind it and then click ‘Create appointment’.
Please note that in the nine appointment for the time being the complete time slot is entered. When you set the exact start time of the appointment, the end time automatically adjusts itself so that the duration of the appointment is again the same as the original appointment.

 Entry
Entry Dashboard
 Addresses
 Properties
 Email
Email Calender
 Tasks
Tasks Acquisition Cockpit
 Audit-proof mail archiving
 Automatic brochure distribution
 Billing
 Groups
 Intranet
 Marketing box
 Multi Property module
 Multilingual Module
 onOffice sync
 Presentation PDFs
 Process manager
 Project management
 Property value analyses
 Request manager
 Showcase TV
 Smart site 2.0
 Statistic Tab
 Statistics toolbox
 Success cockpit
 Time recording
 Address from clipboard
 Boilerplates
 Customer communication
 External Tools
 Favorite links
 Formulas and calculating
 Mass update
 onOffice-MLS
 Portals
 Property import
 Quick Access
 Settings
 Templates
 Step by step