 Entry
Entry Dashboard
 Contacts
 Properties
 Email
Email Calendar
 Tasks
Tasks Acquisition Cockpit
 Audit-proof mail archiving
 Automatic brochure dispatch
 Billing
 Groups
 Intranet
 Marketing Box
 Multi Property module
 Multilingual Module
 onOffice sync
 Presentation PDFs
 Process manager
 Project Management
 Property value analyses
 Enquiry Manager
 Showcase TV
 Smart site 2.0
 Statistic Tab
 Statistics toolbox
 Success Cockpit
 Time Tracking
 Address from clipboard
 Text block
 Customer communication
 External Tools
 Favorite links
 Calculating with formulas
 Mass update
 onOffice-MLS
 Portals
 Property import
 Quick Access
 Settings
 Templates
 Step by step
You are here: Home / Modules / Properties / Detailed property view / Agent’s log / List view agent’s log entries

Properties
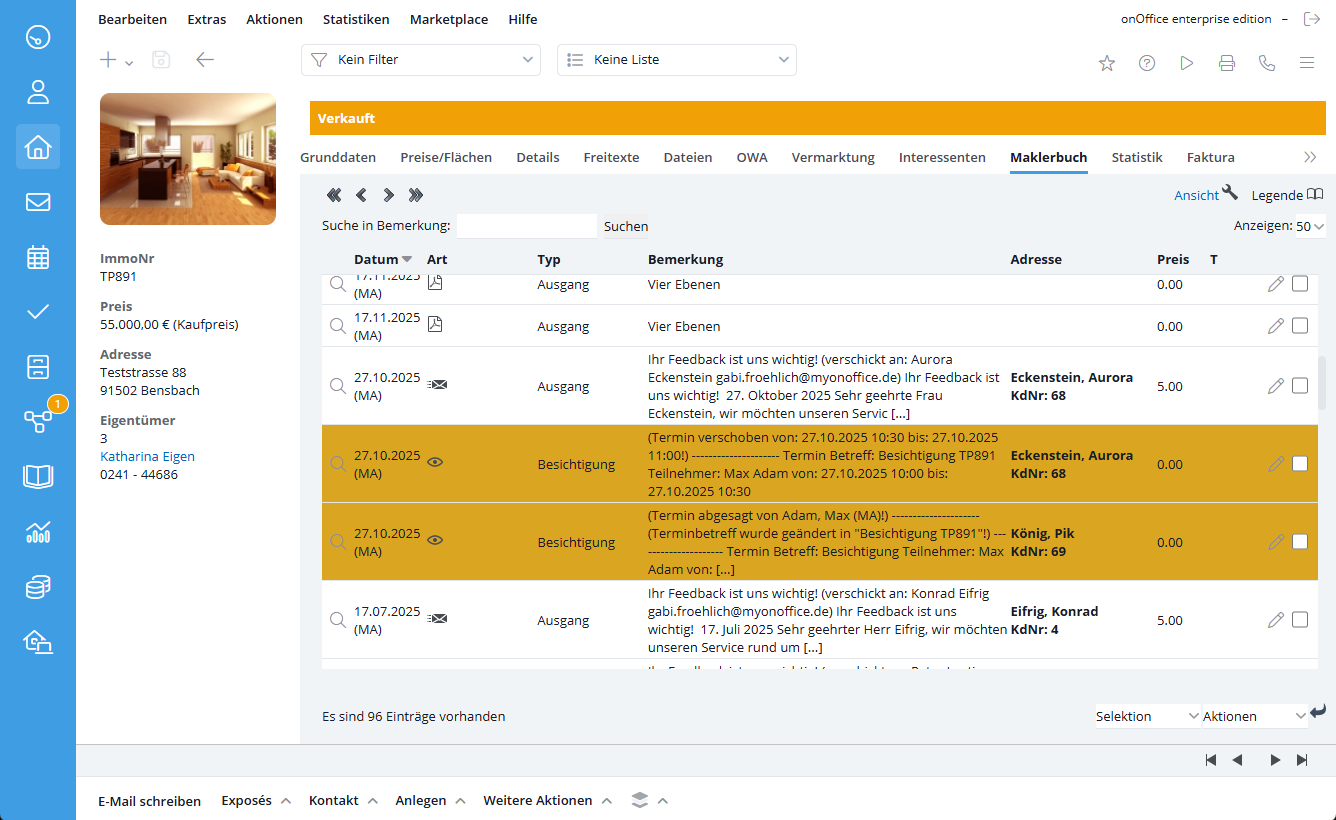
List view agent’s log entries
Customize the view
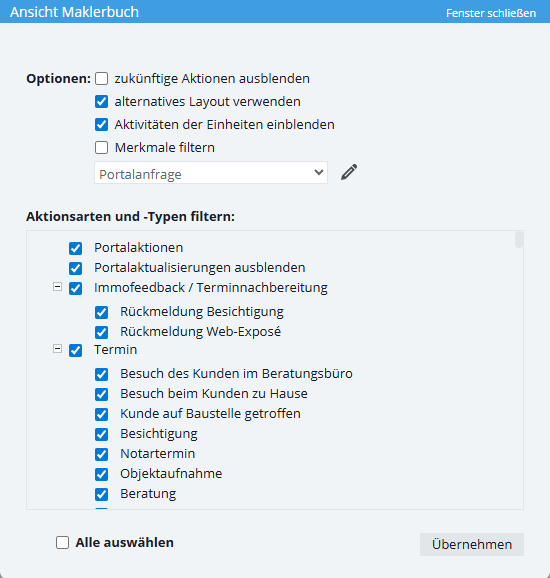
The wrench ![]() in the upper left corner opens the view settings window. For example, you can hide future actions (appointments) or choose an alternative layout of the agent’s log.
in the upper left corner opens the view settings window. For example, you can hide future actions (appointments) or choose an alternative layout of the agent’s log.
Filtering the types of action and kinds of action
In the lower part of the pop-up window you can select which types of action / kinds of action should be displayed in the agent’s log. Check the boxes next to the action types / kinds of action that are to be displayed.

Call legend
Using the legend function ![]() , a summary of the entries can be called up just as in the activities of the prospect. Here, an external pop-up window lists the activity entries divided into categories. It is possible to assign costs for the individual entries. These costs can be defined for certain kinds of action in the administration , or they can be recorded directly for the individual entries. For example, for email dispatch with and without brochure.
, a summary of the entries can be called up just as in the activities of the prospect. Here, an external pop-up window lists the activity entries divided into categories. It is possible to assign costs for the individual entries. These costs can be defined for certain kinds of action in the administration , or they can be recorded directly for the individual entries. For example, for email dispatch with and without brochure.