You are here: Home / Extras / Settings / User / User details / Email

Settings
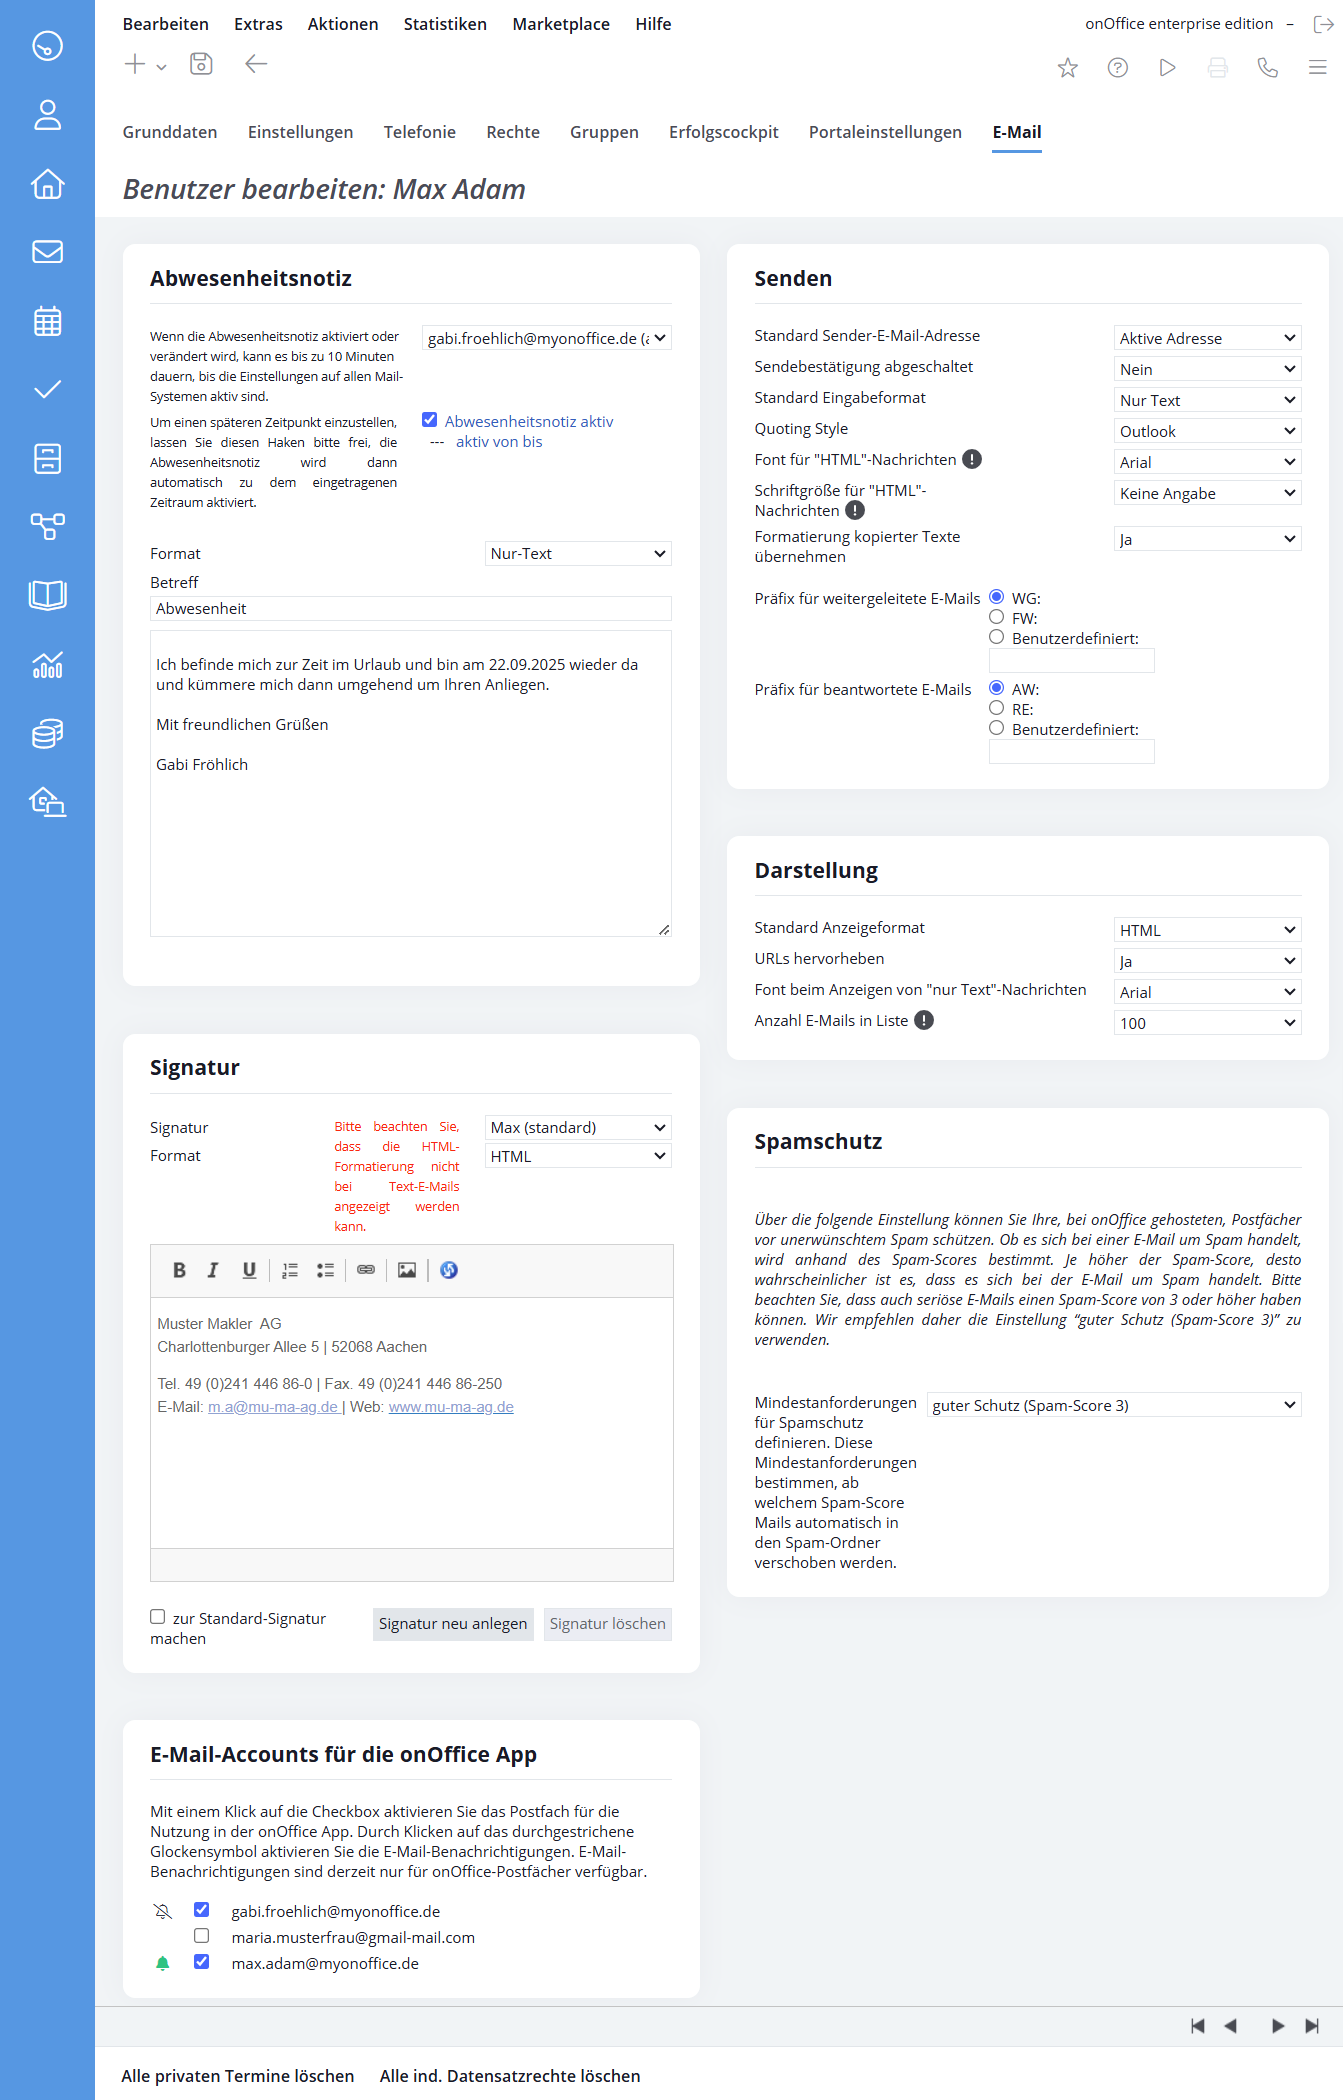
You can define basic settings for emails such as the assignment of e-emailboxes or forwarding in the basic settings. For more information about emails and the setup, click here.
In the user settings you define the defaults for your email dispatch. You can get there via Tools >> Settings >> Users >> Email tab .
Absence note
Here you store absence notes for the individual mailboxes located at onOffice and mailboxes integrated via Microsoft Graph (for other, external mailboxes please use the mailbox management at the corresponding provider). Select the corresponding e-emailbox via the drop-down menu and activate the out-of-office notification. In the lower area, enter the appropriate text for the selected e-emailbox.
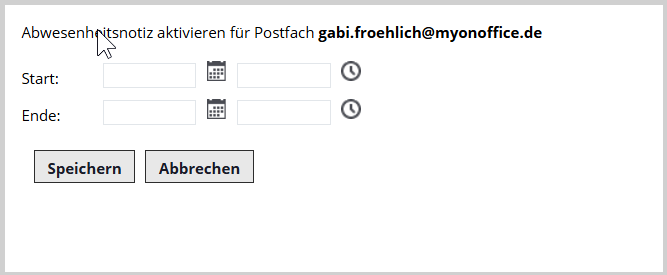
You can define a fixed time period via the “active from to” setting.
Signature
In the Signature area you can create as many signatures as you want. You can find detailed instructions in the tutorials.
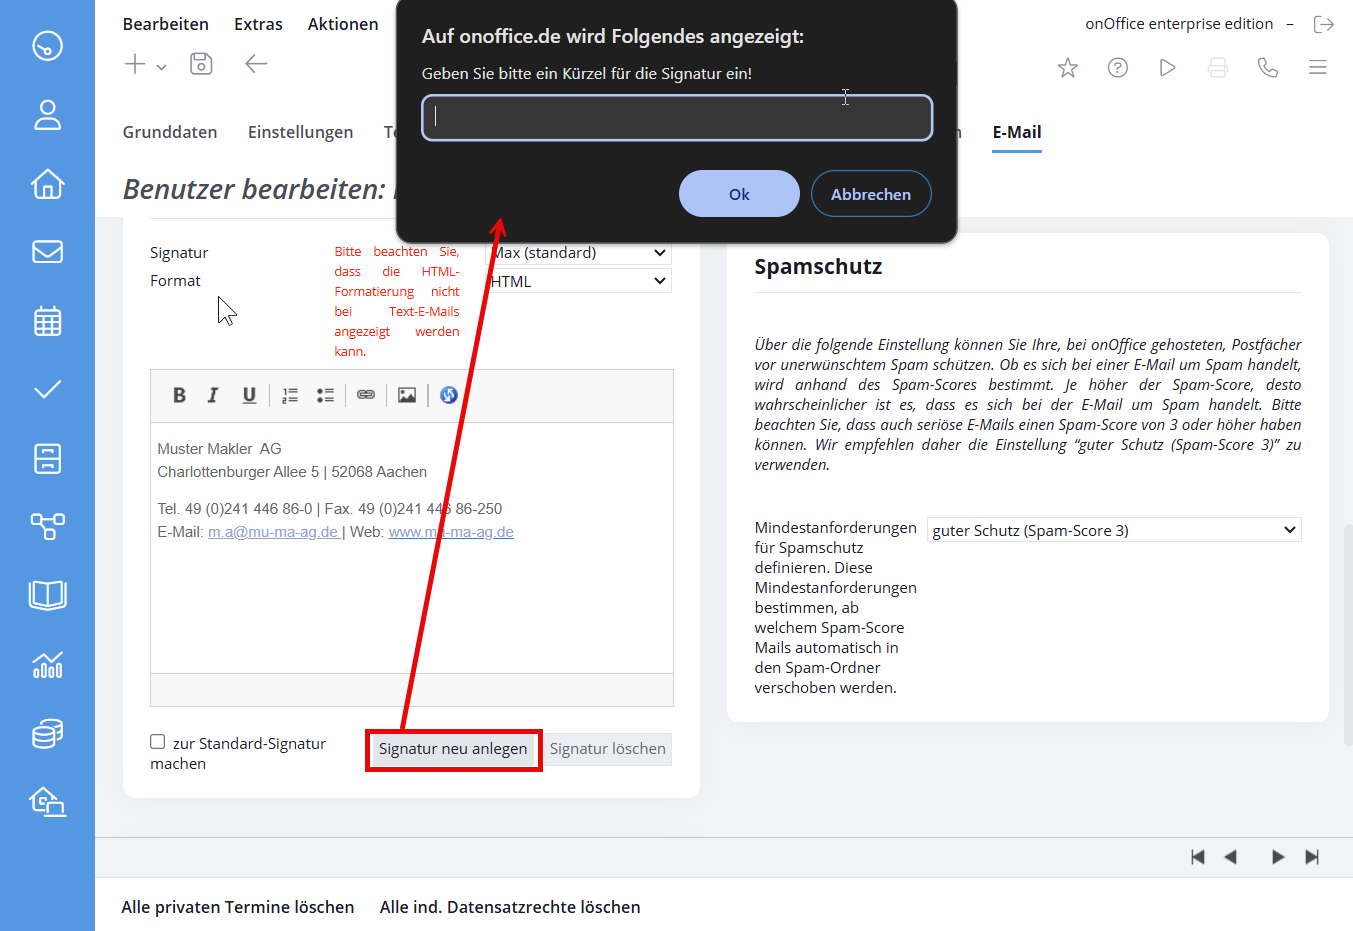
To create a signature, click the “Create new signature” button. You will be prompted to enter an abbreviation for your signature. Please enter the abbreviation and confirm with “OK”. Note that you have the option to include a signature using appropriate macros.
It is possible to change the format of the signature to HTML. Only in this mode it is possible to format the font or insert images and logos. Use the HTML editor to add further formatting or upload logos and images.
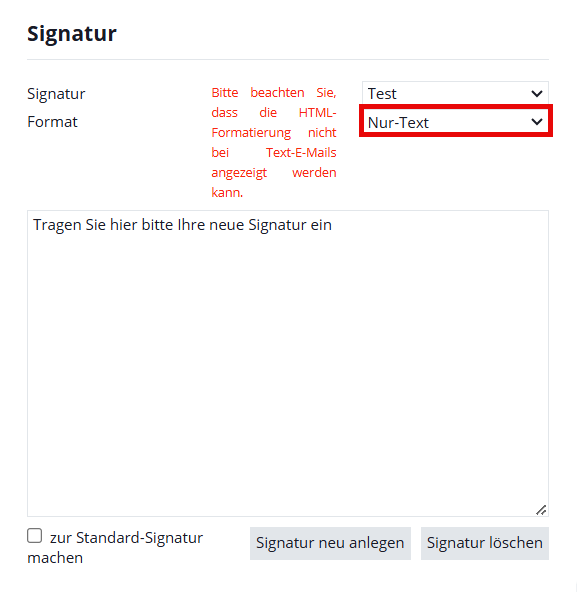
To change a signature, select the signature using the abbreviation. Now you can change the signature in the text field. Please remember to save afterwards.
Switch from text to HTML
If you want to change the default signature, first select the new default signature and save it. After that you need to set the signature from text to HTML or the other way around and make a textual change in the signature. Save the signature and it should be in the appropriate format. The textual change can now be reversed if necessary.
To delete a signature, select the signature using the shortcut, clear the text field, and then save the change.
email accounts for the onOffice app
Specify which email accounts you would like to use in the app on the move and for which mailboxes you would like to be notified of new emails.
Notification of email receipt
Please note that email notifications are only possible for onOffice mailboxes.
For onOffice mailboxesthat are activated for the app, you can activate the sending of push notifications to the onOffice app here.

A green bell stands for activated notification, a crossed-out gray bell is displayed when notification is deactivated.
Send
If multiple identities (emailboxes) are available to the user, you can specify here the e-emailbox with which the user sends by default. The mailbox set here is used as the sender for system mails, such as automatically sent appointment reminders.
This option controls whether the message “An email has been sent” appears when a email is sent.
- No: Message comes
- Yes: Message does not come
Here you can choose whether you want to compose your emails basically in HTML or text format.
Display the repeated text of the original email when replying.
Write your emails in different fonts. You can choose from Arial, Comic Sans MS, Courier News, Georgia, Lucida Sans Unicode, Tahoma, Times New Roman, Trebuchet MS, Verdana.
Select the respective default font size for your HTML emails here.
Here you can specify whether texts that you copy, e.g. from Word, into an email are pasted with or without formatting. If texts with formatting (=yes) are inserted into an email, the font, font size, etc. are taken from the original document. If texts are inserted into an email without formatting (=no) , the format defaults from your email settings are applied.
Select the abbreviation here before the text in your subject line when forwarding your email. WG for “forwarded”, FW for “forwarding” or user defined.
Select the abbreviation here before the text in your subject line when replying to an email. AW for “reply”, RE for “return” or user defined.
Representation
HTML or text as a representation of all emails.
In the email text, the Internet contacts are underlined.
Write your emails in Arial or Courier font.
Define how many emails should be displayed in the list view.
Spam protection
Attention, in case of spam level changes, please check your spam folder regularly afterwards for incorrectly sorted emails.
Abstracts:
Here they set the threshold above which an email is categorized as spam. A common value for spam is 3. You should set a lower threshold only if the setting doesn’t seem rigorous enough, otherwise just click on the recommended value.
More detailed:
The spam level defines at which spam score emails are considered spam. Each email receives a spam rating, the spam score- If the spam score is above the selected level, the system marks the email as spam. Only emails with a spam score below the level will reach the inbox.
You can also find a detailed explanation in the spam settings video.
Spam level 1 is therefore the strictest spam setting, i.e. all emails with a spam score of 1 or higher are recognized as spam. With this, most emails are marked as spam – often even emails that are not spam, so after a change, the spam folder must also be checked regularly…
Emails detected as spam are not deleted, but moved to the spam folder.
Emails in the spam folder of onOffice mailboxes are automatically deleted after 7 days.
For mailboxes from other providers, their conditions apply, please contact your provider if you have any questions.

 Introduction
 Dashboard
 Addresses
 Properties
 Email
Email Calender
 Tasks
Tasks Acquisition Cockpit
 Audit-proof mail archiving
 Automatic brochure distribution
 Billing
 Groups
 Intranet
 Marketing box
 Multi Property module
 Multilingual Module
 onOffice sync
 Presentation PDFs
 Process manager
 Project management
 Property value analyses
 Request manager
 Showcase TV
 Smart site 2.0
 Statistic Tab
 Statistics toolbox
 Success cockpit
 Time recording
 Address from clipboard
 Boilerplates
 Customer communication
 External Tools
 Favorite links
 Formulas and calculating
 Mass update
 onOffice-MLS
 Portals
 Property import
 Quick Access
 Settings
 Templates
 Step by step