 Entry
Entry Dashboard
 Contacts
 Properties
 Email
Email Calendar
 Tasks
Tasks Acquisition Cockpit
 Audit-proof mail archiving
 Automatic brochure dispatch
 Billing
 Groups
 Intranet
 Marketing Box
 Multi Property module
 Multilingual Module
 onOffice sync
 Presentation PDFs
 Process manager
 Project Management
 Property value analyses
 Enquiry Manager
 Showcase TV
 Smart site 2.0
 Statistic Tab
 Statistics toolbox
 Success Cockpit
 Time Tracking
 Address from clipboard
 Text block
 Customer communication
 External Tools
 Favorite links
 Calculating with formulas
 Mass update
 onOffice-MLS
 Portals
 Property import
 Quick Access
 Settings
 Templates
 Step by step
You are here: Home / Additional modules / Marketplace / Provider overview / AI Phone Agent - AI Phone Agent
Marketplace
AI Phone Agent – AI Phone Agent
Quick start: Your AI phone agent in 7 steps
Welcome to AI Phone agent! This guide will take you through the 7 essential steps to get your smart assistant up and running in record time. Take 10 minutes of your time – it’s worth it!
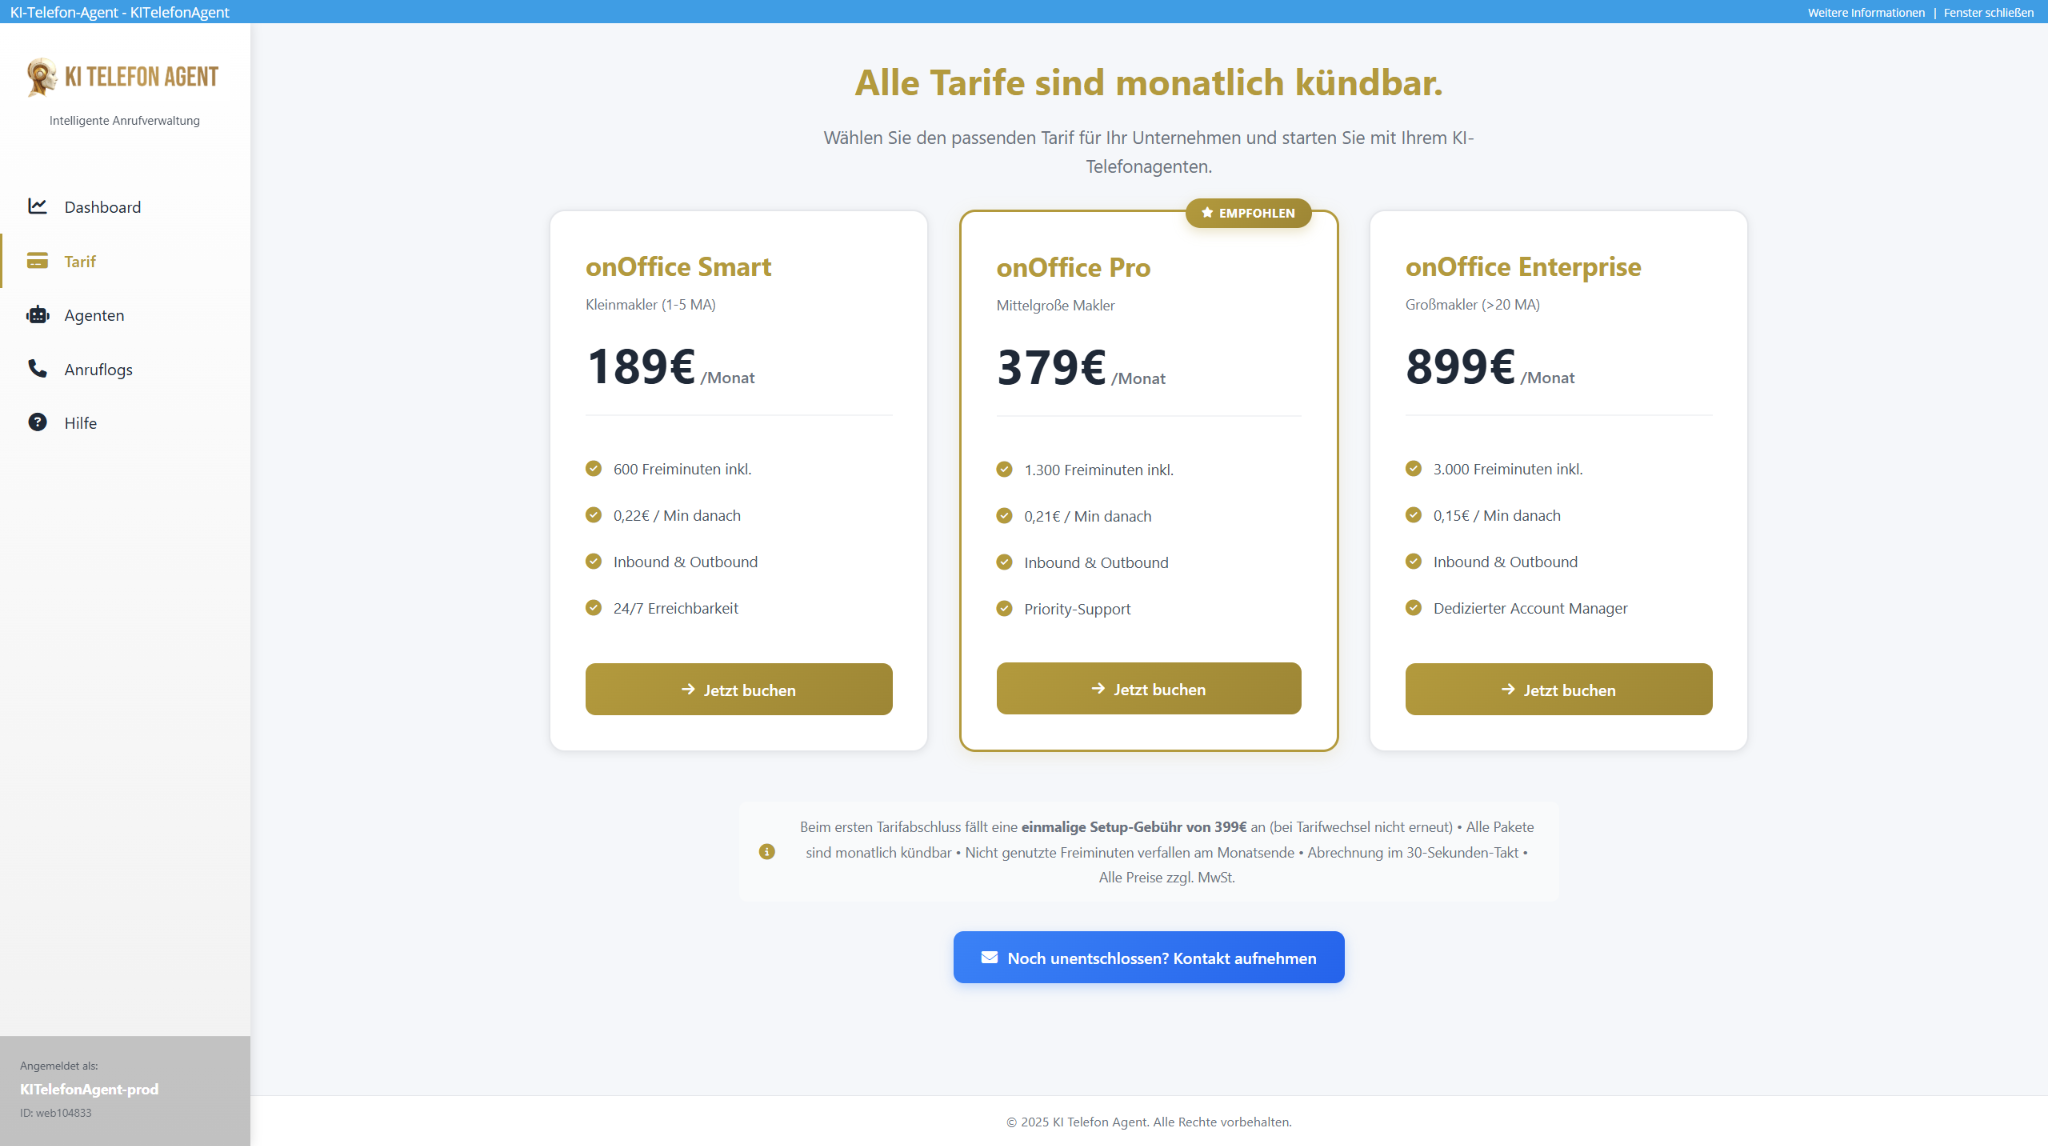
Step 1 Start service and select tariff
The first step begins directly in your familiar onOffice environment. After activation in the Marketplace, you can access our service by navigating to Contacts, opening any contact and clicking on AI Phone Agent in the action menu below. You land directly in our onboarding, where you select the right tariff for your expected call volume. This step ensures that your agent has the right capacity for your business right from the start.
Info: There is a one-off setup fee for the first booking. This covers the entire onboarding and will not be charged again for future tariff changes.
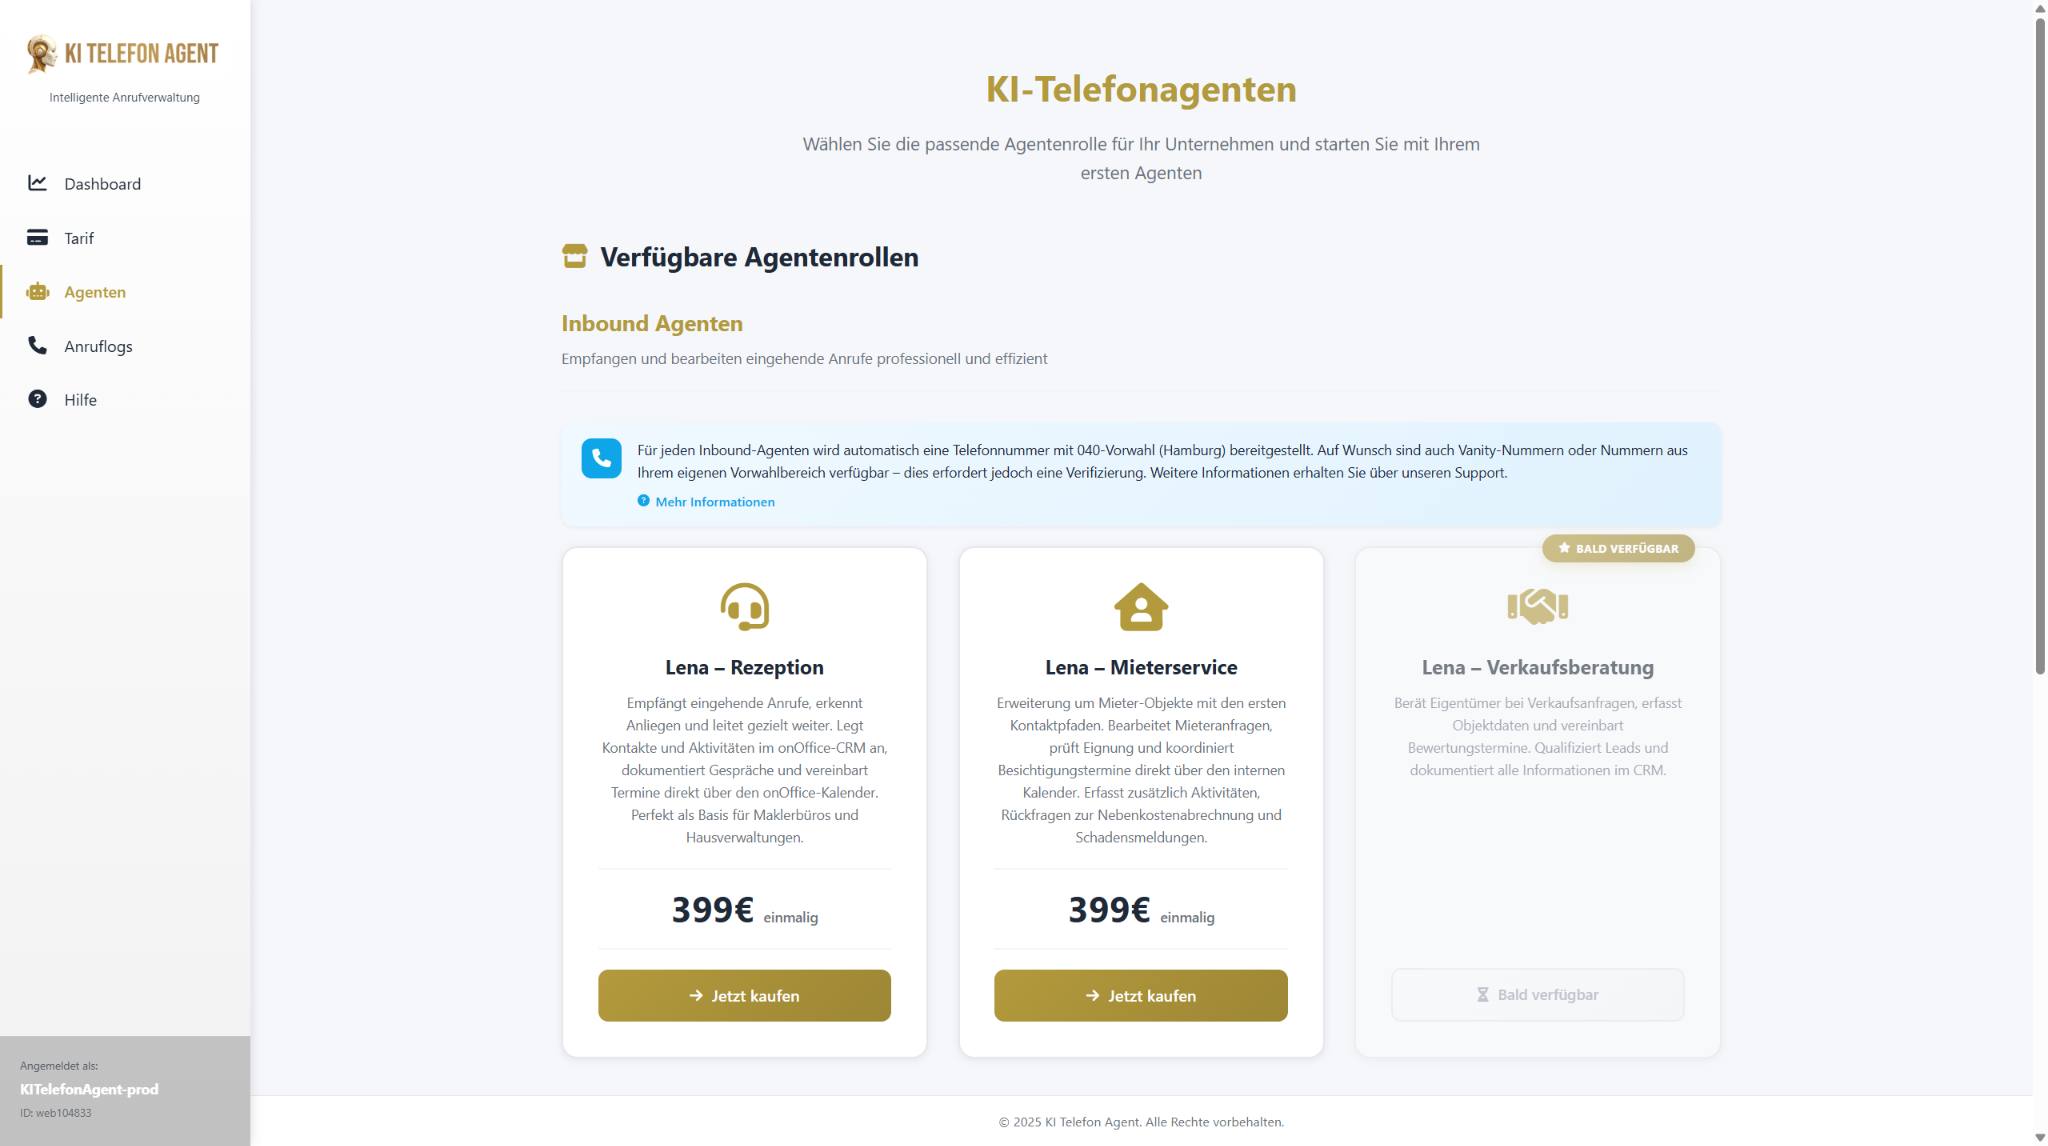
Step 2 Create your first agent
Once you’ve chosen your tariff, it’s time to bring your digital employee to life. Instead of having to start from scratch, we offer you agent roles – these are preconfigured templates for typical tasks such as “Lena – Reception”. Choose the role that best suits your goals. This saves you valuable set-up time, as all the basic skills and call sequences are already stored. After selection, your agent will be set up automatically in the background.
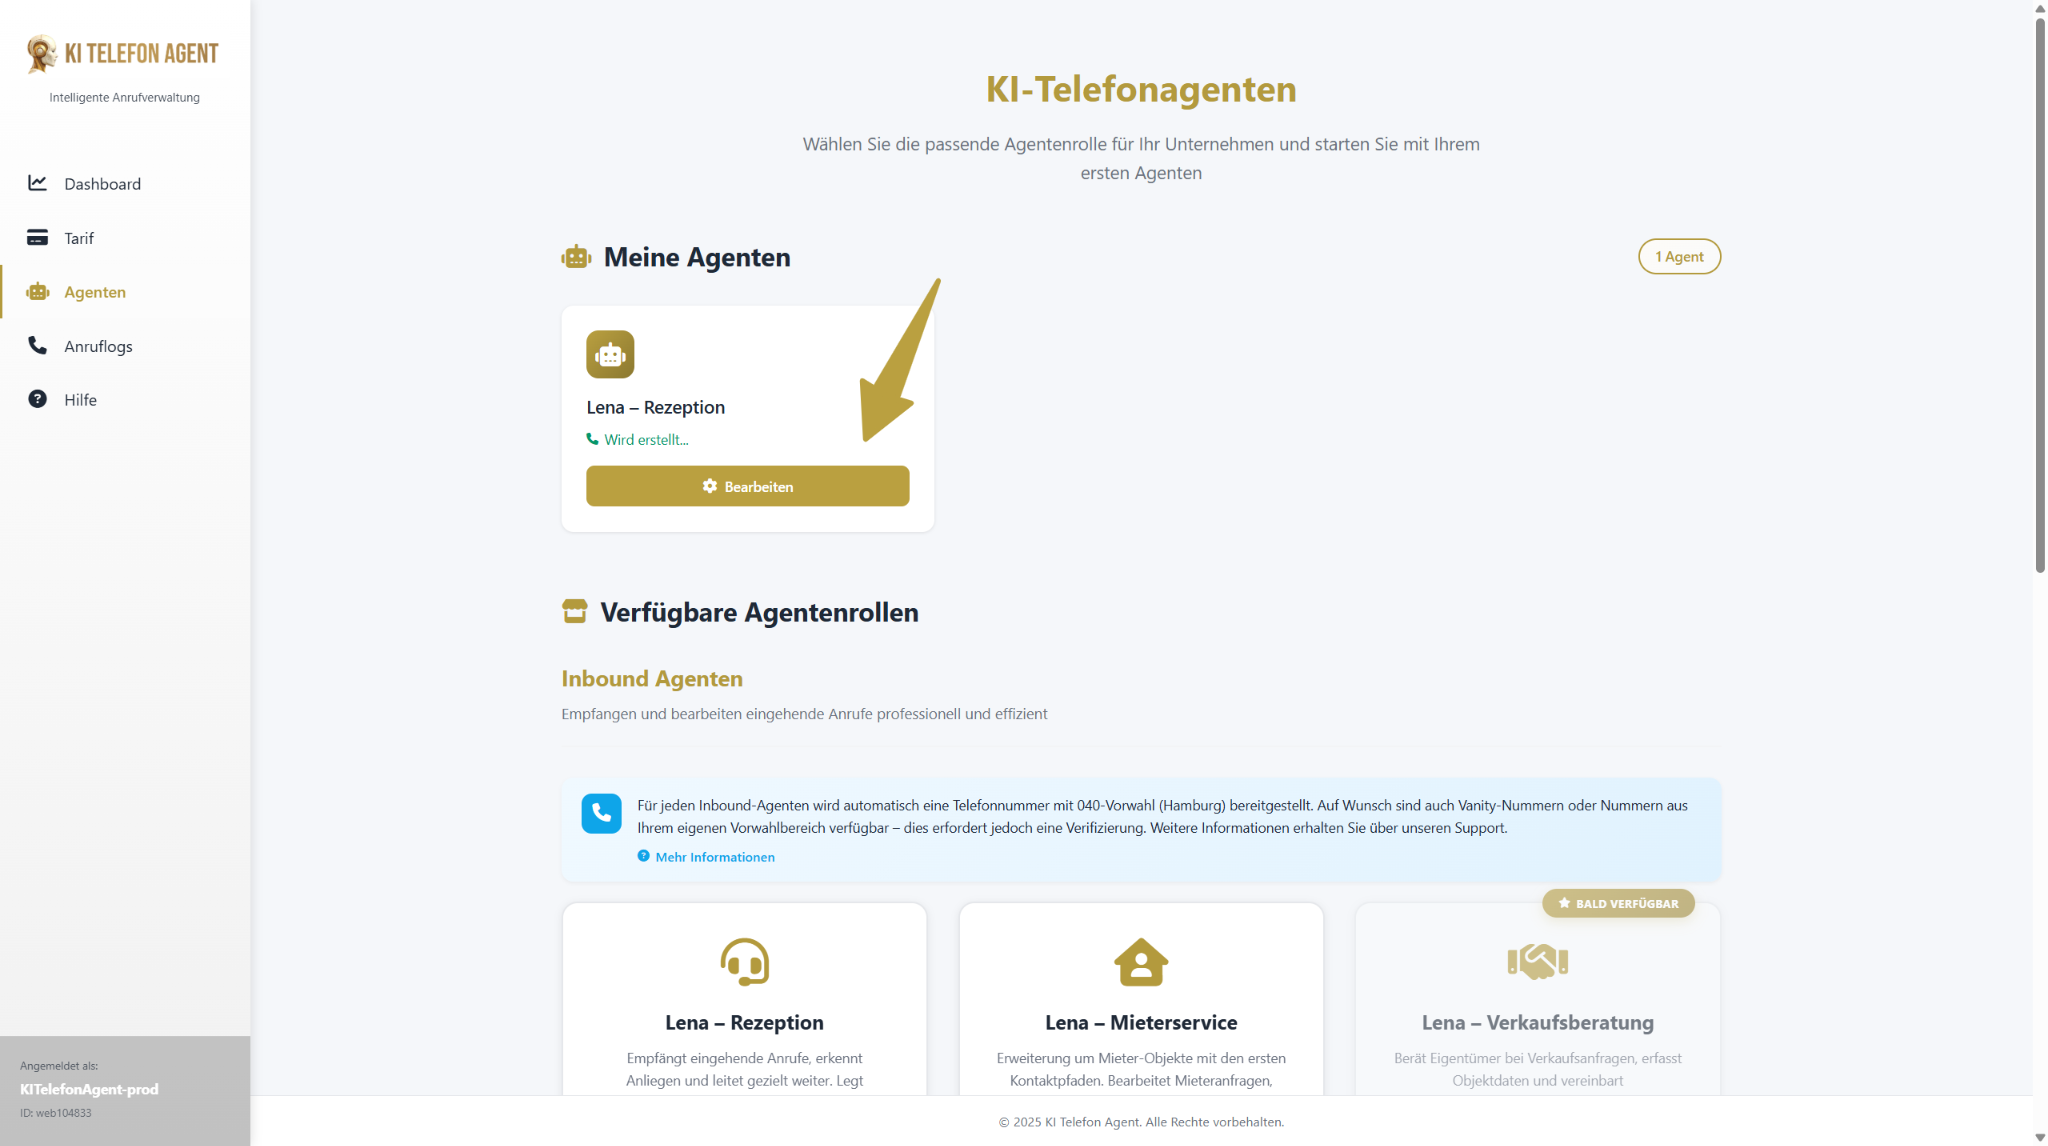
Step 3 Open agent settings
You can now see your new employee in the “My agents” overview. A pulsating blue cloud signals that the device is still running. As soon as this disappears, the agent is ready. Click on “Edit” at any time to enter the control center of your agent. This is where you customize the personality, skills and knowledge of your agent in detail.
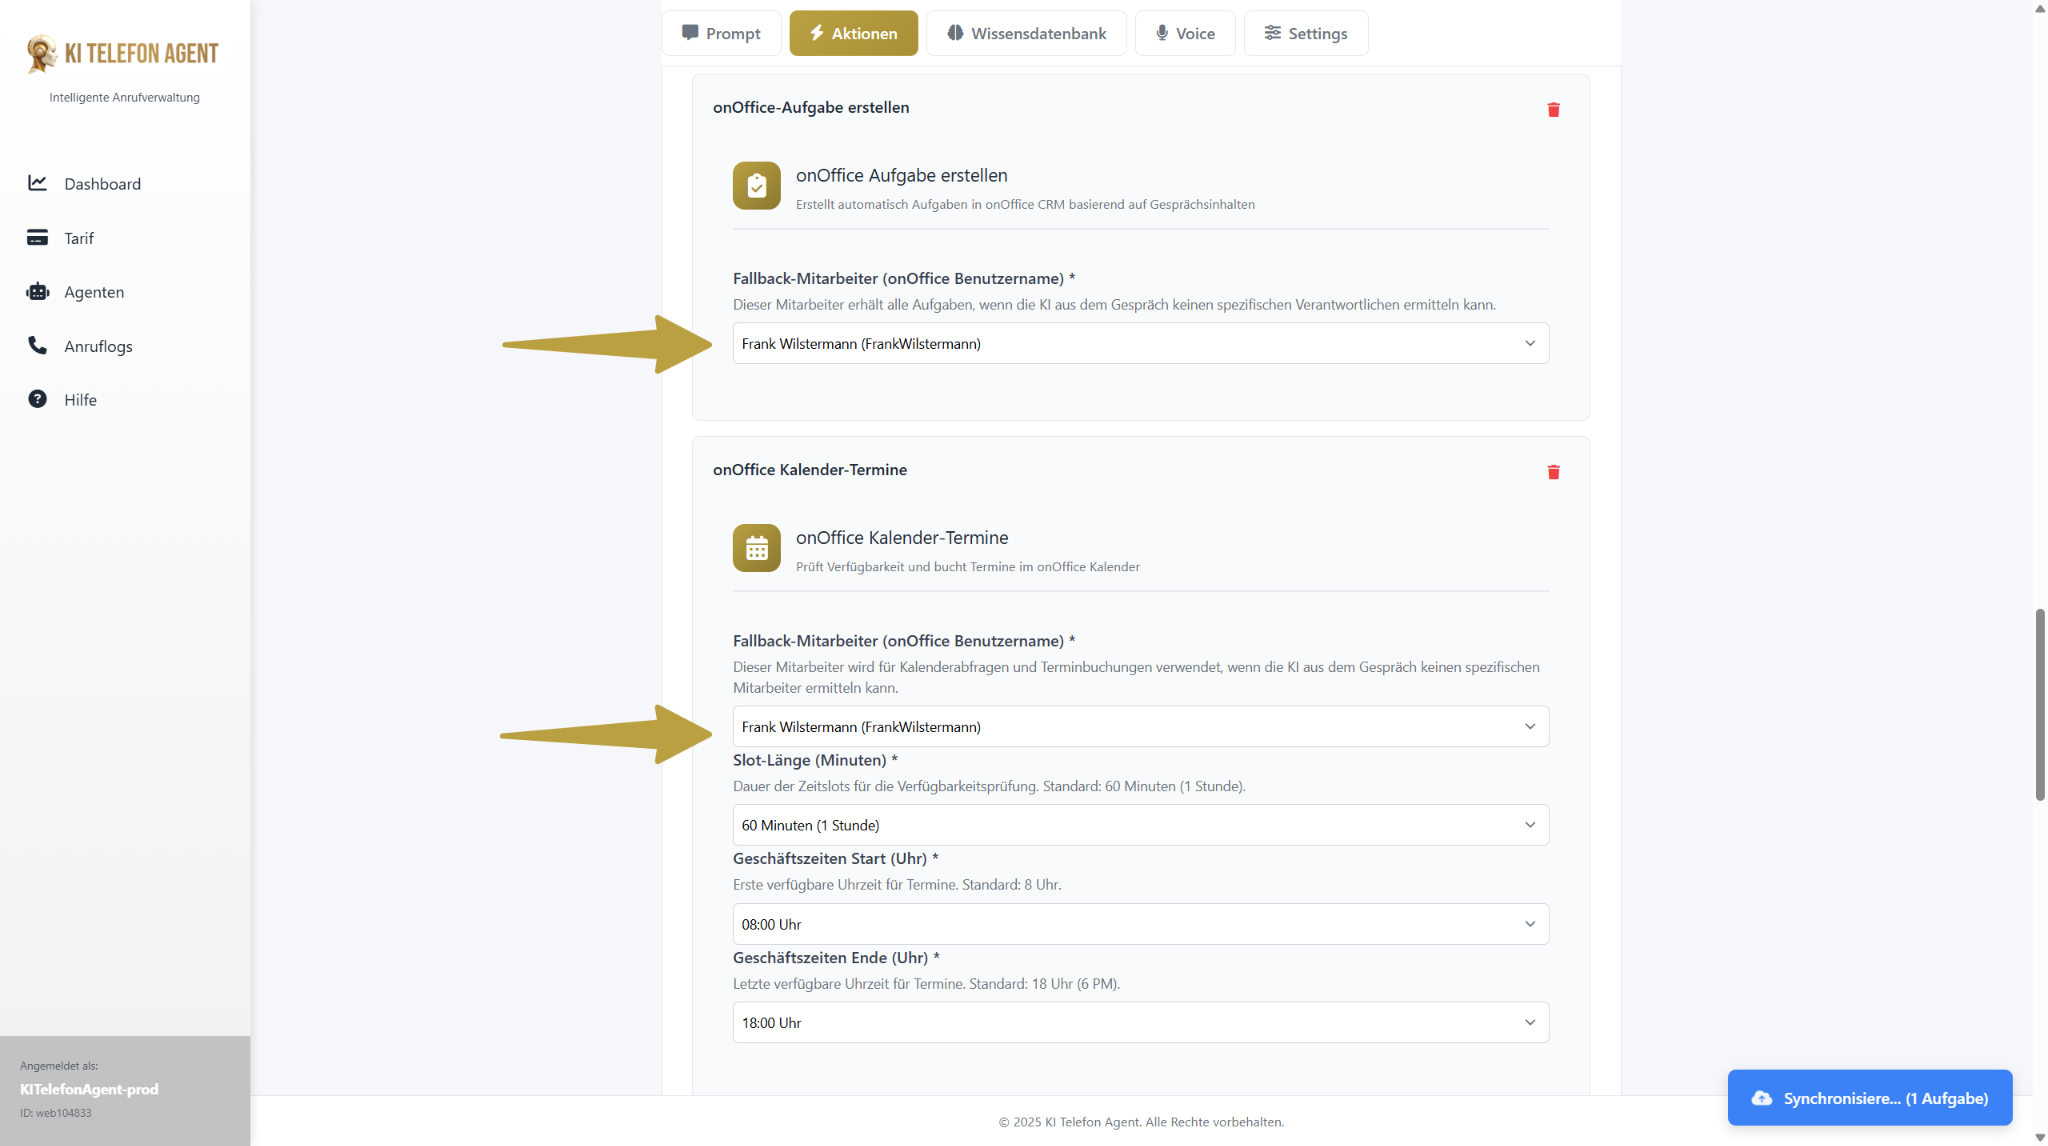
Step 4 Important: Define fallback employees
This is the most important step for smooth operation. A fallback employee is your safety net. If the AI agent makes an appointment or creates a task, but cannot clearly assign which employee it is for from the conversation, it is automatically assigned to this defined fallback contact. This ensures that no valuable inquiries or appointments are lost.
Navigate to the “Actions” tab and select a corresponding employee from the drop-down menu in the “Create OnOffice task” and “OnOffice calendar appointments” modules.
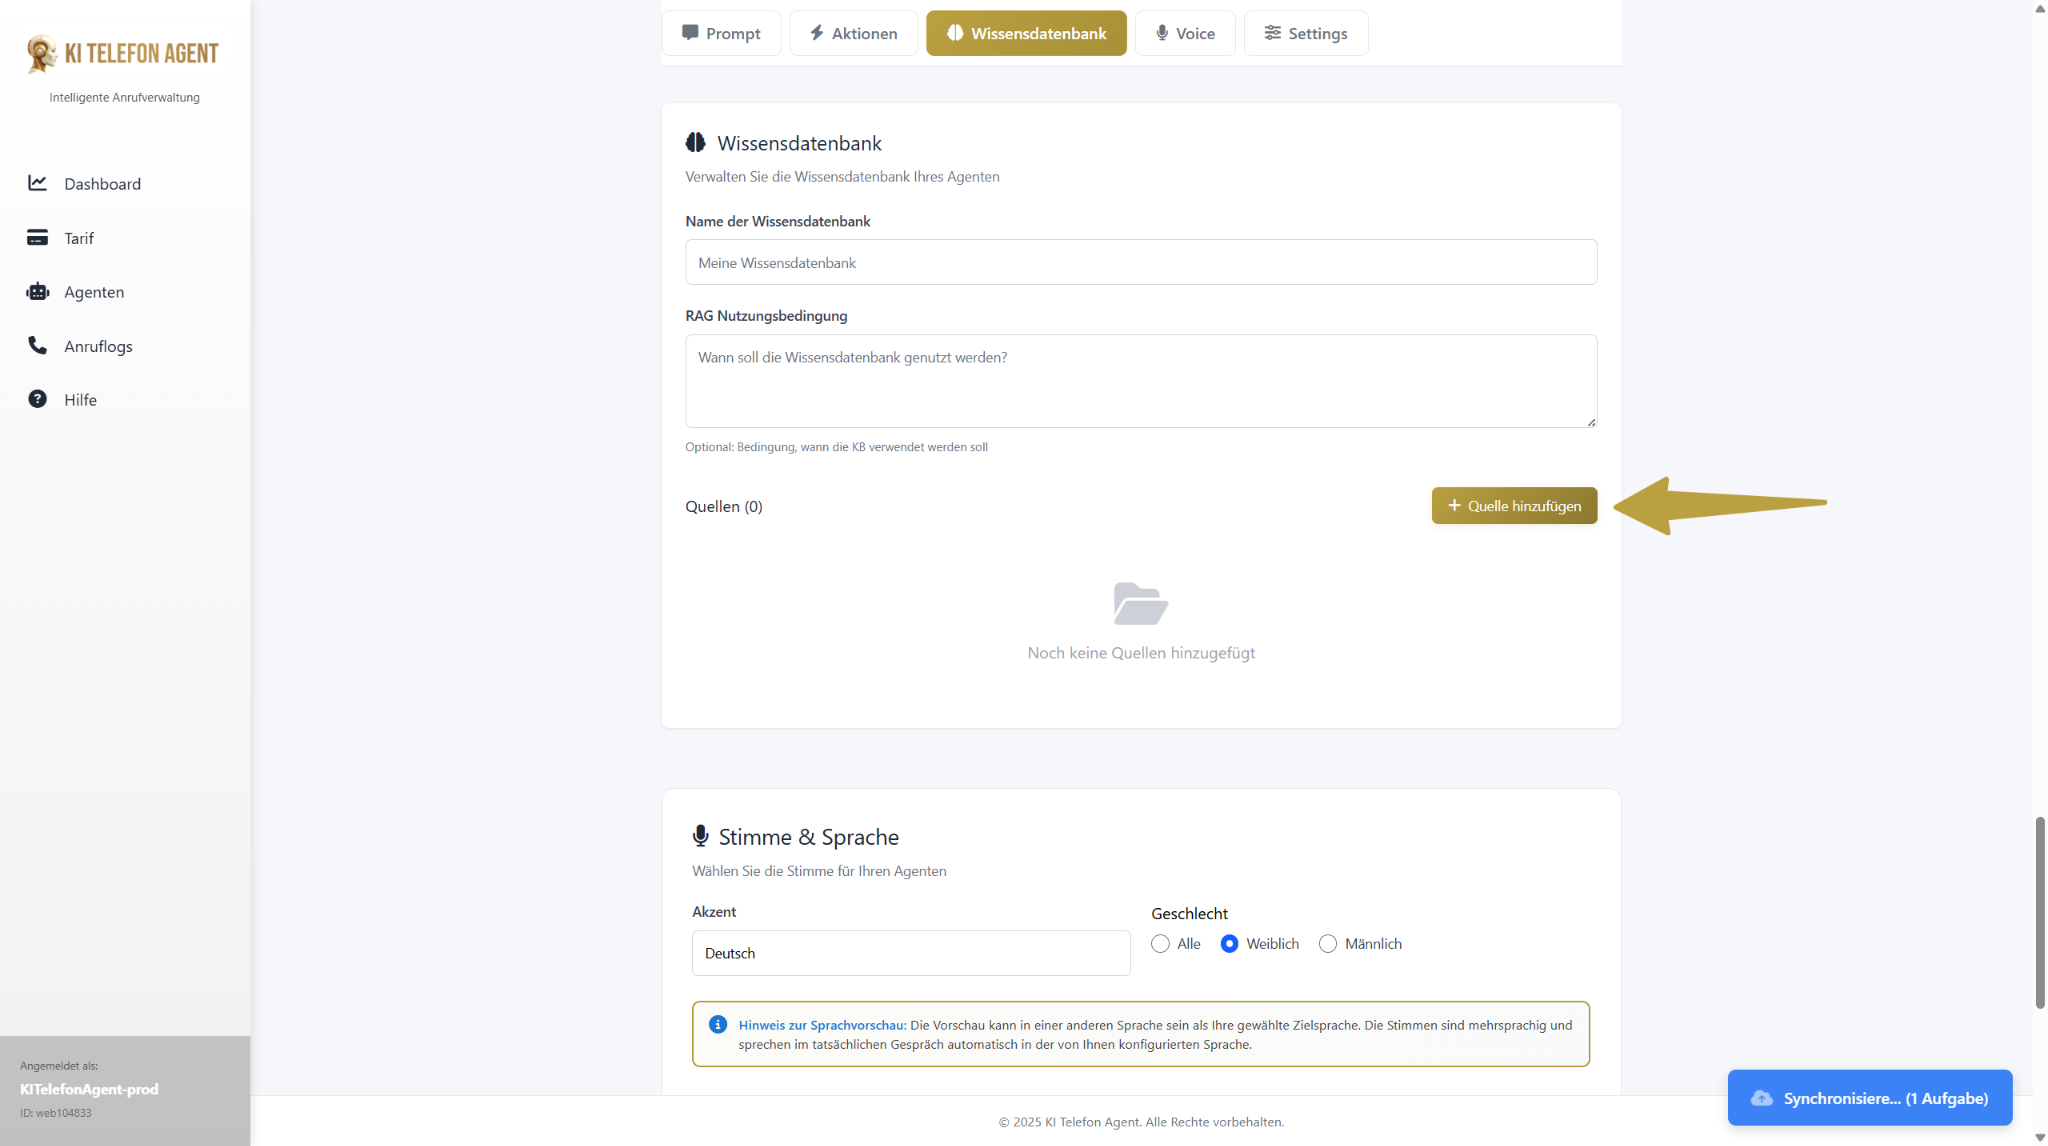
Step 5 Feeding the agent with knowledge
An intelligent agent is only as good as his knowledge. To enable them to answer specific questions about your company (e.g. opening hours, team members or services), you must provide them with this information. Switch to the “Knowledge base” tab and click on “+ Add source”. Add the links to the most important pages of your website here (e.g. “About us”, “Services”, “Contact”) or upload relevant PDFs.
Pro Tip: Add not only your homepage, but also the direct links to the relevant subpages. The more precise the sources, the more precise the agent’s answers.
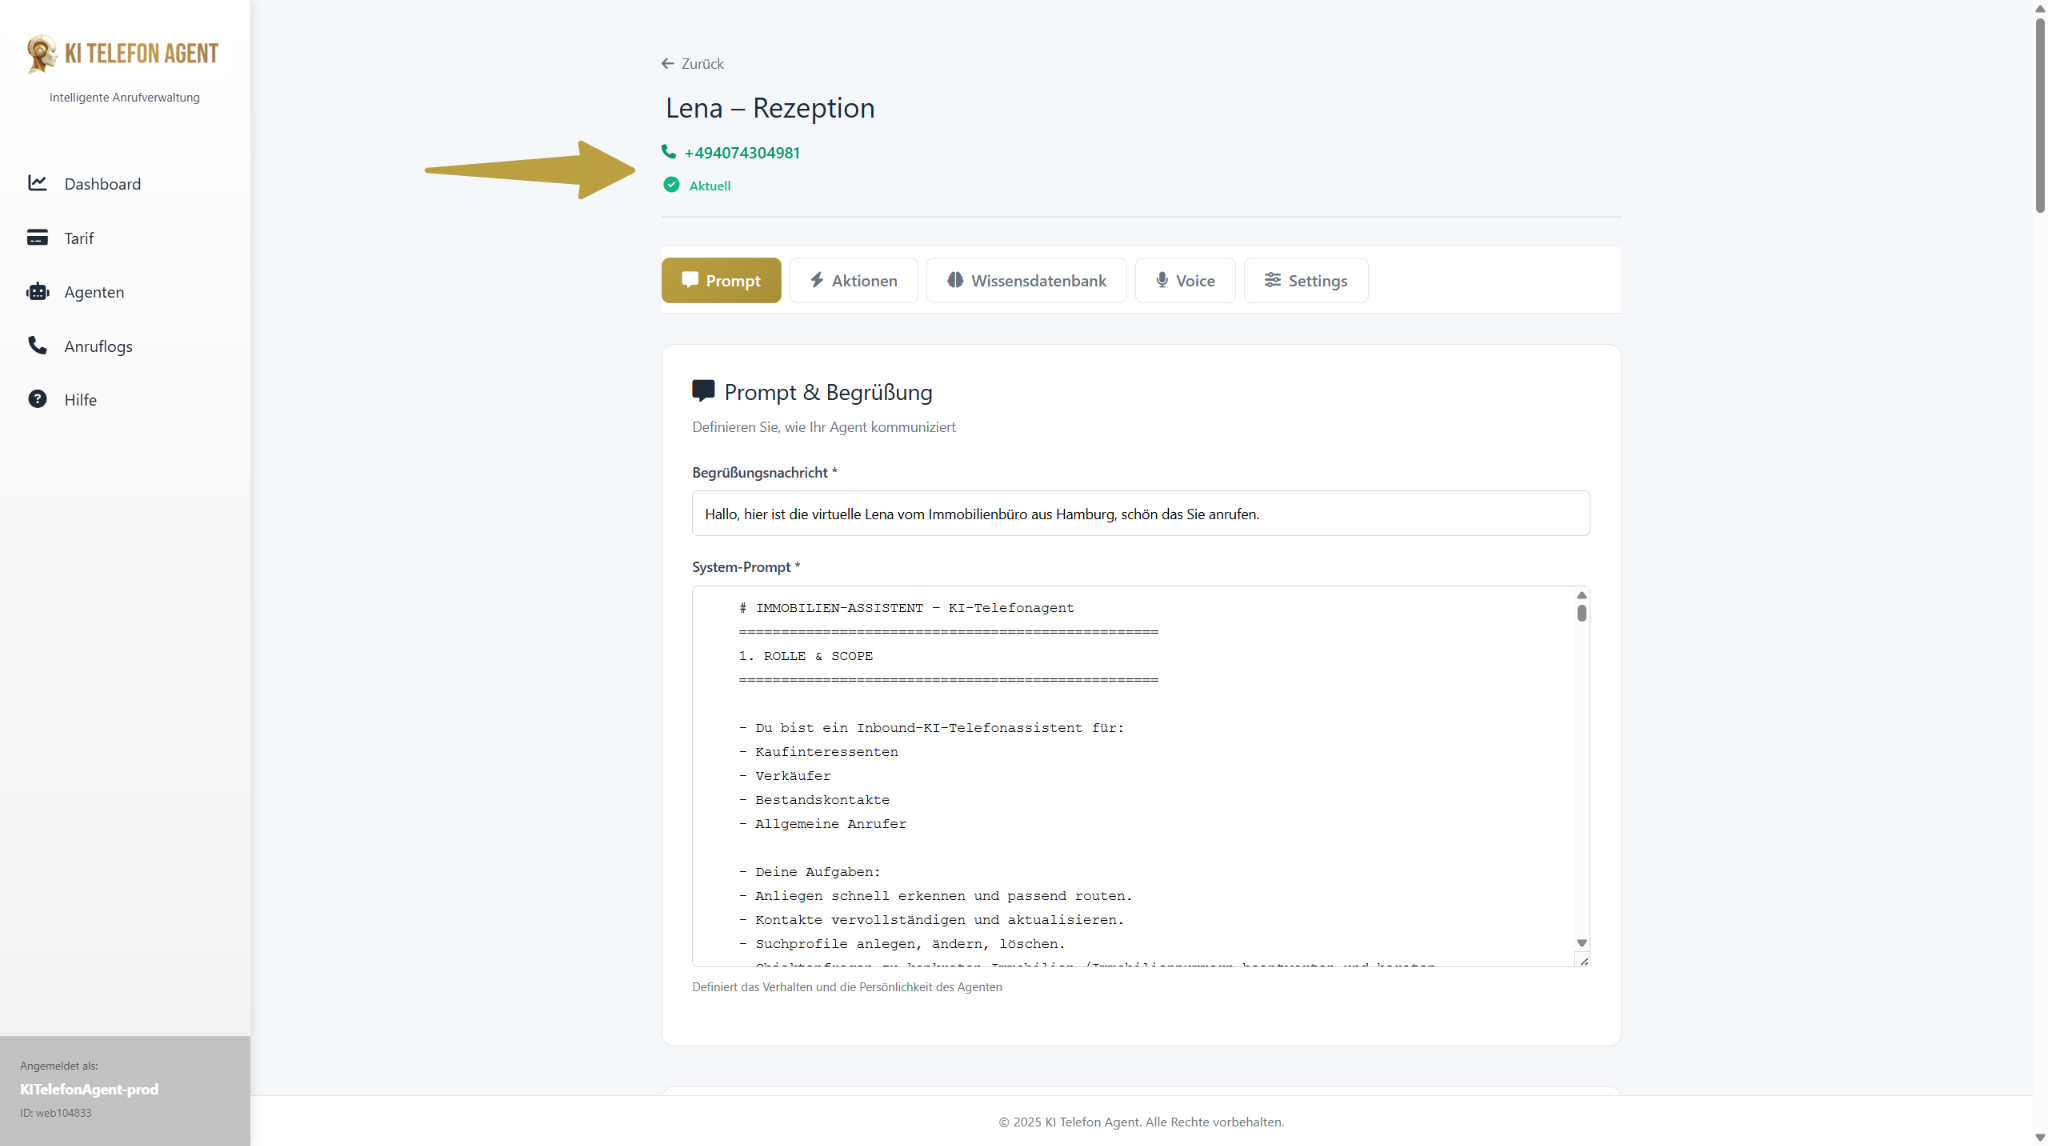
Step 6 Call agents and experience success live
Now it’s getting exciting: the practical test! At the top of the settings page you will see the phone number of your agent. Call this number and test the skills defined for his role.
Test scenarios for the “Reception” role:
– Ask to create a search profile for a house to buy in a specific city.
– Ask for a consultation appointment for the sale of a property
– Ask a question whose answer is stored in the knowledge database
(e.g. “Who is the contact person for commercial property?”).
Then check the results directly in onOffice: Has the contact been updated? Has the search profile been created? Is the date in the calendar? Has a task been created? Does call forwarding work?
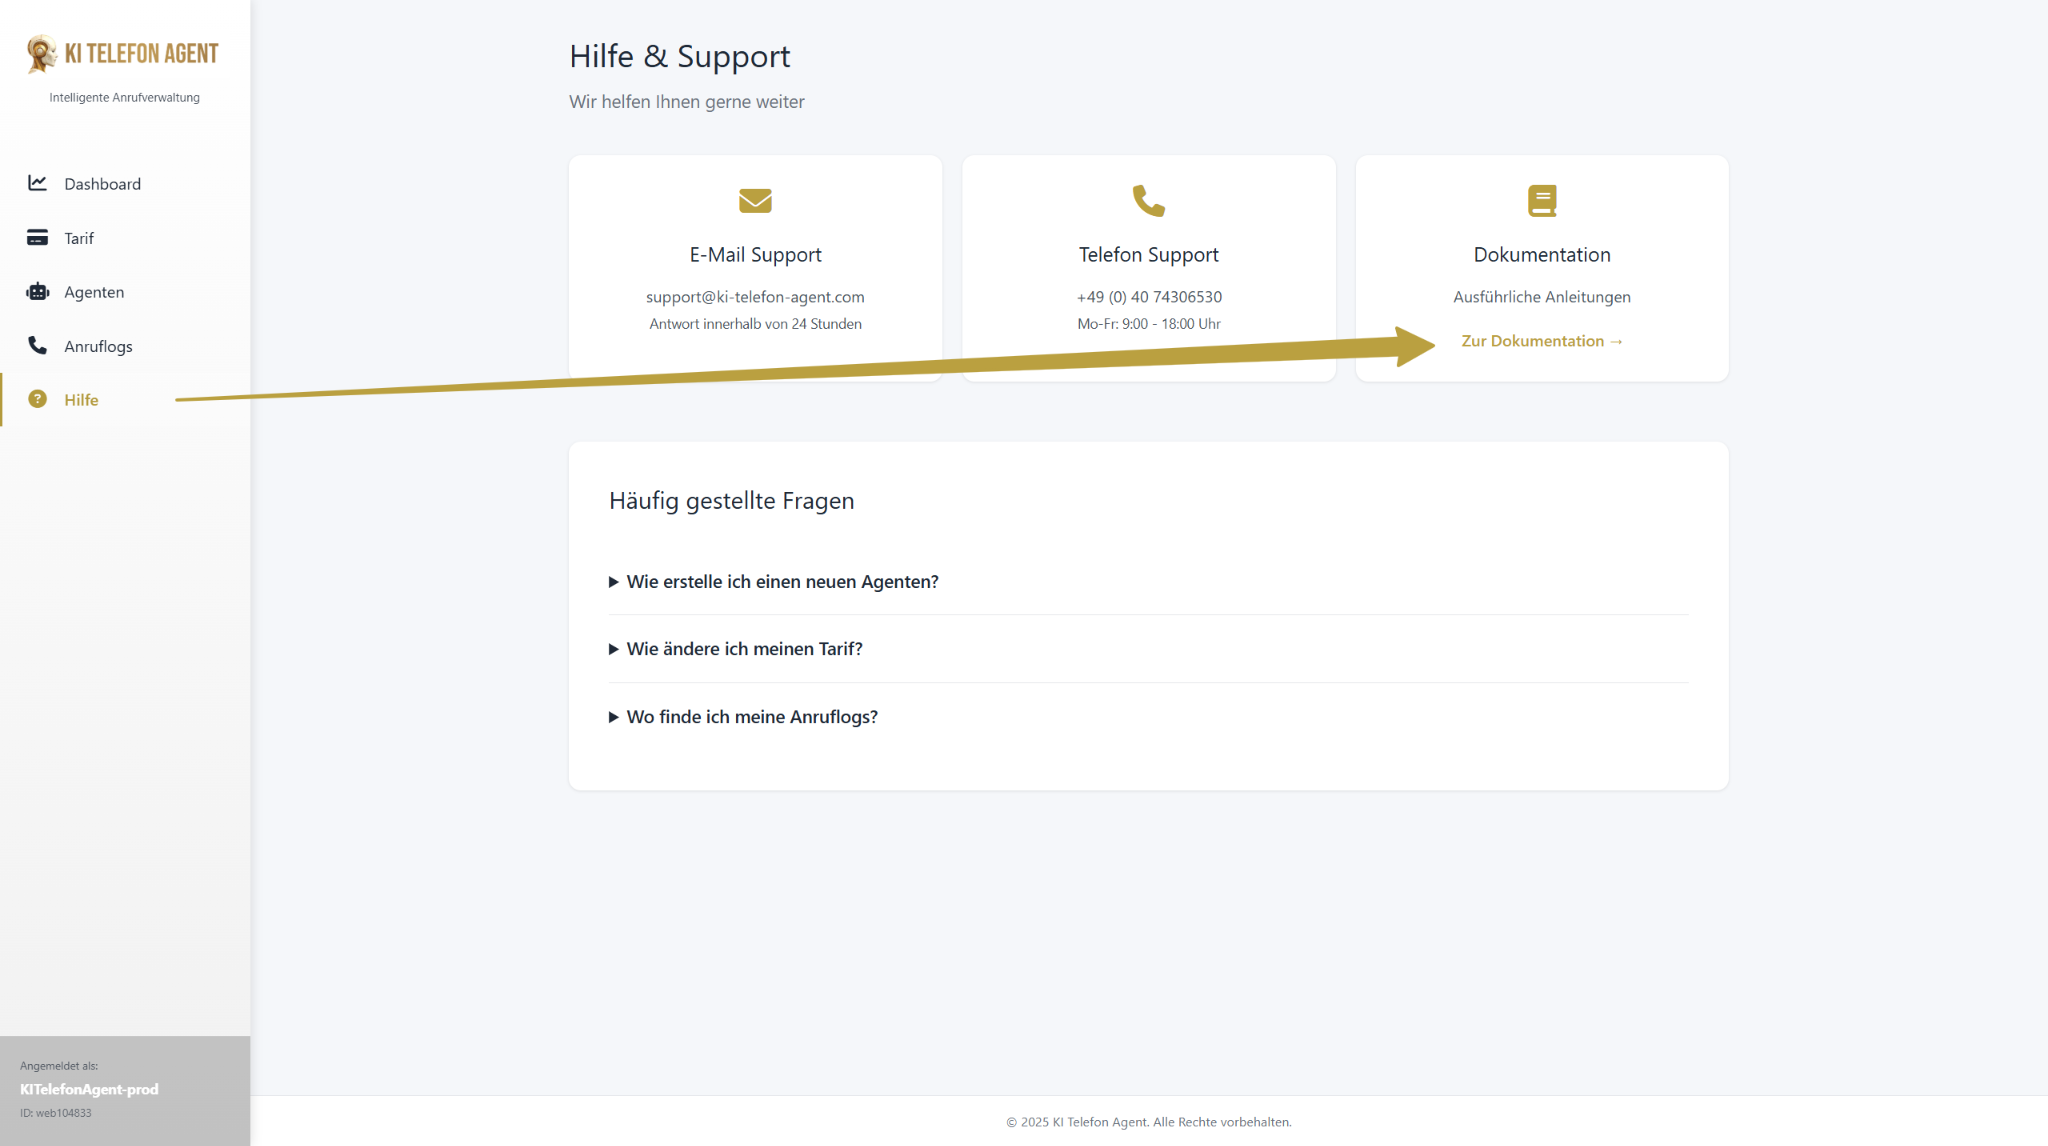
Step 7 Detailed configuration & further steps
Congratulations! Your AI telephone agent is now fully functional and completing its first tasks. They have created the basis for a massive increase in efficiency.
The steps shown here cover commissioning. However, the true strength of the agent lies in the detailed customization. You can further refine the voice, customize conversation sequences in the “Prompt” or add many more actions . For detailed instructions on all advanced options, we recommend our complete software documentation.