You are here: Home / Tutorials / Step by step / General instructions / Address data record maintenance

Step by step
Address data record maintenance
You have several thousand addresses in your database and are not sure which search criteria are still up to date? In addition, you are missing important information in many search criteria records?
onOffice has developed a system for address completion and updating for this purpose. You send a serial mail to all interested party data records in one go and ask your customers to check that the data is up to date and update it if necessary. Your customers enter these data in a form and click on “Send”. The entered data will then automatically be saved in your database. You will receive an email with the information that the interested party has completed the data.
You can decide whether the interested party should complete his or her search criteria, address data, or both. The individual steps are described below
Inhaltsverzeichnis
Before you send the address completion email, you must select the addresses to which the email is to be sent. To do this, you can create an address filter that only searches for addresses that match the desired criteria.
As an example we take addresses of prospective tenants in Aachen who have not yet entered any search criteria.
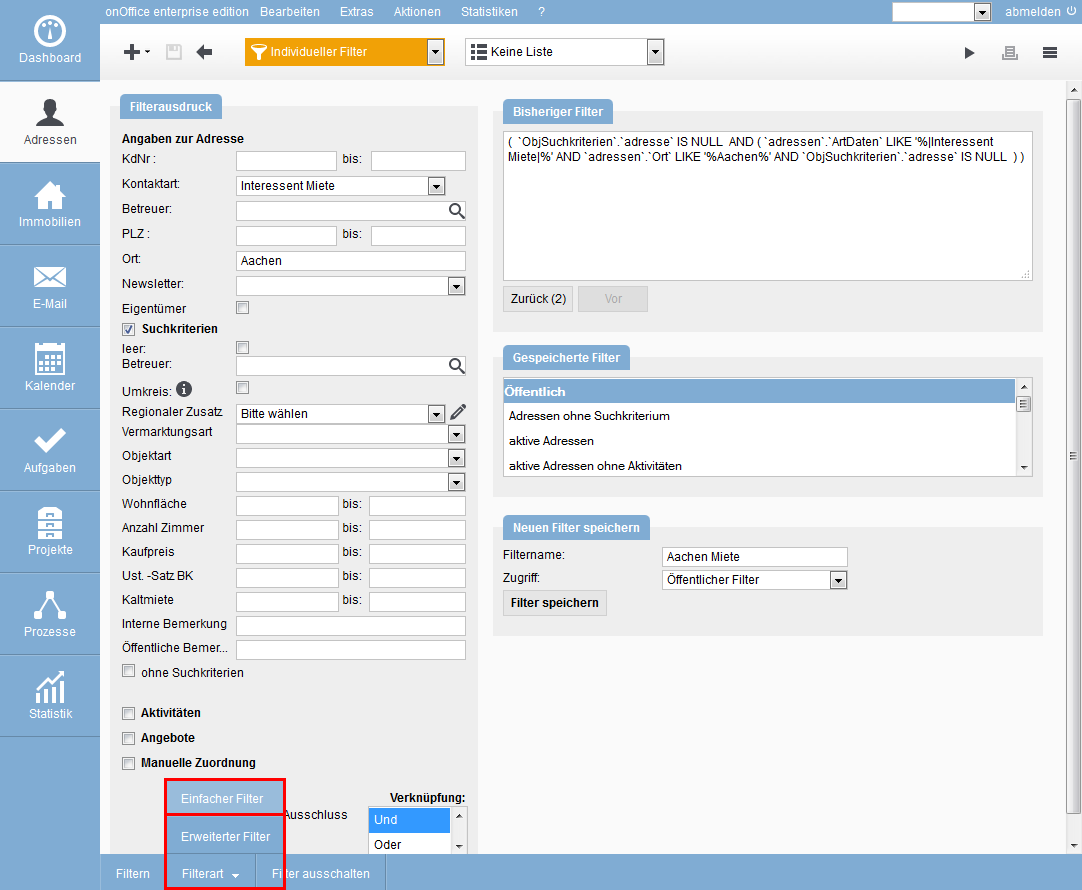
Therefore we create an address filter (Address list view: Edit filter), “Filter type: Simple filter” with the following criteria:
- Type of contact: interested party rent
- place: Aachen
- search criteria: Checkbox – without search criteria
Click on the “Filter” button in the action bar to enter the criteria in the “Previous filter” box. Now save the address record filter under “Save new filter” and assign a name to the filter. Under “Access” you can define whether only you are allowed to see this filter or the colleagues in the group or whether everyone is allowed to see and use it.
In the example, we decided to use a “public filter” because it can also be used by all other employees.
Of course, you can also explicitly filter for certain search criteria by omitting the check mark for “without search criteria” and entering certain criteria in the specified fields.
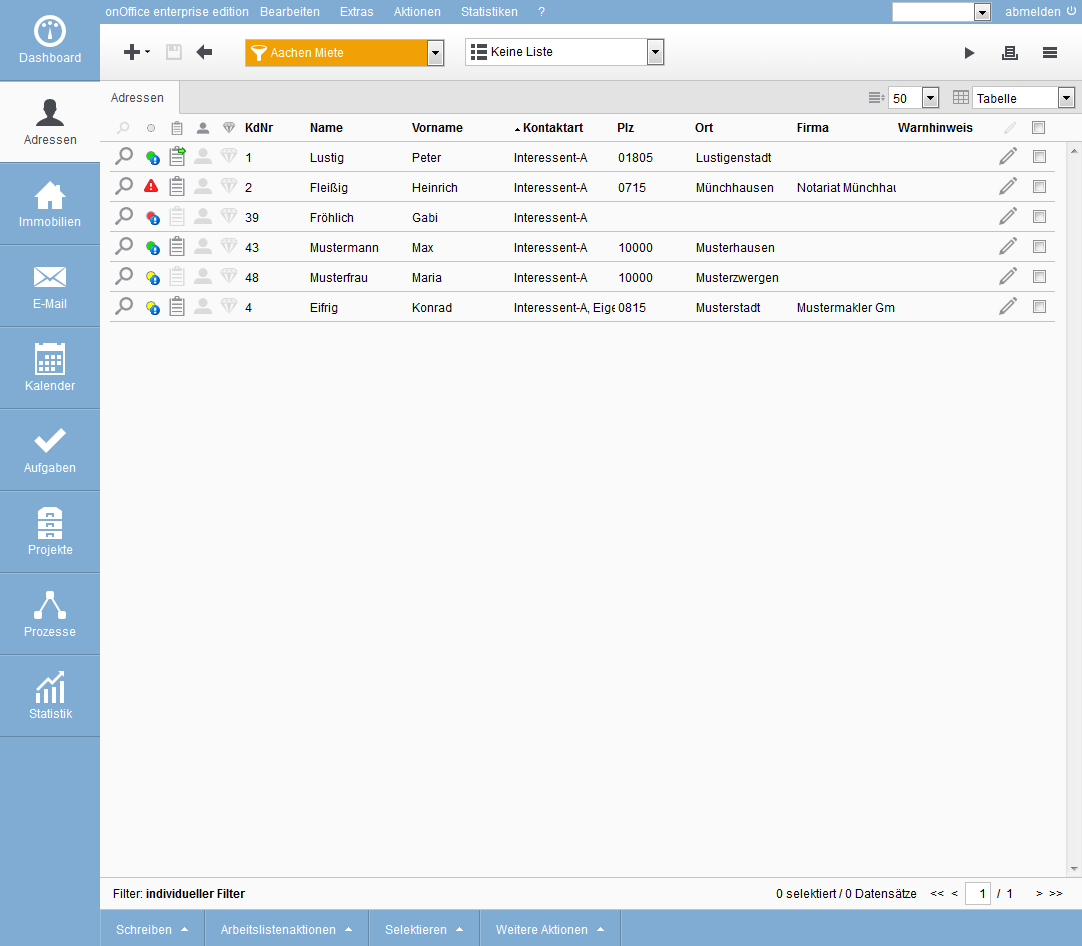
Now open the address module again via the Moduli con, the filter you just created is already set.
You can then use this filter to write an email
Address data record maintenance by email templates
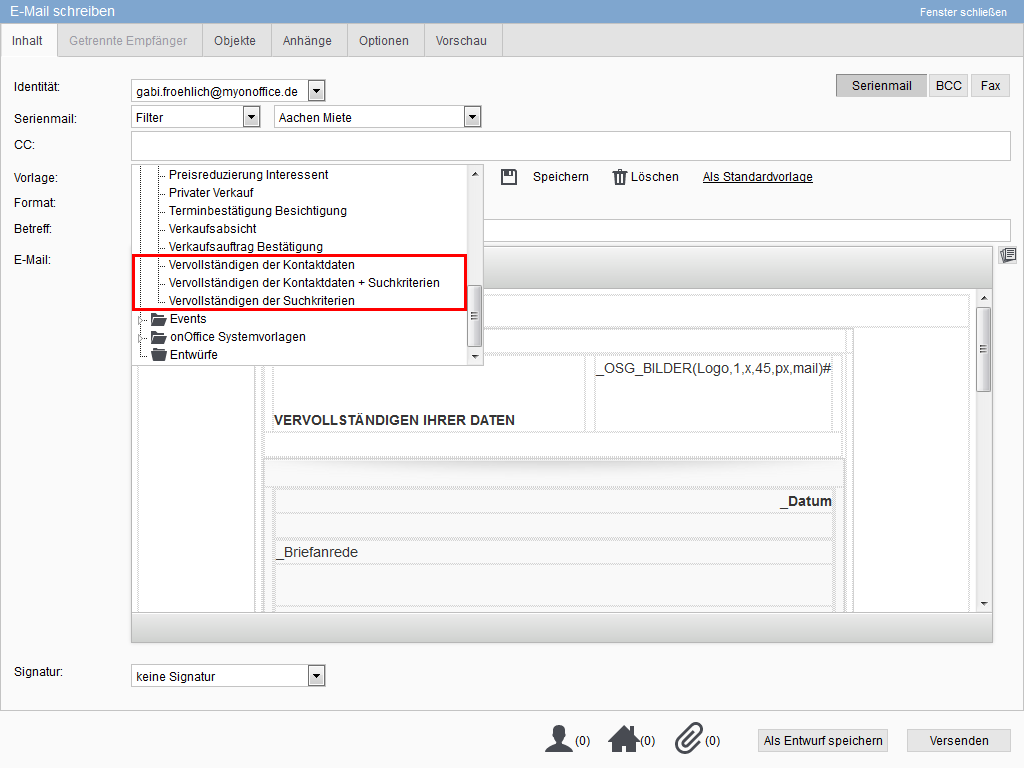
Now all address data records that correspond to the filter can be written to. You can do this by sending a serial mail, for example. onOffice has prepared email templates for address completion. You can find them when you write an email under “Templates >> General – HTML Design”. You can choose from 3 different template variants:
- Completion of contact data Completion
- of contact data + search criteria Completion
- of search criteria
Example
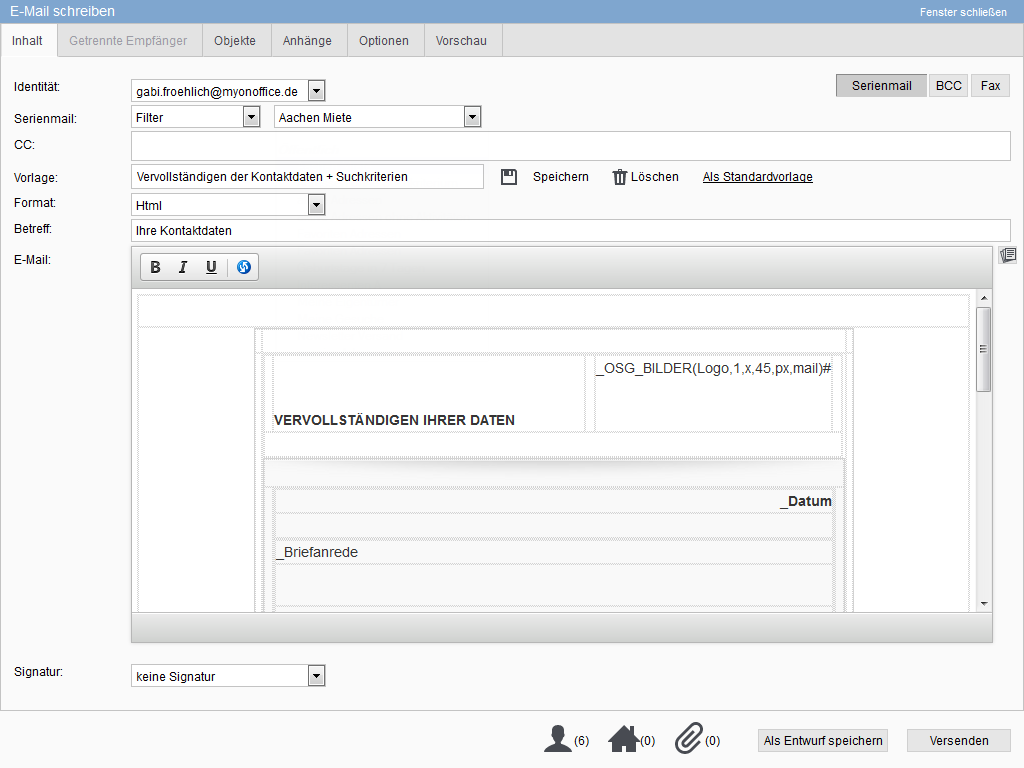
As an example we take the address filter just created and the template “Completion of contact data + search criteria”.
- Open a new email Select a new mail
- merge Select a
- new address filter Select a
- template
If you want, you can also add attachments. Please check the email preview before sending the email.
Create your own email templates
If you don’t like our email templates, you can customize them or create your own email templates. You can add the macro for address completion “_Adr_Vervollstaendigung(x,y,z,bemerkung, newsletter, agb, kontakt, E-Mail, autoexpose)” into this macro.
You can readmore about working with macros or creating templates here
Receiving an email to complete
your address When you’ve sent the email, you want to know what your contact is receiving.
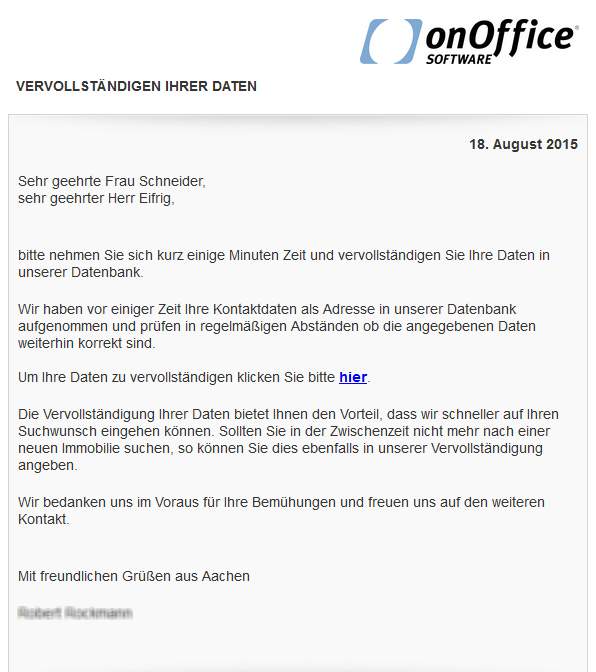
On the one hand, your contact will receive this email:
And as soon as he clicks on the link in the email, the following form will open for him to fill in. This can vary from customer to customer, depending on the settings in the administration:
After saving, the information is updated directly in the address record
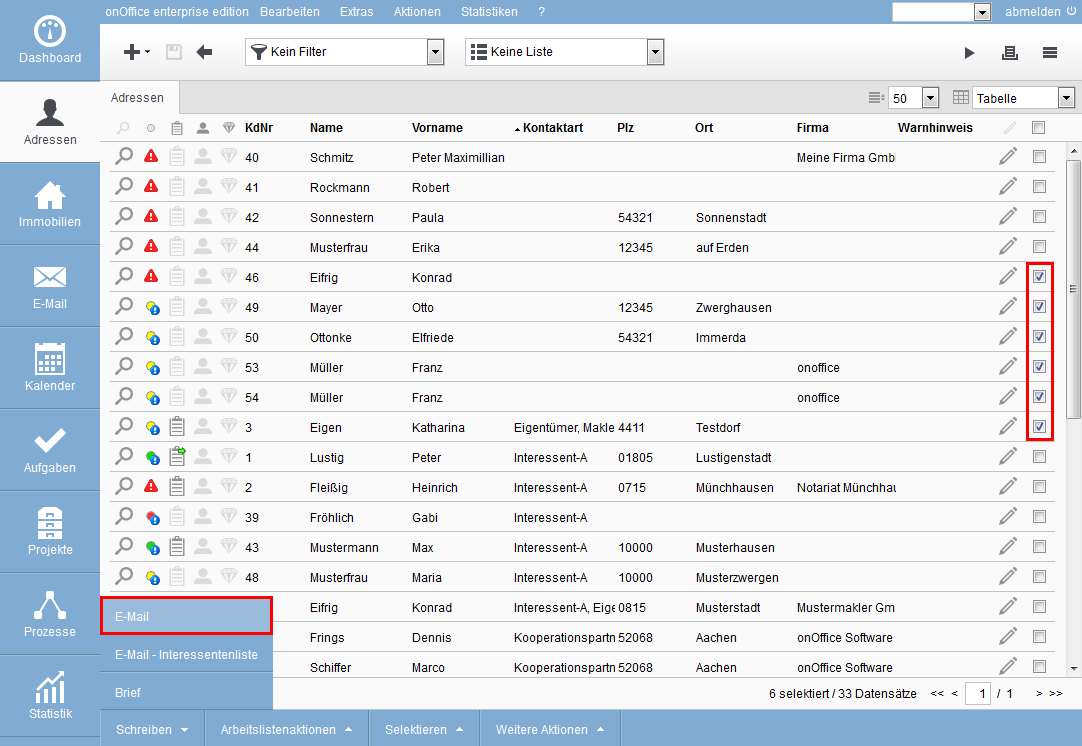
If you want to write an email without writing a serial email, you can also select the contacts to whom an email should be sent in the address list. You do this by clicking on the checkboxes of the individual contacts in the address list and clicking on Write >> email
in the address action bar.
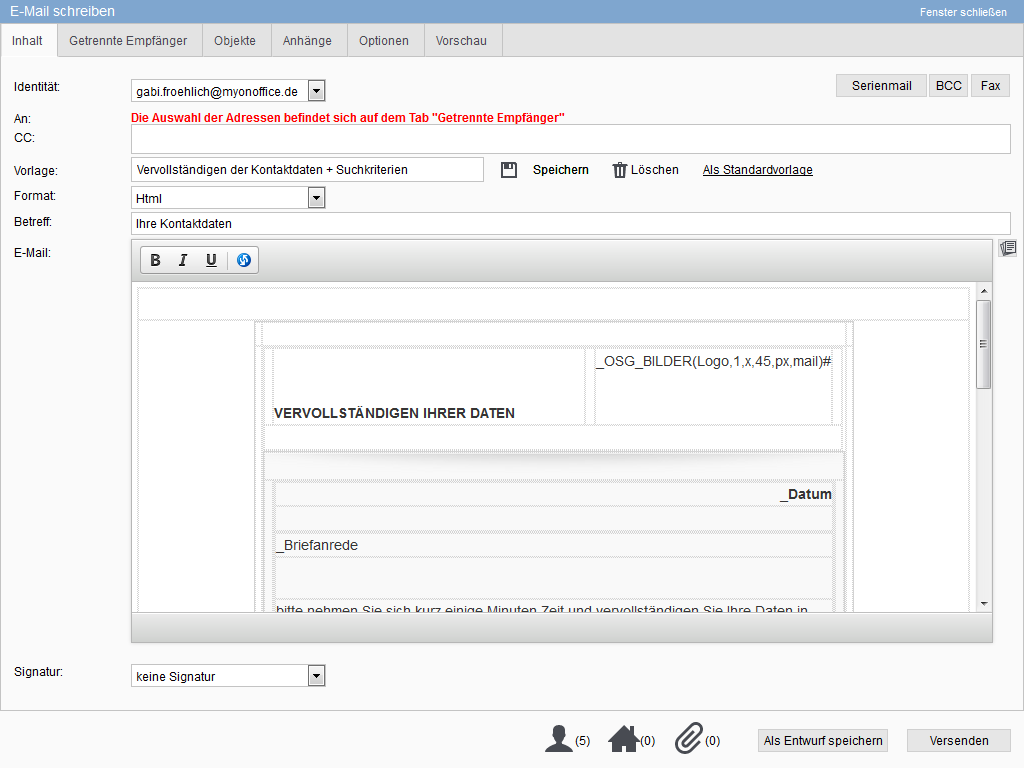
You can then write an email to “Separate recipients” in which you can also use one of our templates or the template you created
- Administrative instructions
- General instructions
- Status and extended status
- Create email signature
- Create Word templates
- Marketplace - Create user account
- Address data record maintenance
- Dictionary
- Absence note
- property search
- Send serial email
- Store files on server
- Create work lists
- Edit work lists
- Assign contact person
- onOffice-MLS
- Watermark
- Set values configure at revocation

 Introduction
 Dashboard
 Addresses
 Properties
 Email
Email Calender
 Tasks
Tasks Acquisition Cockpit
 Audit-proof mail archiving
 Automatic brochure distribution
 Billing
 Groups
 Intranet
 Marketing box
 Multi Property module
 Multilingual Module
 onOffice sync
 Presentation PDFs
 Process manager
 Project management
 Property value analyses
 Request manager
 Showcase TV
 Smart site 2.0
 Statistic Tab
 Statistics toolbox
 Success cockpit
 Time recording
 Address from clipboard
 Boilerplates
 Customer communication
 External Tools
 Favorite links
 Formulas and calculating
 Mass update
 onOffice-MLS
 Portals
 Property import
 Quick Access
 Settings
 Templates
 Step by step